Welcome to the GS ART ZONE. This is the art zone where you will be guided step by step on how to draw any art. So today you will learn how to draw a Dolphin in an easy way. Dolphins are incredibly intelligent and graceful marine mammals. According to the World Wildlife Fund (WWF), there are dozens of species of dolphins worldwide, each possessing a beautifully streamlined body perfect for gliding through the ocean.
⚡ Quick Answer: How to Draw a Dolphin
To draw a dolphin easily, start with a curved teardrop shape for the body, taper it down to a sleek tail fluke, and add a triangular dorsal fin and curved flippers. Focus on fluid, organic S-curves to capture their natural swimming motion.
📌 Key Takeaways
- Fluid S-Curves: Always use curved, continuous lines instead of stiff straight lines to convey the dolphin’s aquatic grace.
- Fins & Flukes: Position the dorsal fin about halfway down the back, and ensure the flippers point slightly backward for a streamlined look.
- Smooth Shading: Use soft gradients blending from dark gray on top to a light belly to create realistic depth and wet skin highlights.
Dolphin art is drawn on the Apple iPad Pro with an Apple Pencil, but you can easily follow along with a simple pencil and paper. If you enjoy sketching sea creatures, you might also love exploring our watercolor animal art ideas or practicing with our step-by-step frog drawing guide to build your animal drawing skills.
Below are the 10 easy steps on how to draw a Dolphin. Follow along with the red guidelines in each illustration to complete your dolphin sketch!
How to Draw a Dolphin Step by Step
Follow the red lines in each step to complete the Dolphin drawing as shown in the images below.
Step 1: Draw the Upper Body Curve
Begin by drawing a smooth, sweeping arc that starts from the snout, curves upward to form the dolphin’s forehead, and slopes gently down to form the back.

Step 2: Add the Snout (Beak)
From the front of your curve, sketch a small, rounded snout or beak pointing forward. This is a classic characteristic of bottlenose dolphins.

Step 3: Sketch the Underbelly Outline
Extend a smooth, curved line from the lower jaw backward to form the chest and belly. Keep this line parallel to the back curve, tapering inward towards the tail.

Step 4: Form the Tail Stock
Continue both the top and bottom lines backward, narrowing them significantly to create a slender tail stock (peduncle) where the flukes will attach.

Step 5: Draw the Dolphin’s Tail Flukes
At the very end of the tail stock, draw two symmetrical, wing-like tail flukes. They should curve outward and meet at a central notch.

Step 6: Add the Dorsal Fin
Sketch a curved, triangular dorsal fin on the middle of the dolphin’s back. Make sure it curves slightly backward to give a sense of motion.

Step 7: Sketch the Primary Pectoral Flipper
Draw a curved pectoral flipper on the lower side of the body, just behind the head. It should point downward and sweep backward gracefully.

Step 8: Add the Second Pectoral Flipper
To create realistic 3D perspective, sketch the tip of the second pectoral flipper peeking out from the far side of the dolphin’s body.

Step 9: Draw the Eye and Smile
Place a small, dark eye just above and behind the beak line. Add a gentle, upward-curved line along the snout to give your dolphin its iconic, friendly smile.

Step 10: Clean Up and Finalize the Outline
Carefully erase any overlapping pencil guidelines. Darken the final outlines of the dolphin’s body, fins, and tail to prepare it for coloring.

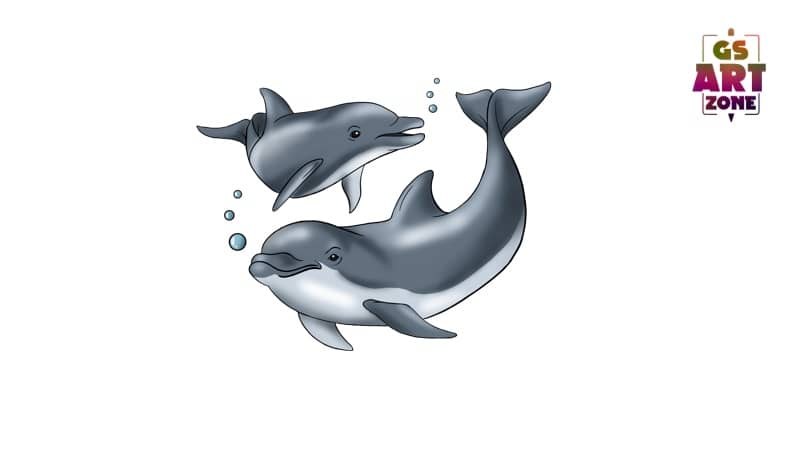
Final Colored Dolphin Illustration
Now, color your dolphin! Use a gradient of medium-to-dark blue-gray on the upper body and head, blending down to a very light gray or soft white on the underbelly. Leave a bright white highlight on top of the head and back to mimic a wet, glistening skin texture.

Congratulations, you have successfully learned how to draw a dolphin! Keep practicing, and don’t hesitate to experiment with different swimming poses and underwater scenes.
✍️ Editorial Note: This tutorial was created by the GS Art Zone Editorial Team and was last reviewed and updated on March 30, 2026 to ensure accuracy, clarity, and ease of learning for beginner artists.