Stop drawing individual hairs and start drawing the dark gaps between clumps. Hair reads as hair because of the shadows separating one section from the next, so shade those gaps and leave the lit clumps as untouched paper.
Key takeaways
- ["Draw the dark gaps between clumps rather than drawing individual hairs", "Work in ribbons of five to ten strands, each keeping a steady width", "Every stroke starts at the parting and follows the curve of the skull", "The shine band wraps around the head where the skull is widest", "Hair sits outside the skull line, so leave real thickness above it"]
Beginners draw hair one strand at a time and end up with wire wool. Draw the gaps instead. What reads as hair is the dark shadow between one clump and the next, so shade those gaps in and leave the lit clumps as bare paper; the strands appear on their own.
The second rule is about size. Work in ribbons of roughly five to ten strands rather than single hairs, and keep each ribbon the same width from root to tip. Ribbons that taper to nothing halfway down are what make drawn hair look like it is falling out.
Then there is direction, which is fixed before you draw anything. Every stroke starts at the parting and follows the curve of the skull. Mark the parting first, decide where the hair is going, and commit; strokes that change direction halfway destroy the illusion faster than any other mistake.
The forty techniques below cover straight, wavy, curly, braided and cropped hair, in pencil throughout. For placing hair on a head correctly see the face drawing tutorial for beginners, and for a stylized version, cute girl drawing for beginners.
Compiled by the GS Art Zone editorial team. Last updated August 2026. Each idea is paired with the specific step that produces the effect, so you can go from the reference straight to paper.
What You Need Before You Start
- A 2B and a 4B, because hair needs darks a hard pencil cannot reach
- A sharp point at all times, since blunt graphite fattens every stroke
- A kneaded eraser shaped to a thin wedge for lifting the shine band
- Smooth paper, as texture breaks up long flowing strokes
- A photograph with strong side lighting, which makes the clumps obvious
1. Long Straight Hair
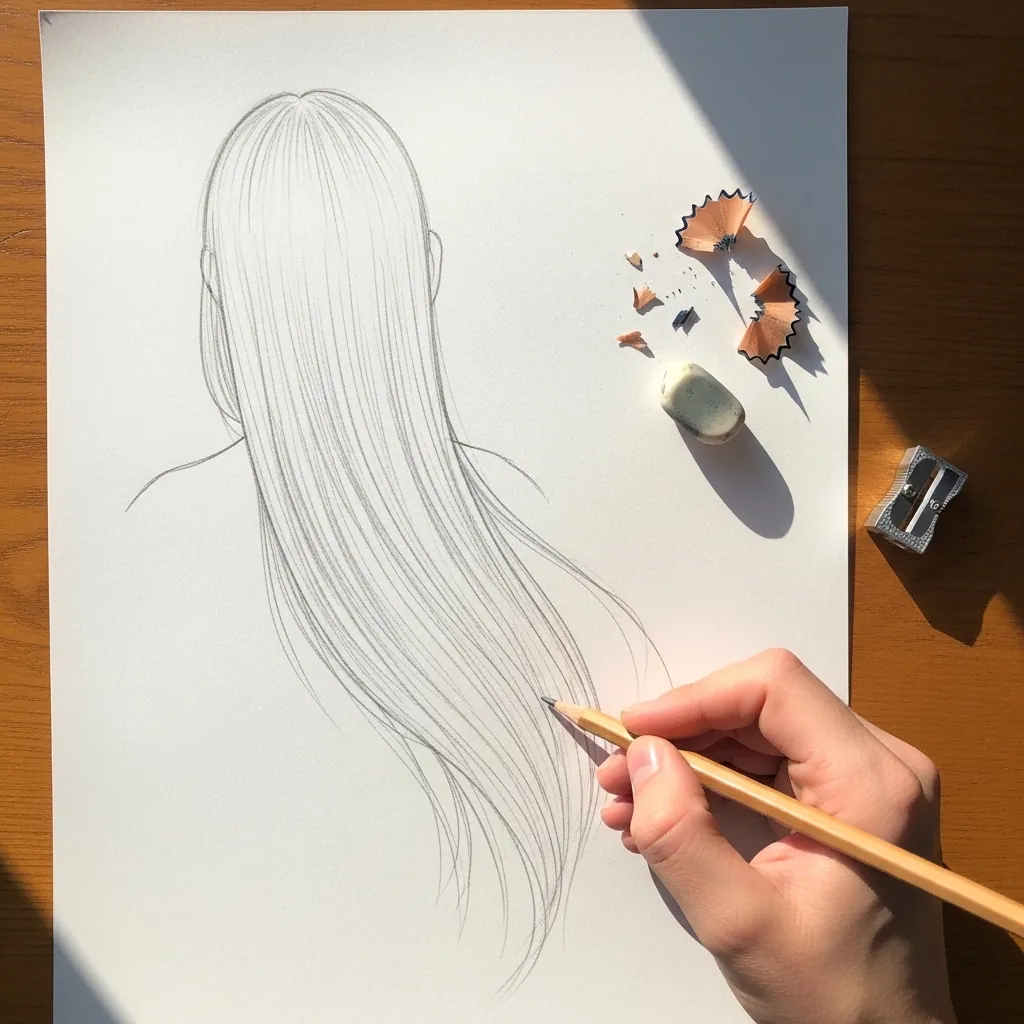
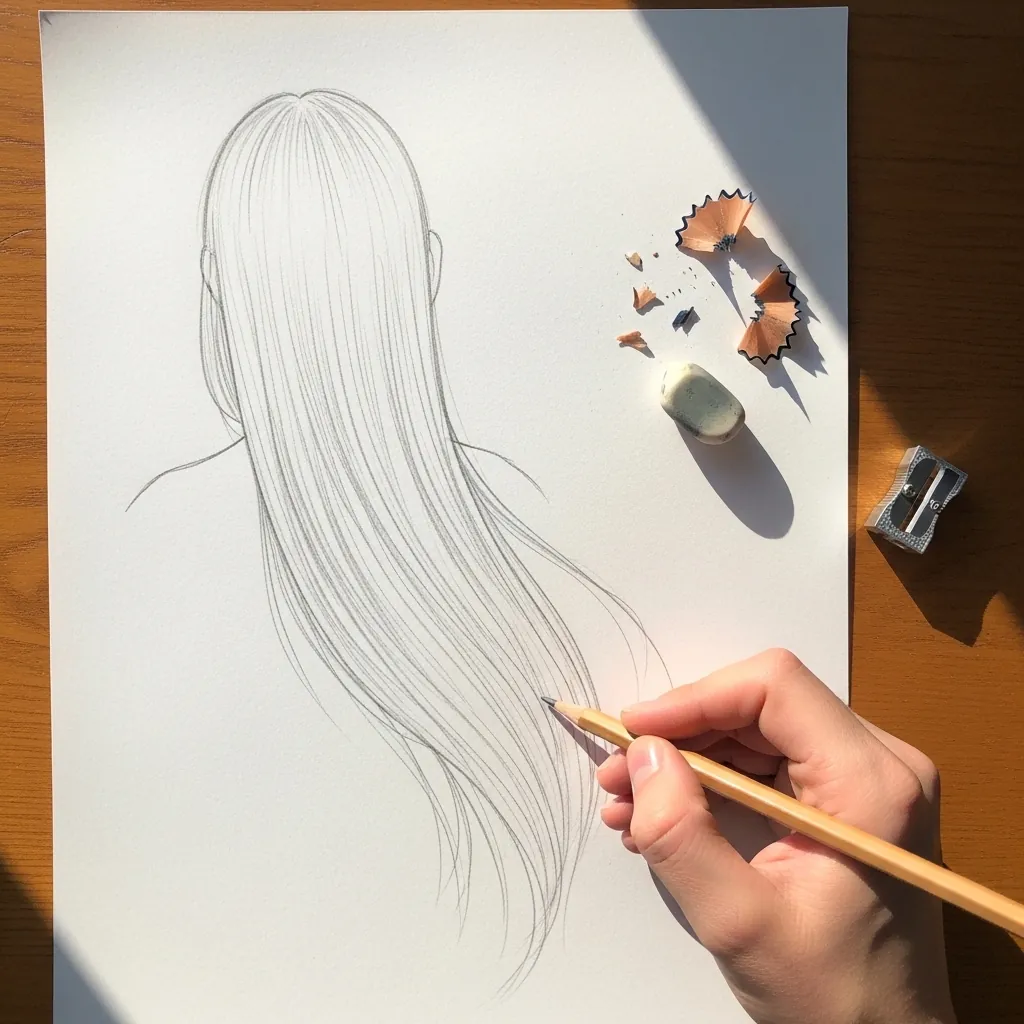
Straight hair is the best place to learn the gap method. Draw the outer silhouette, then put in only the dark separations between ribbons, running each one the full length without lifting the pencil. Leave everything between those darks completely untouched.
2. Bob With a Fringe in Profile
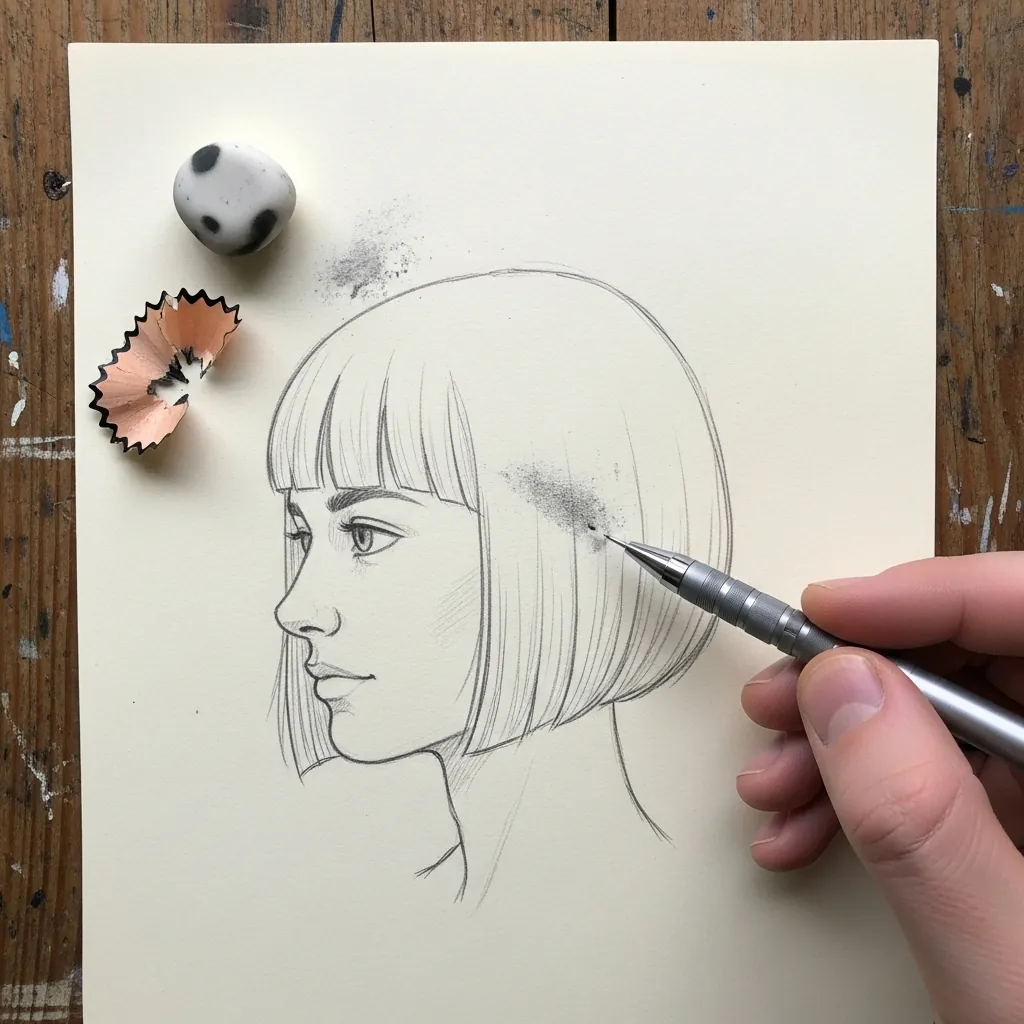
A bob is a solid shape with a hard edge. Keep the outer line crisp where it swings past the jaw, darken the hair immediately behind the ear so the face separates from it, and let the fringe cut straight across the brow.
3. Loose Shoulder Waves
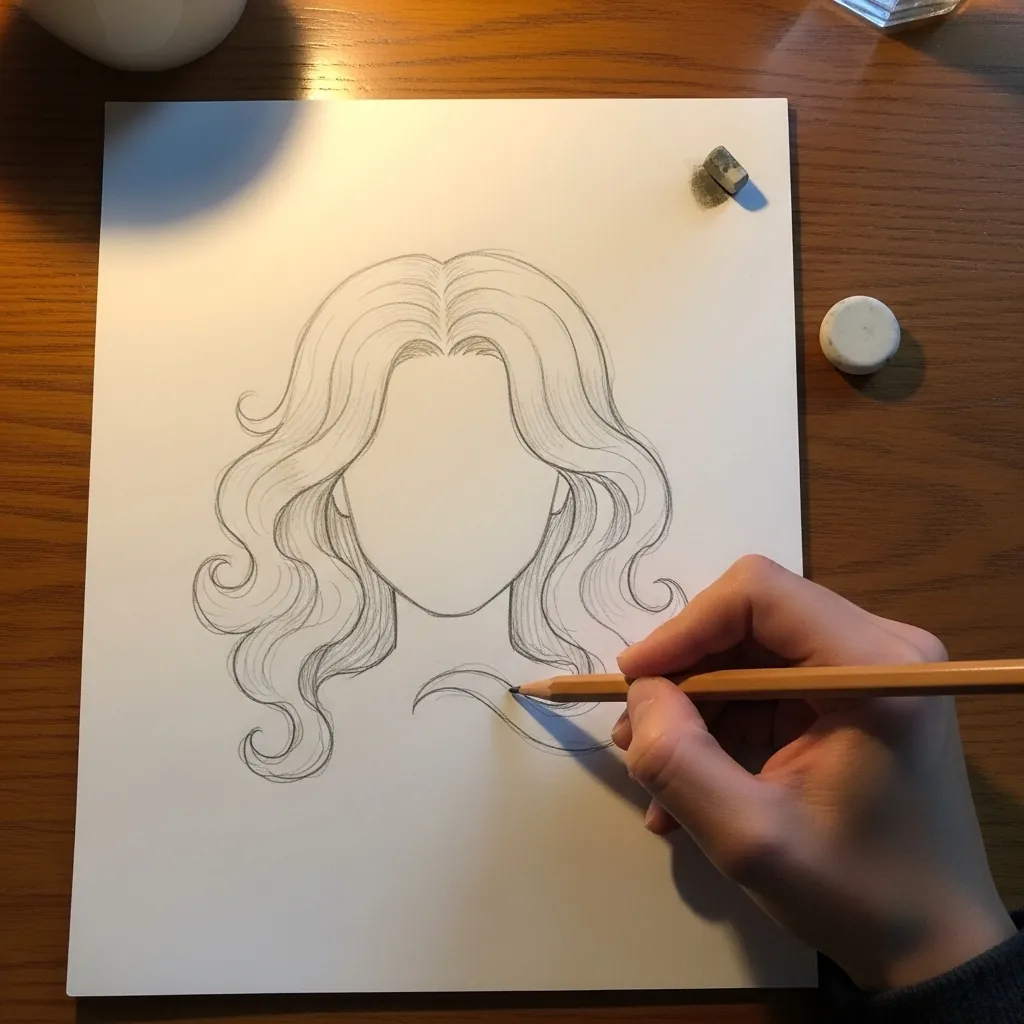
Waves are S curves that share a rhythm. Draw the first ribbon as one long S, then make every neighboring ribbon follow the same wavelength offset slightly to one side, so the whole mass moves together instead of pulling in different directions.
4. Low Ponytail From Behind
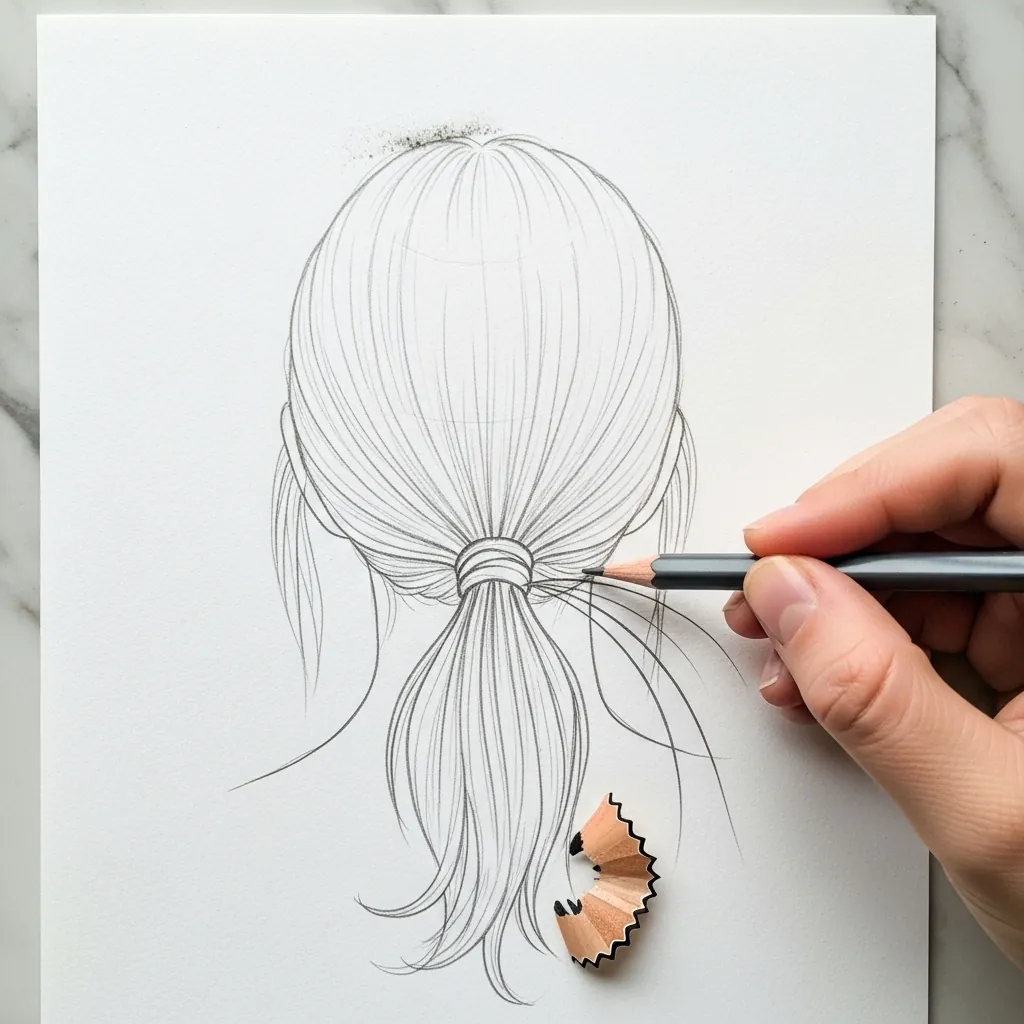
A ponytail has one gathering point, and everything answers to it. Run every stroke from the crown down into the band, pinch the darkest tone right at the tie, and let the tail below fan out and get lighter as it falls.
5. Half-Up Style
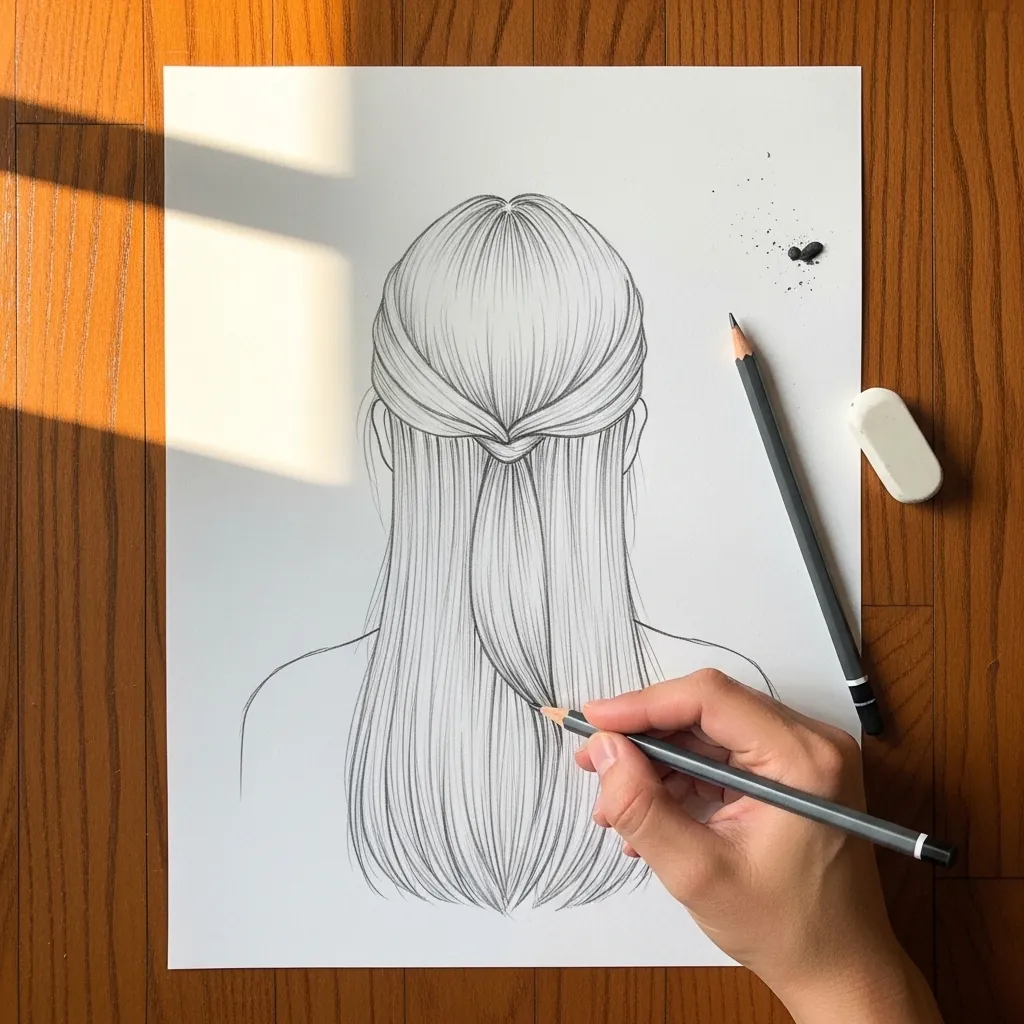
Two masses meet in this style. Draw the upper section pulled back and the lower section hanging loose, keep a dark separation between them, and let a few strands escape at the join. That escape is what stops it looking molded.
6. Neat Spiral Bun
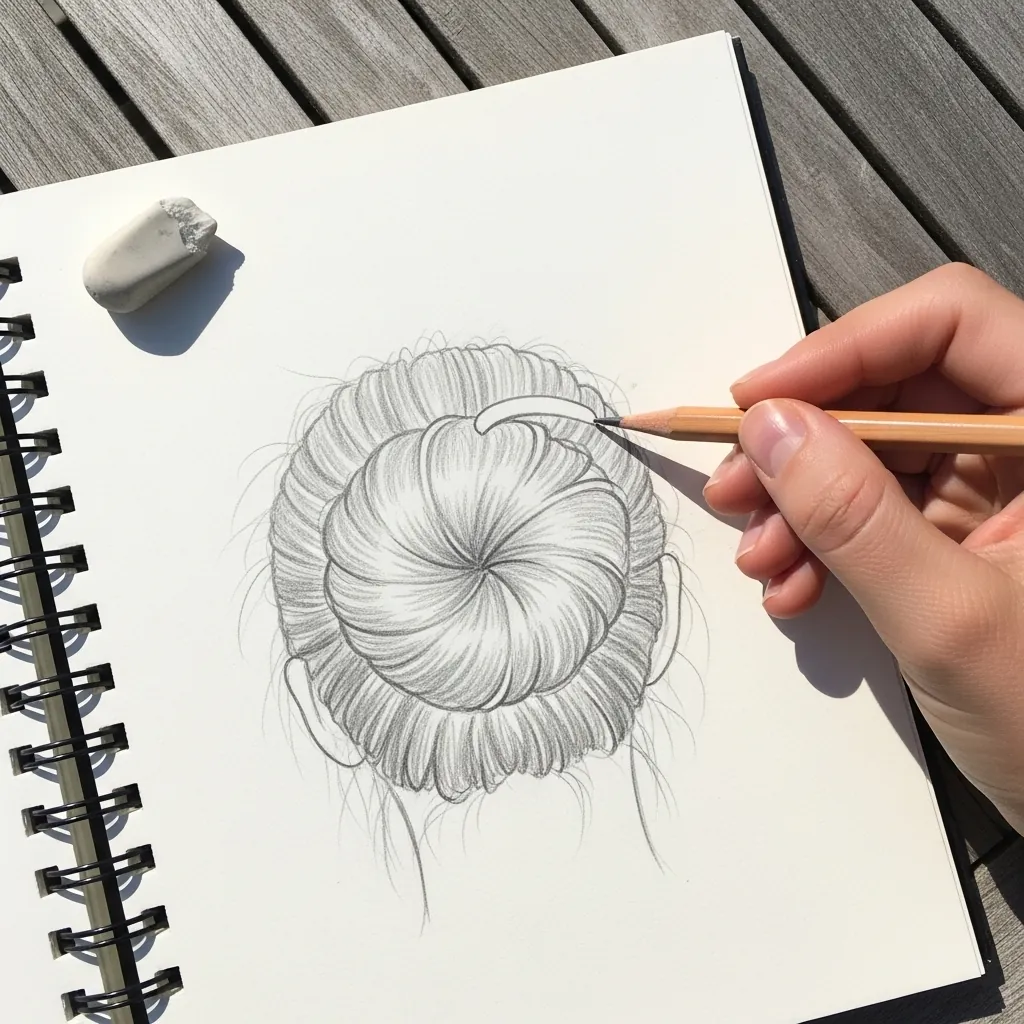
A bun is a spiral wound flat. Start at the center and coil outward, keeping the gaps between coils even, then darken the inside edge of each coil so the whole thing reads as rounded rather than as a flat target.
7. Tight Corkscrew Curls
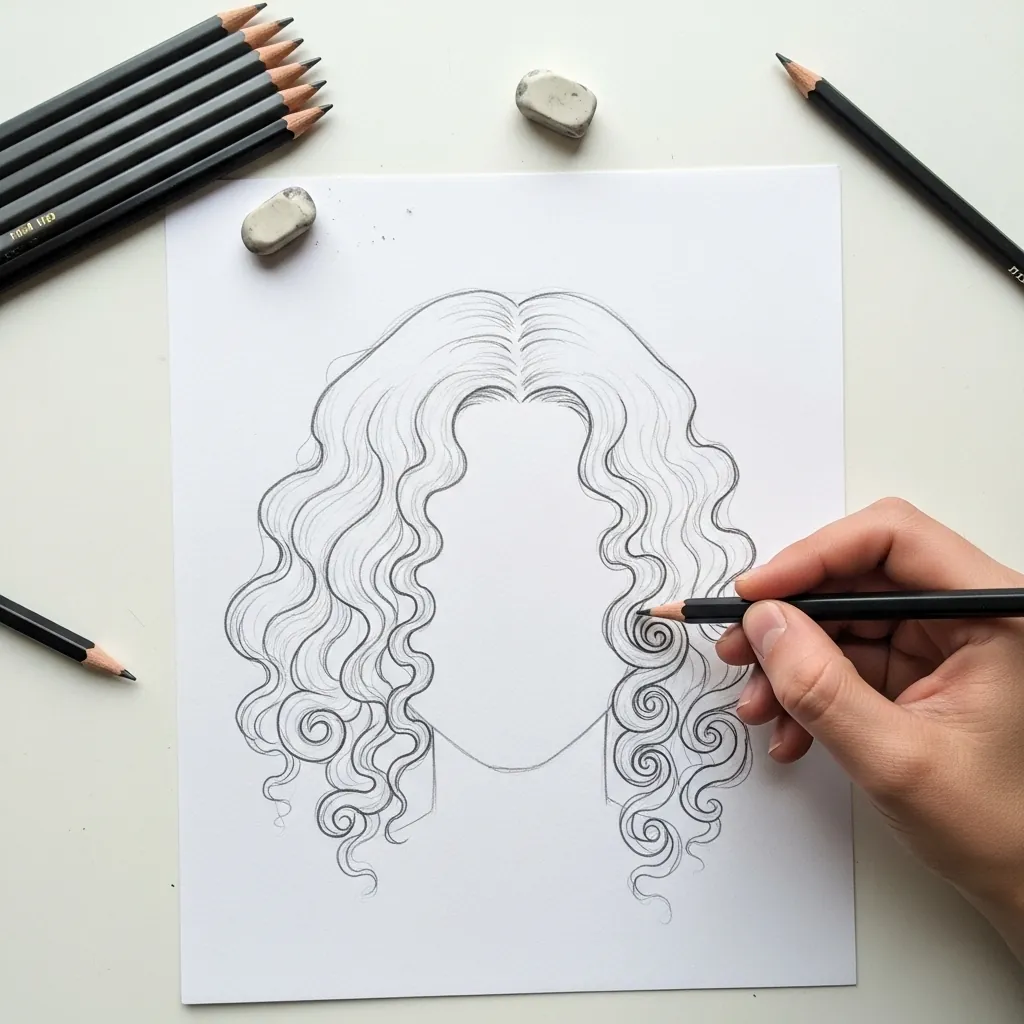
Corkscrews are cylinders seen edge on. Draw each curl as a repeating C shape stacked down a slightly curved line, darken the inside of every C where it turns away, and vary the diameter between curls; identical curls read as a wig.
8. Textured Braid Rows
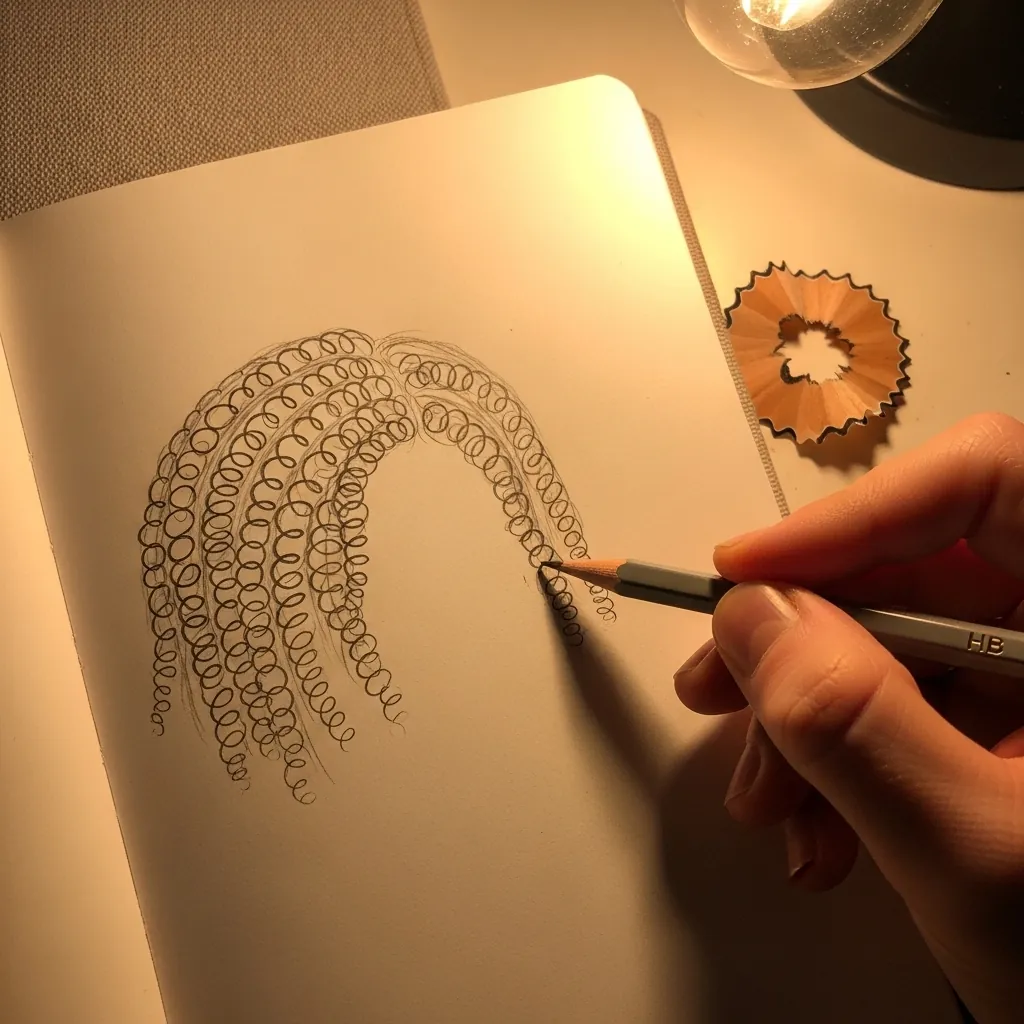
Rows of braids need consistent spacing above all. Rule light guide lines from the hairline back across the skull, keep each row exactly parallel to its neighbors, and build the texture inside those channels. The gaps between rows stay the darkest part.
9. Single Braid Down the Back
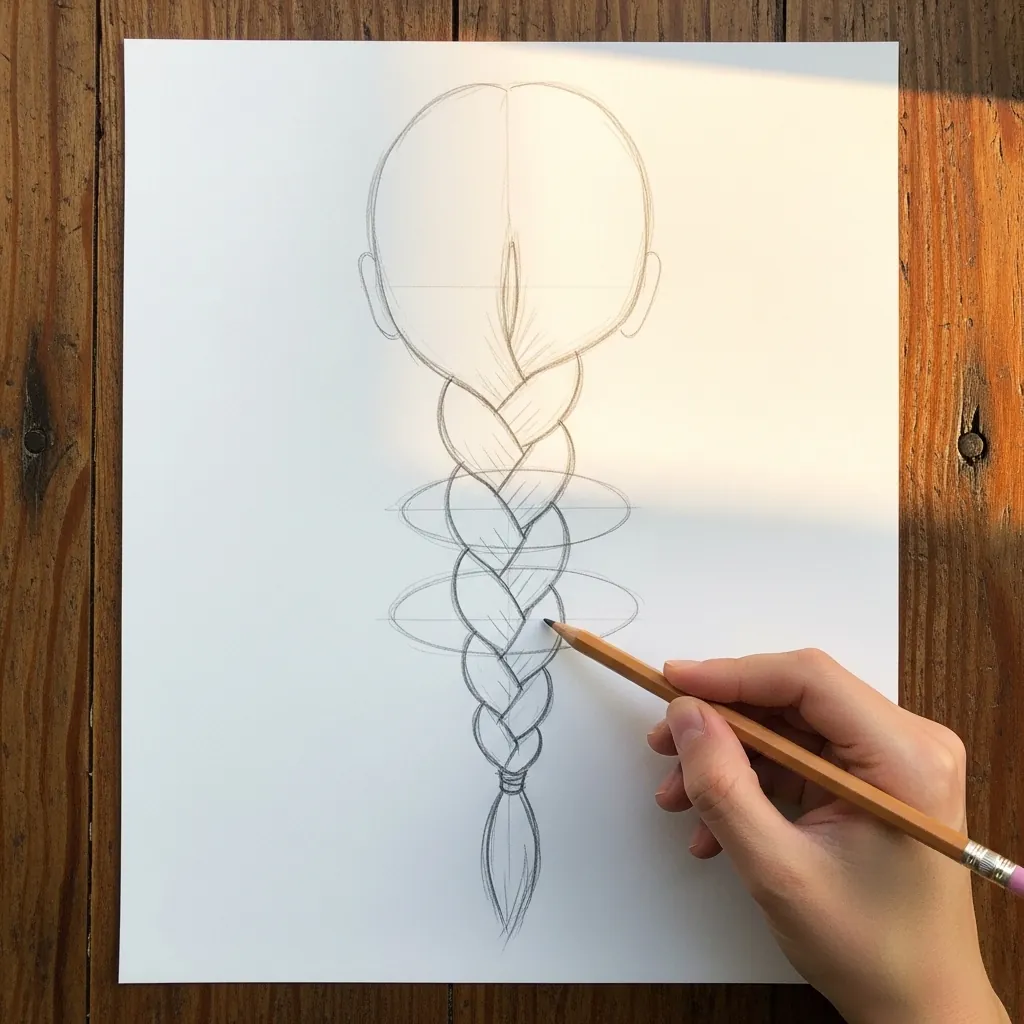
A braid is a stack of leaf shapes alternating side to side. Draw a gentle center line first, fill it with wedges that shrink toward the end, and put the darkest mark where each wedge tucks under the one below.
10. Straight Fringe Curtain
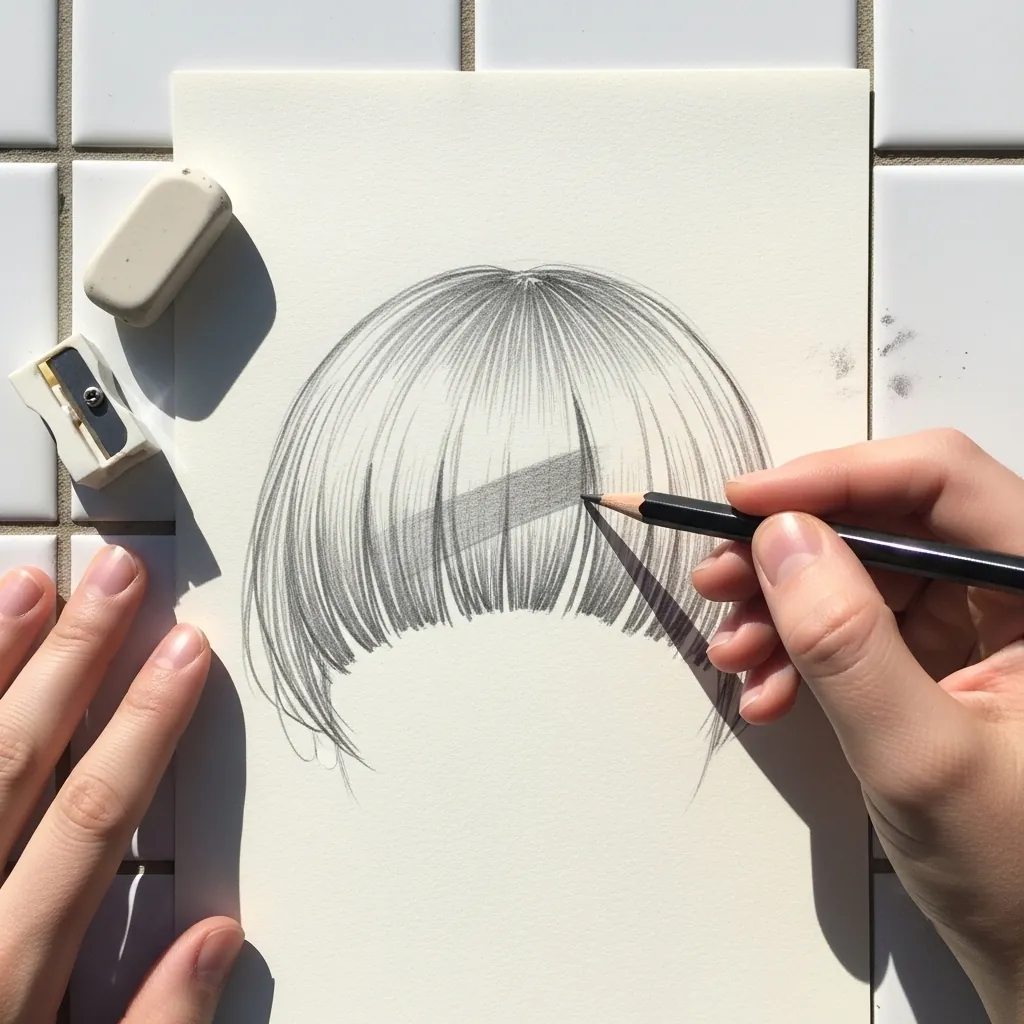
A fringe hangs from a line, not from the whole head. Establish where it parts from the rest of the hair, drop every strand from that line, and keep the bottom edge slightly uneven; a ruler-straight fringe edge always looks cut out of paper.
11. Side-Swept Waves
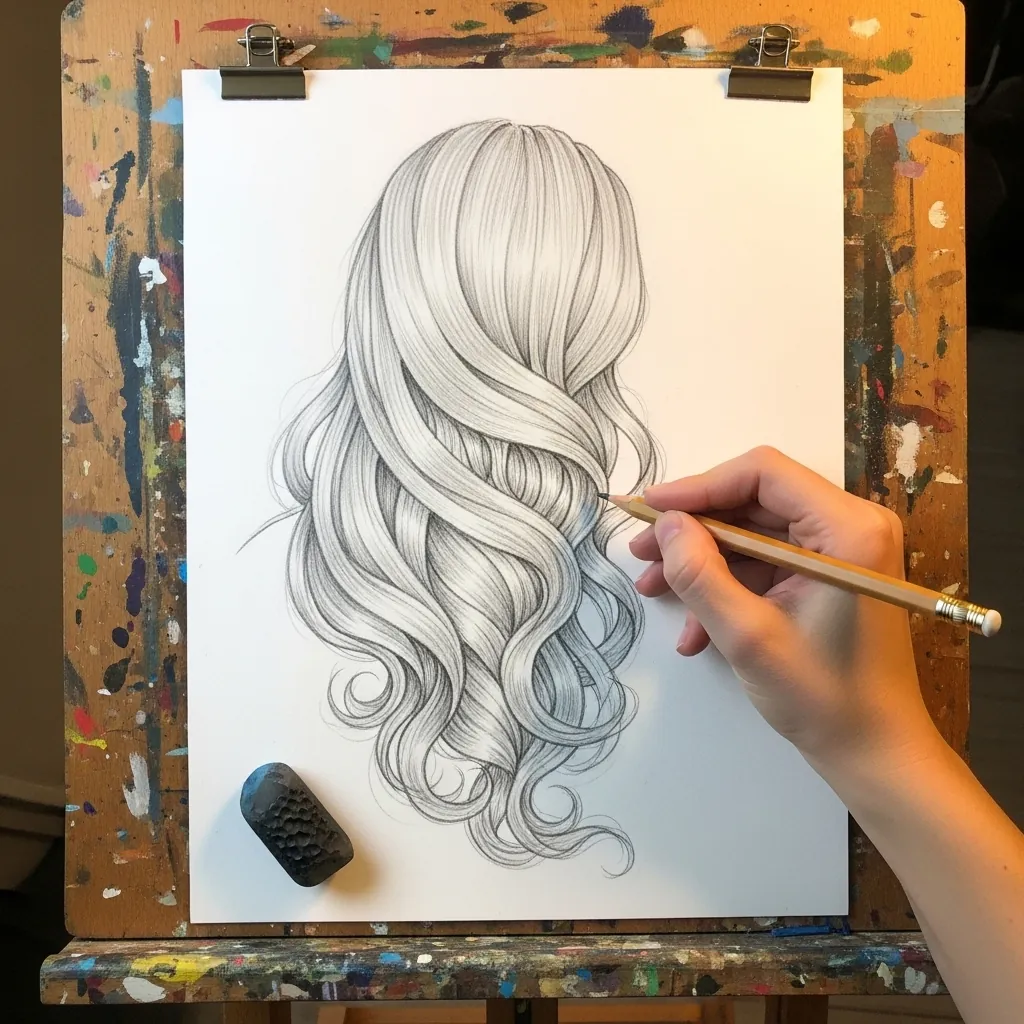
Sweeping the mass to one side creates an obvious light side and dark side. Keep the far side of the head almost solid, pile the tone up where the hair crosses the shoulder, and reserve the pale clumps for the near side only.
12. Messy Top Knot
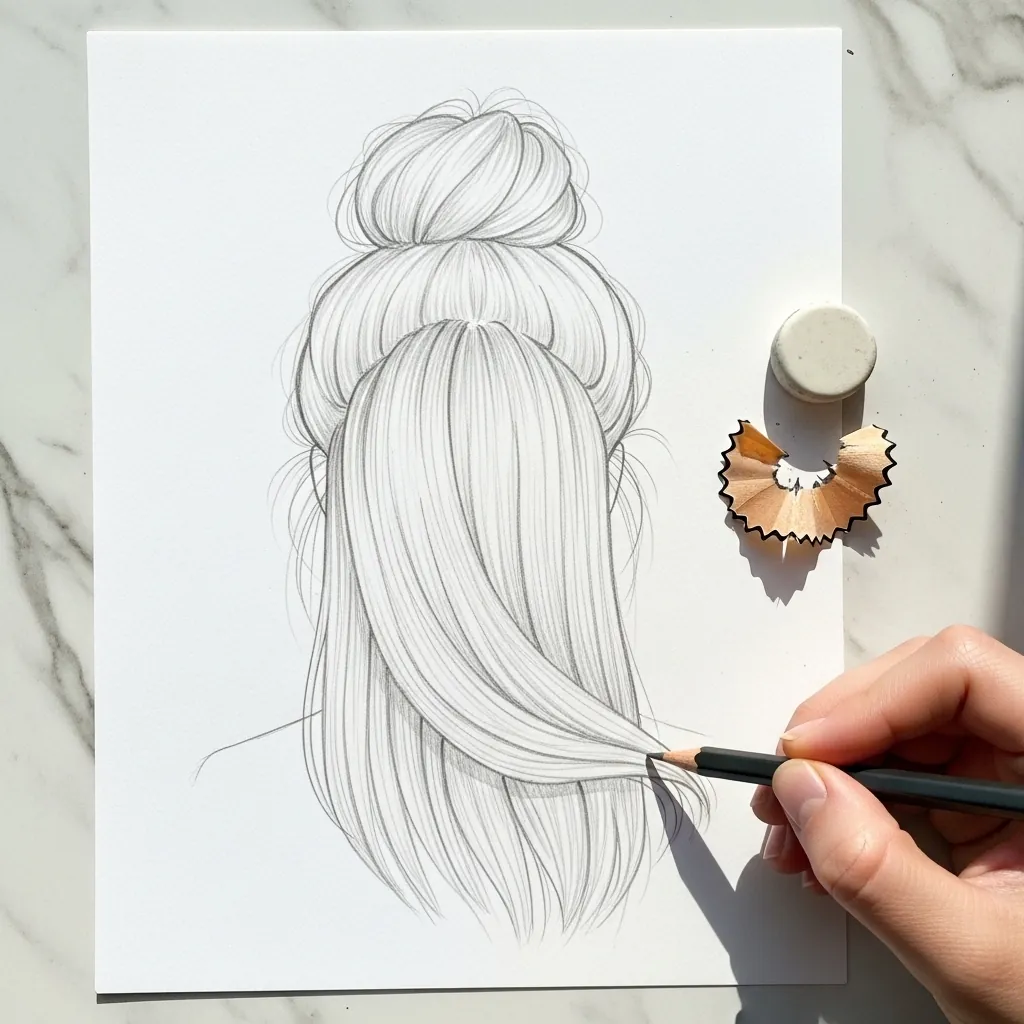
Mess has to be deliberate. Draw the knot itself as a tight controlled shape, then let exactly four or five strands escape at different angles and lengths, and keep the rest smooth. More escaping strands than that just looks unfinished.
13. Short Spiky Hair
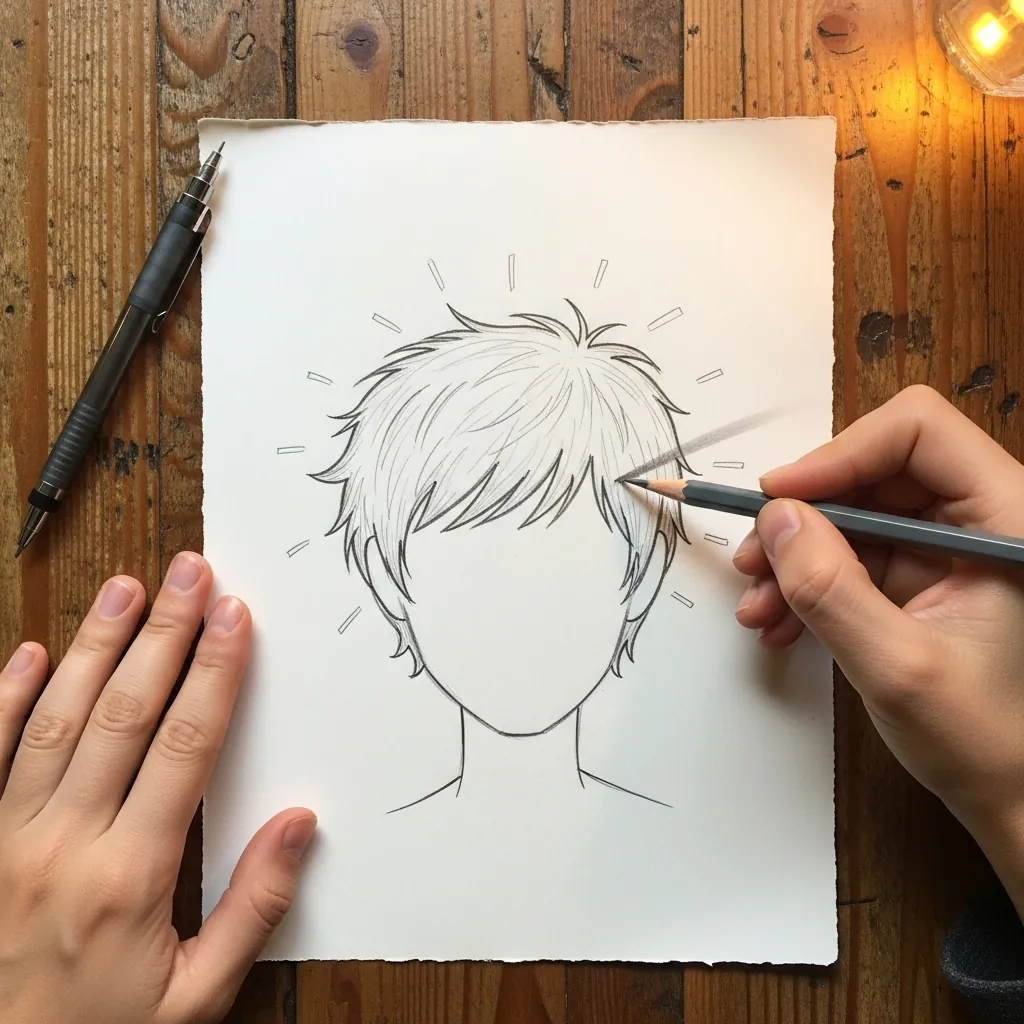
Spikes are triangles that share a base. Draw the hairline first, build each spike from it so they all grow from the same edge, and alternate the direction they lean; keep the tips sharp and the bases wide and joined.
14. Curly Hair Study Spread
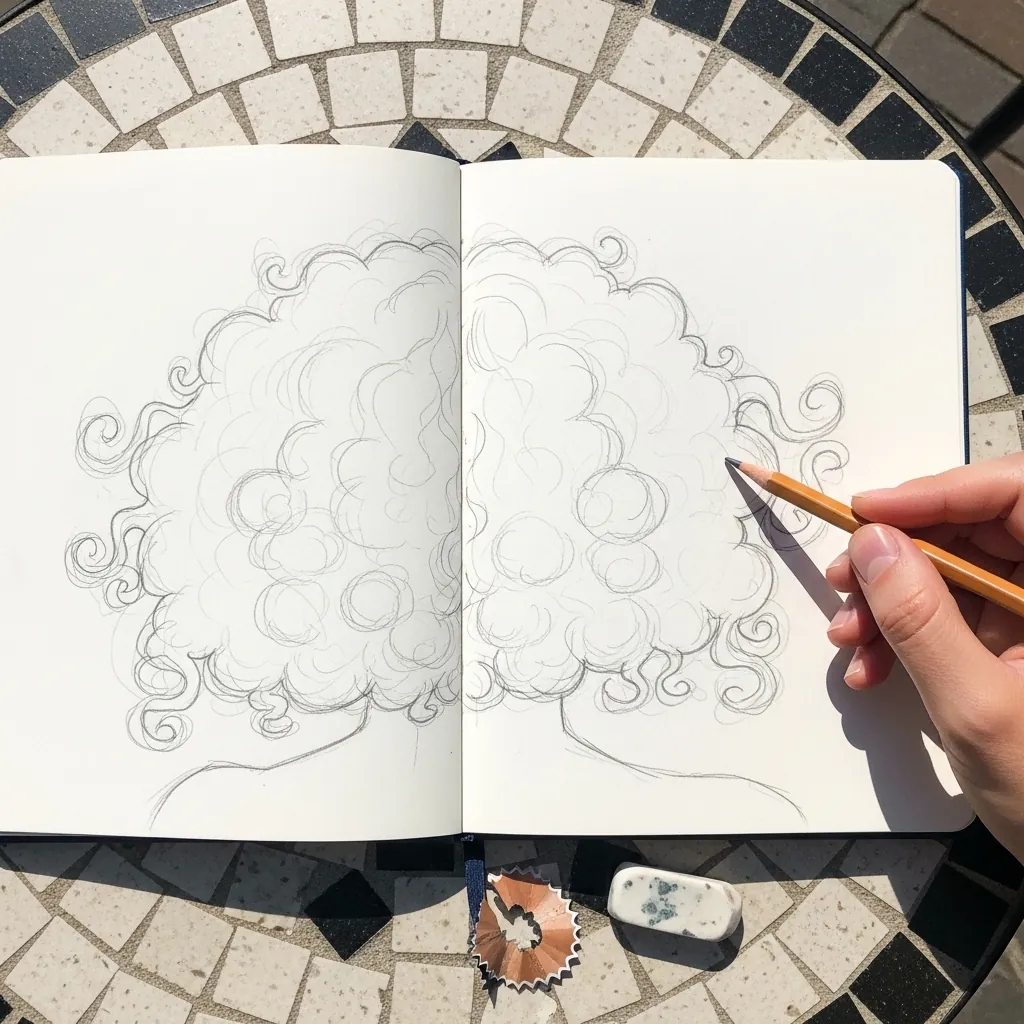
Filling a spread with curls is practice rather than a picture. Draw the same curl shape over and over, changing only its size and angle, until your hand produces it without thinking. Comparing them to each other slows the learning down.
15. Blunt Bob in Full Tone
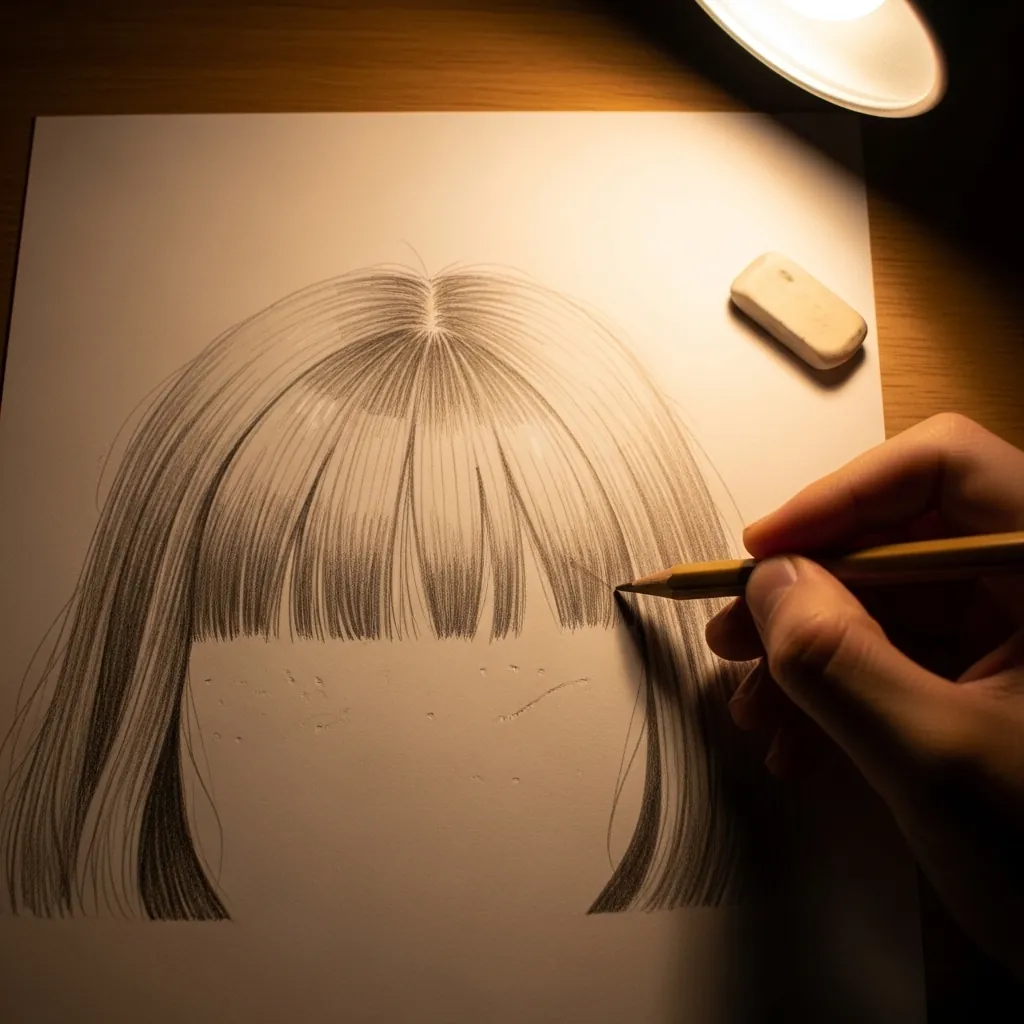
A dark bob is mostly a silhouette. Fill the whole shape to a solid mid tone first, then cut the ribbon separations in with a 4B, and lift the shine band with an eraser last. Working in that order is far faster than the reverse.
16. Hair Under a Headband
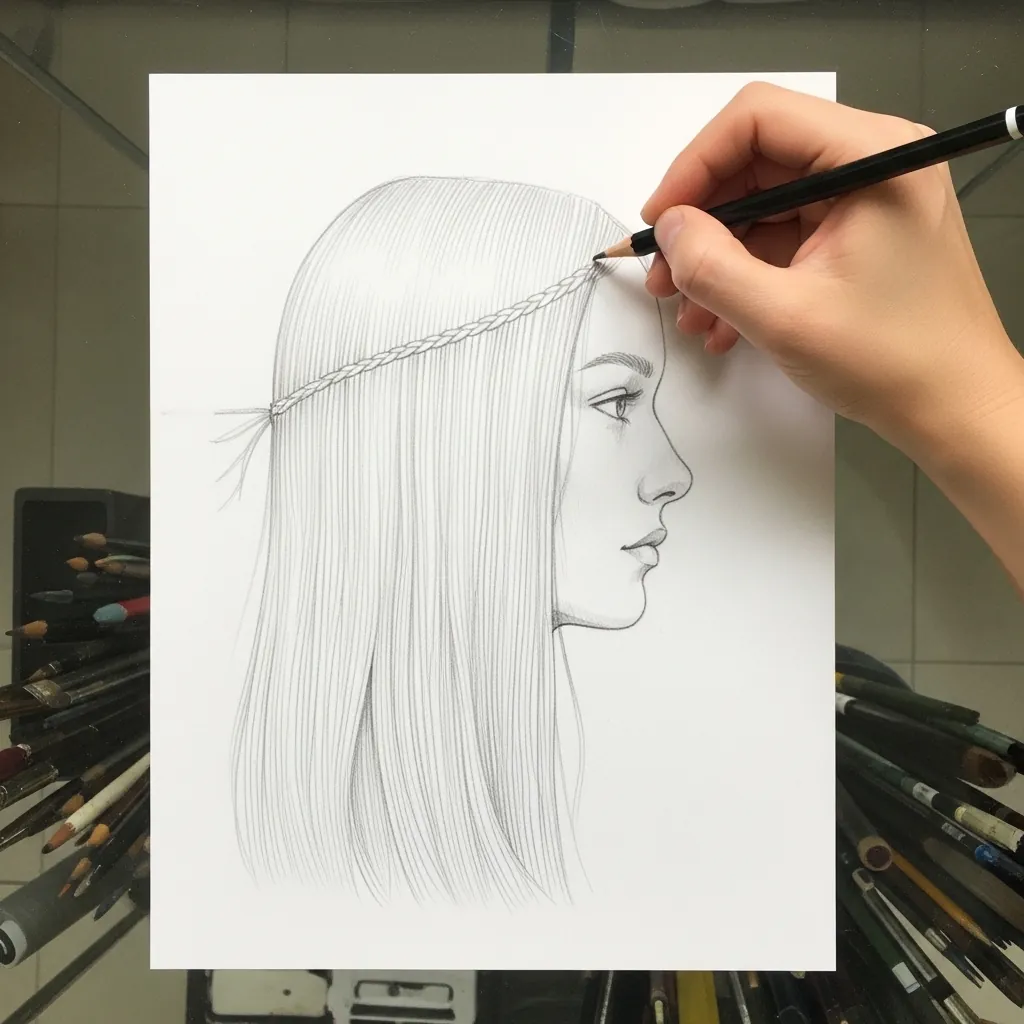
Anything worn in the hair should compress it. Draw the headband crossing over the hair, flatten the mass slightly where it sits, and let the hair puff back out immediately behind it. A band drawn on top of undisturbed hair looks glued on.
17. Crown Braid
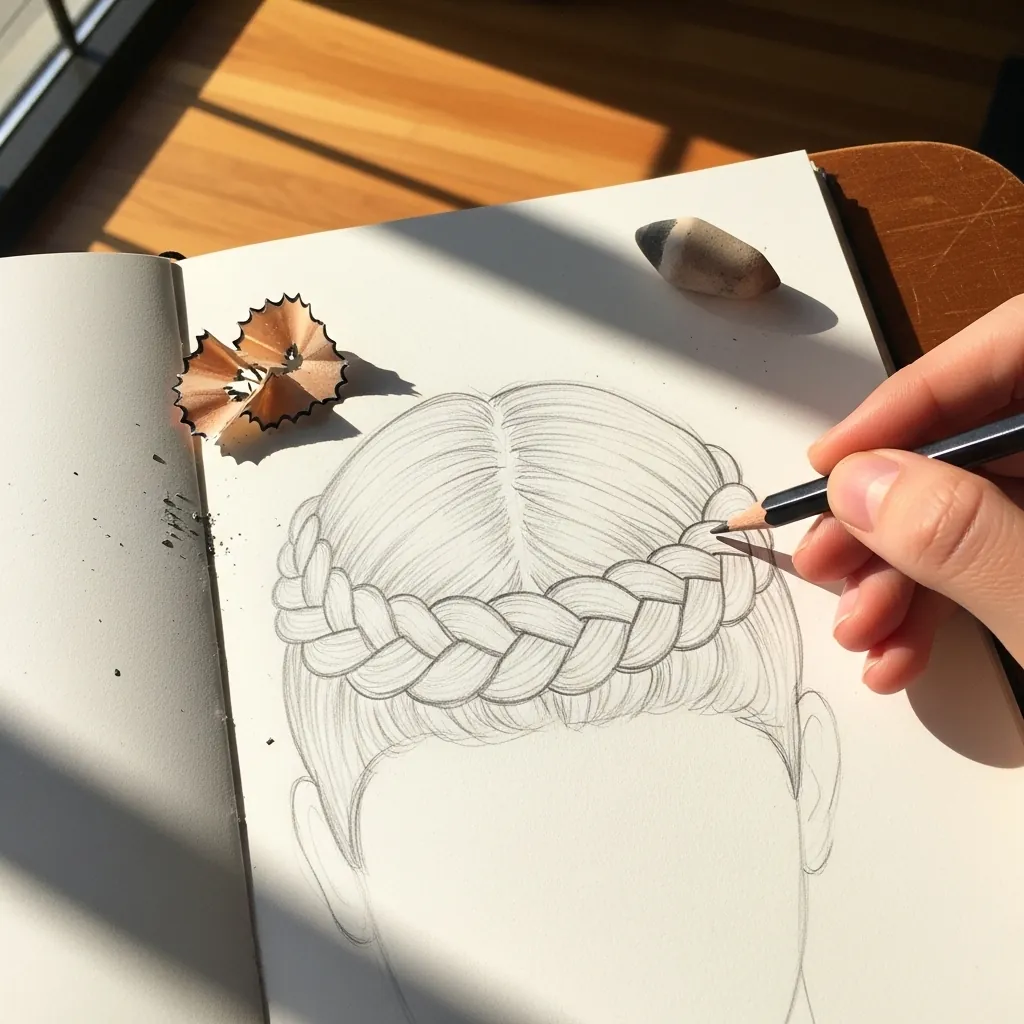
A crown braid follows the curve of the skull, so it foreshortens. Make the wedges wider at the front where you see them fully and narrower at the sides where they turn away, and keep the whole braid sitting outside the head outline.
18. Afro Texture
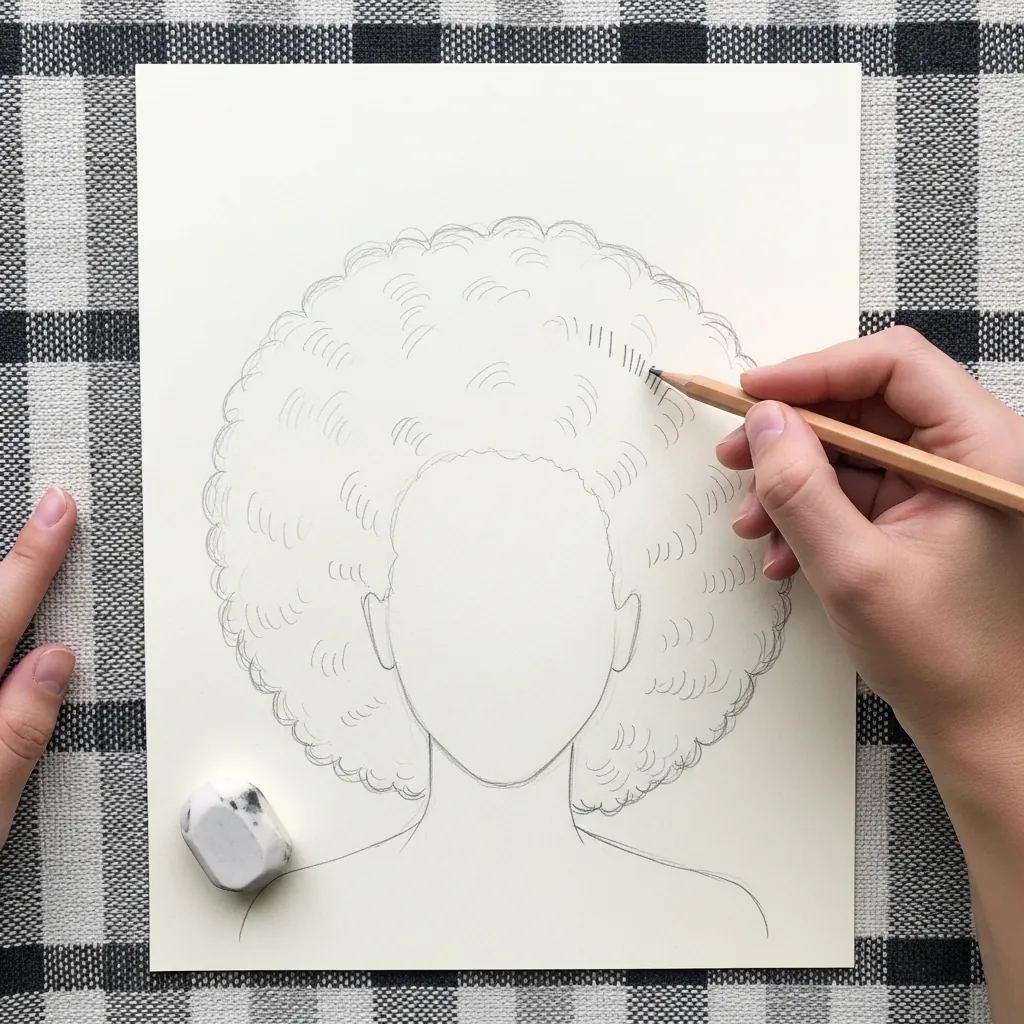
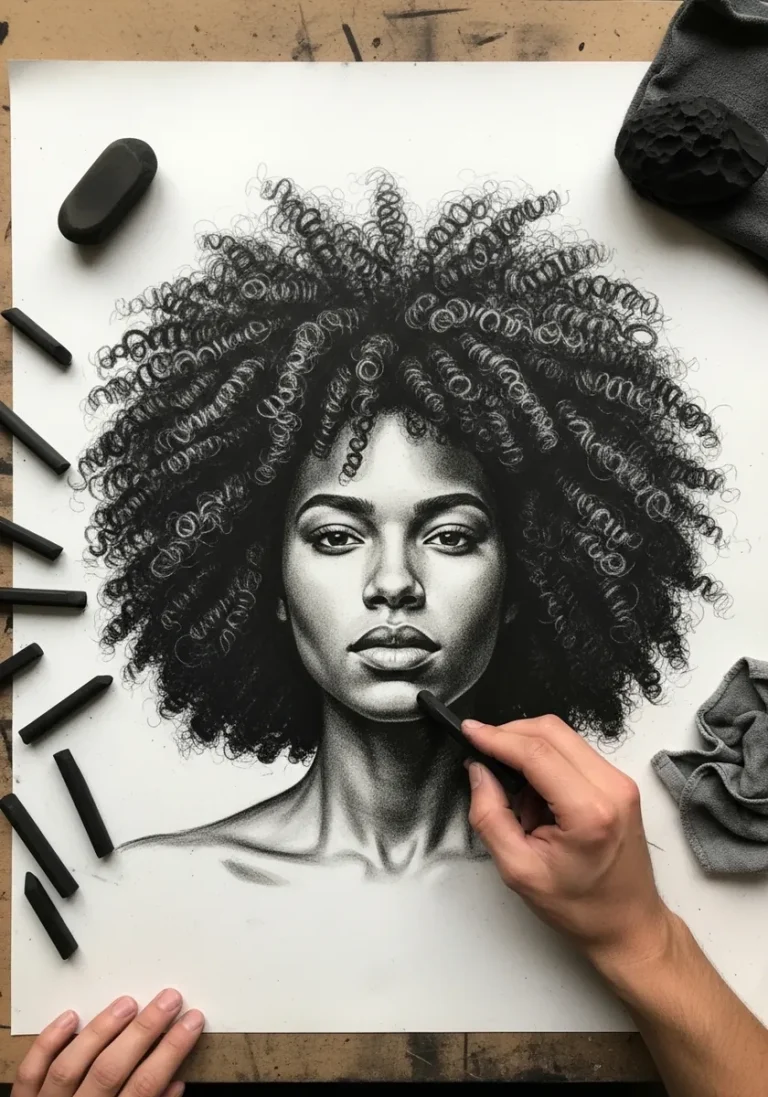
Afro hair is a shape first and texture second. Establish the outer silhouette as a full rounded mass with a slightly irregular edge, shade it evenly, and add small tight marks only near the outline and around the parting; the middle stays soft.
19. Low Bun With Loose Strands
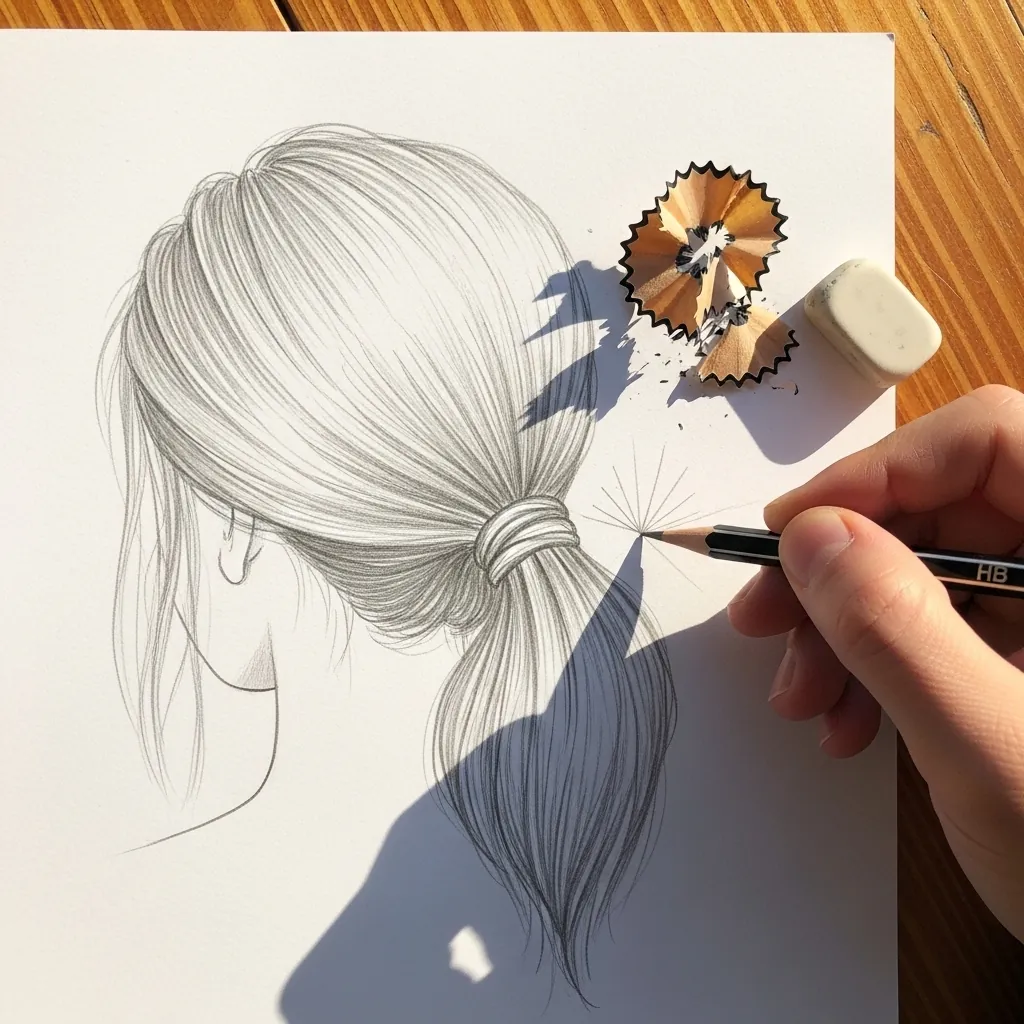
The nape is where hair naturally escapes. Keep the bun itself tidy and tightly wound, draw three or four short strands lifting away at the neck, and make everything sweeping into it smooth by comparison. Those few escapees are what stop it looking molded.
20. Two Braids
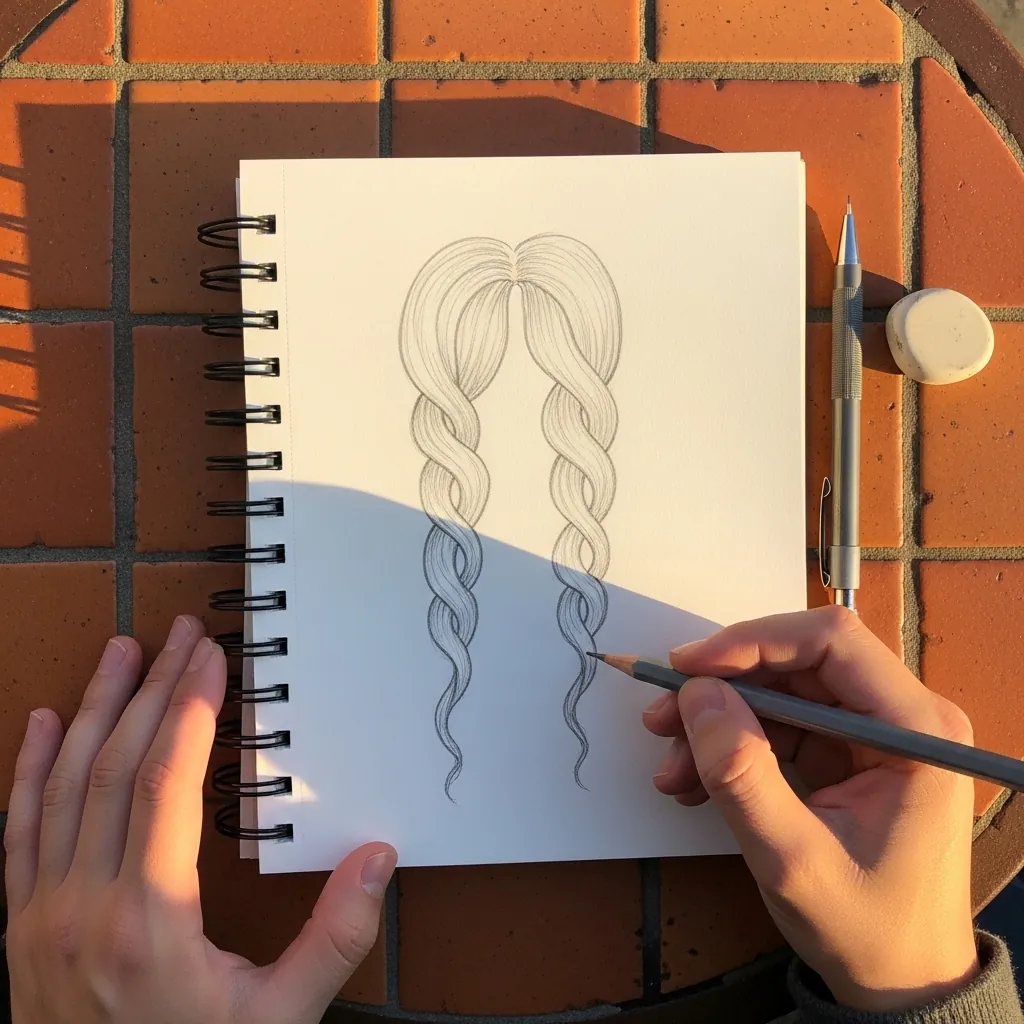
Two of anything must not be identical. Give each braid a slightly different angle and length, let one hang further forward than the other, and stagger where the wedges fall down each one. Perfect symmetry is what makes paired braids look drawn rather than worn.
21. Hair Across the Face
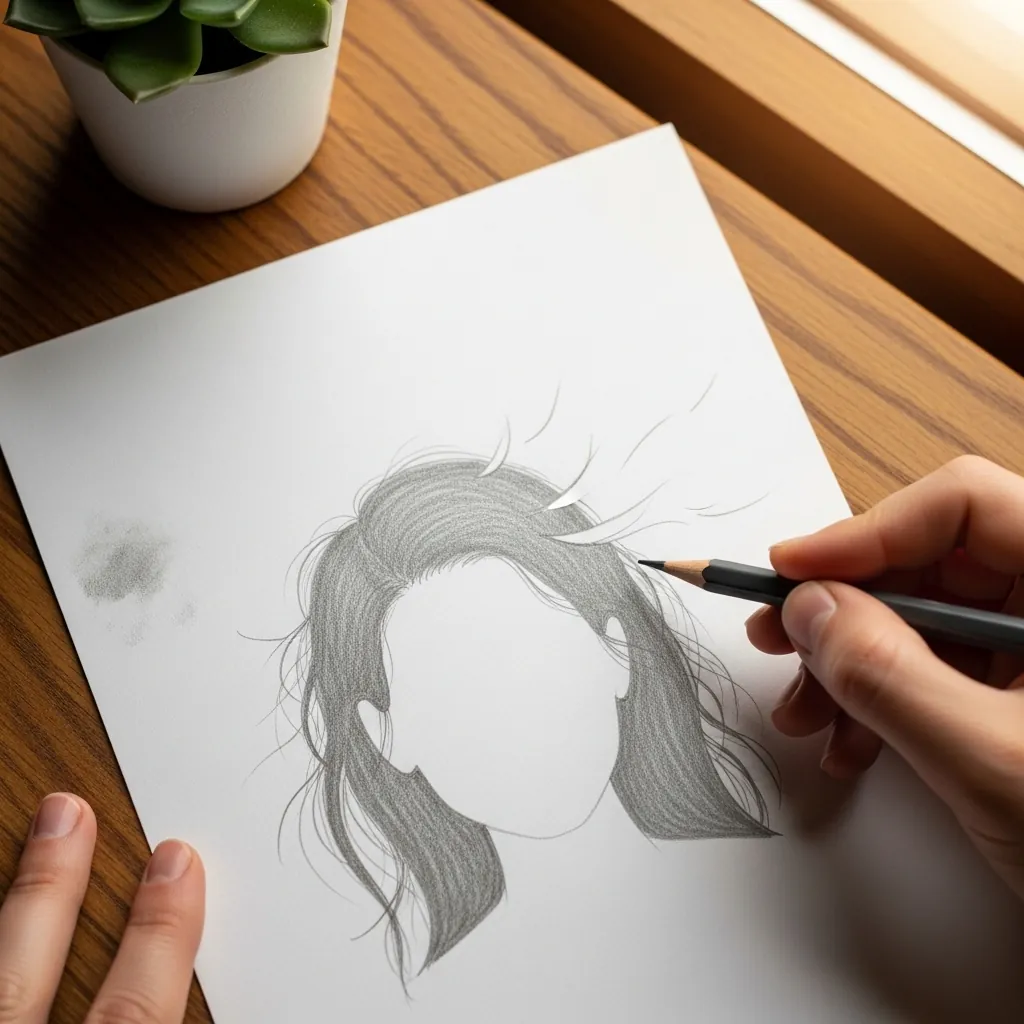
A strand crossing the face proves the hair has depth. Draw the face first, then run two or three strands right over it without breaking them, and darken the face very slightly beneath each one. The overlap is the whole point.
22. High Bun and Fringe
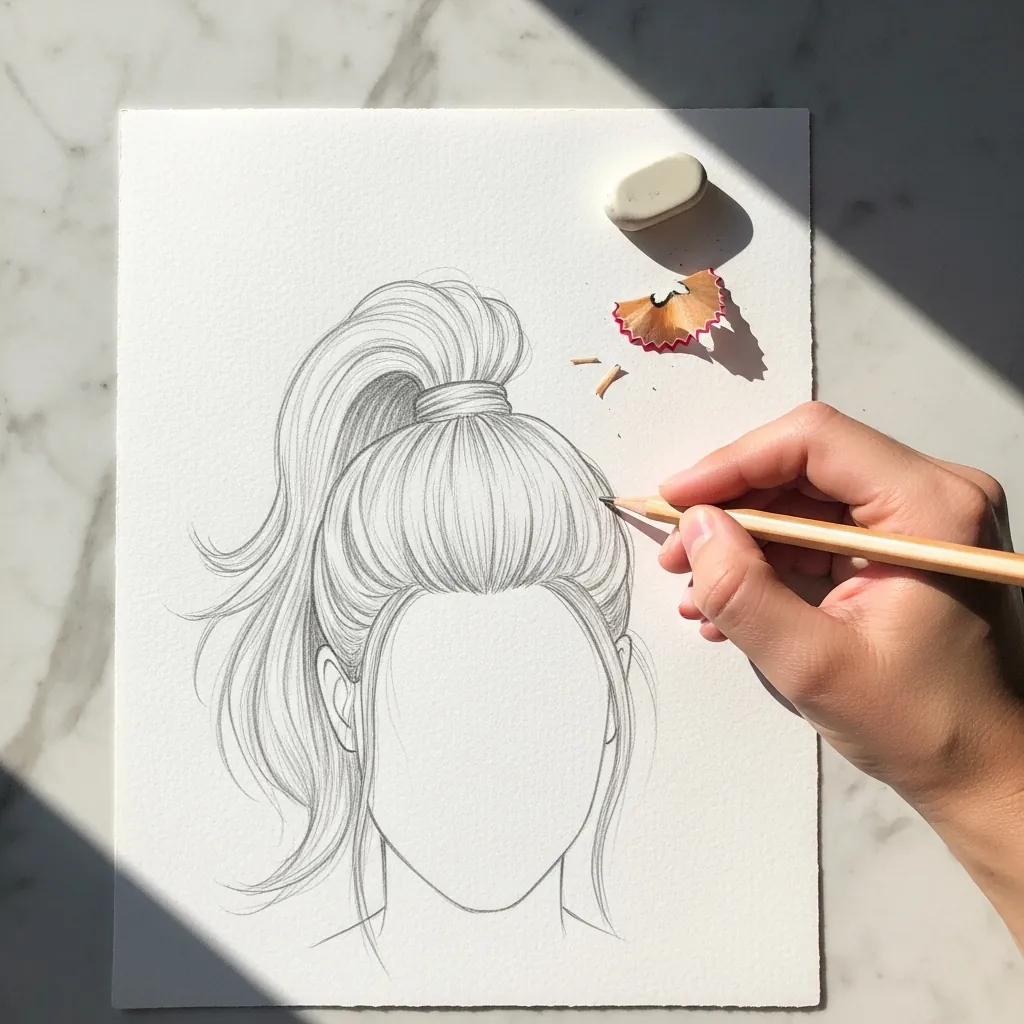
Pulling hair up stretches it, and the strokes have to show that. Run every one tightly from the hairline to the tie with almost no gaps between them, then let the bun above break into looser looping shapes. Tension below, softness above.
23. Hair Falling From the Crown
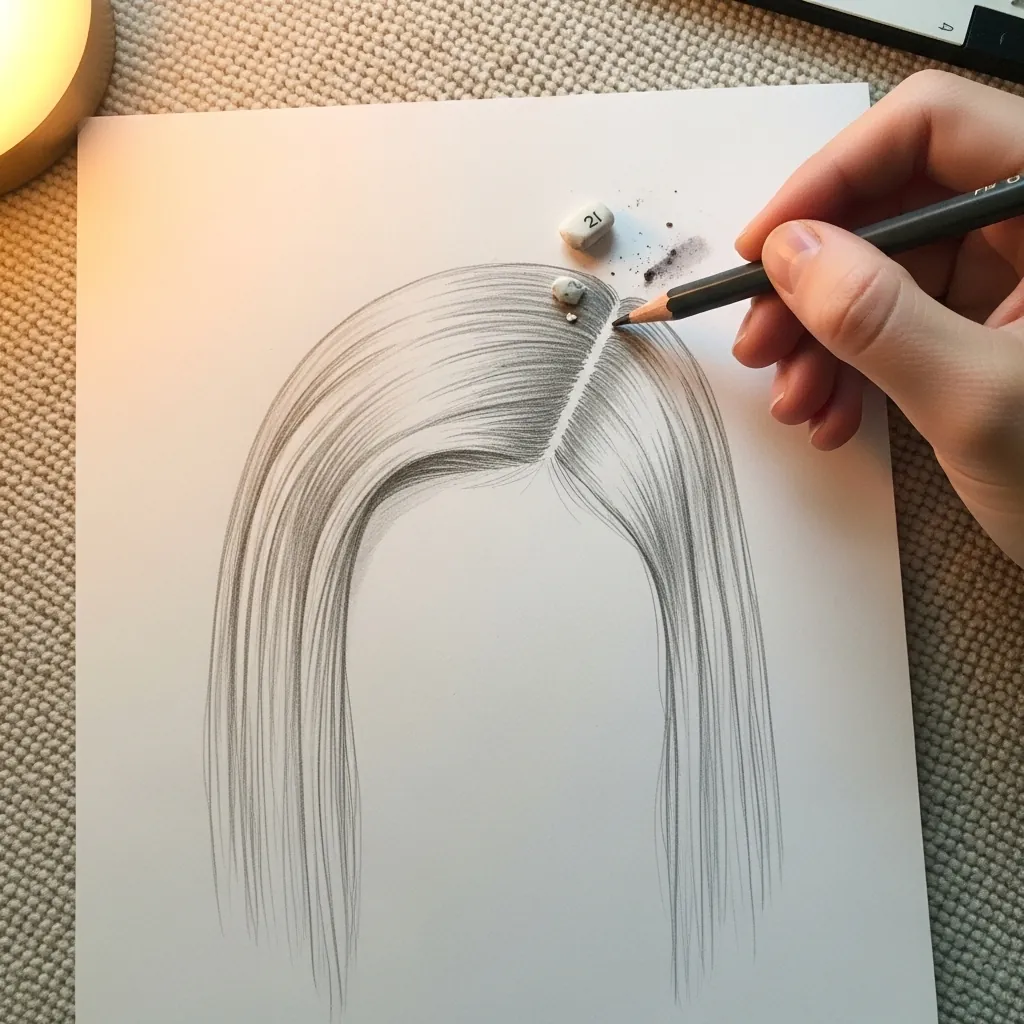
The crown is where every stroke originates. Mark it as a small point, radiate the strokes outward from it in every direction, and let them straighten as they fall past the ear. Ignoring the crown is why so much drawn hair looks like a hat.
24. Windblown Short Hair
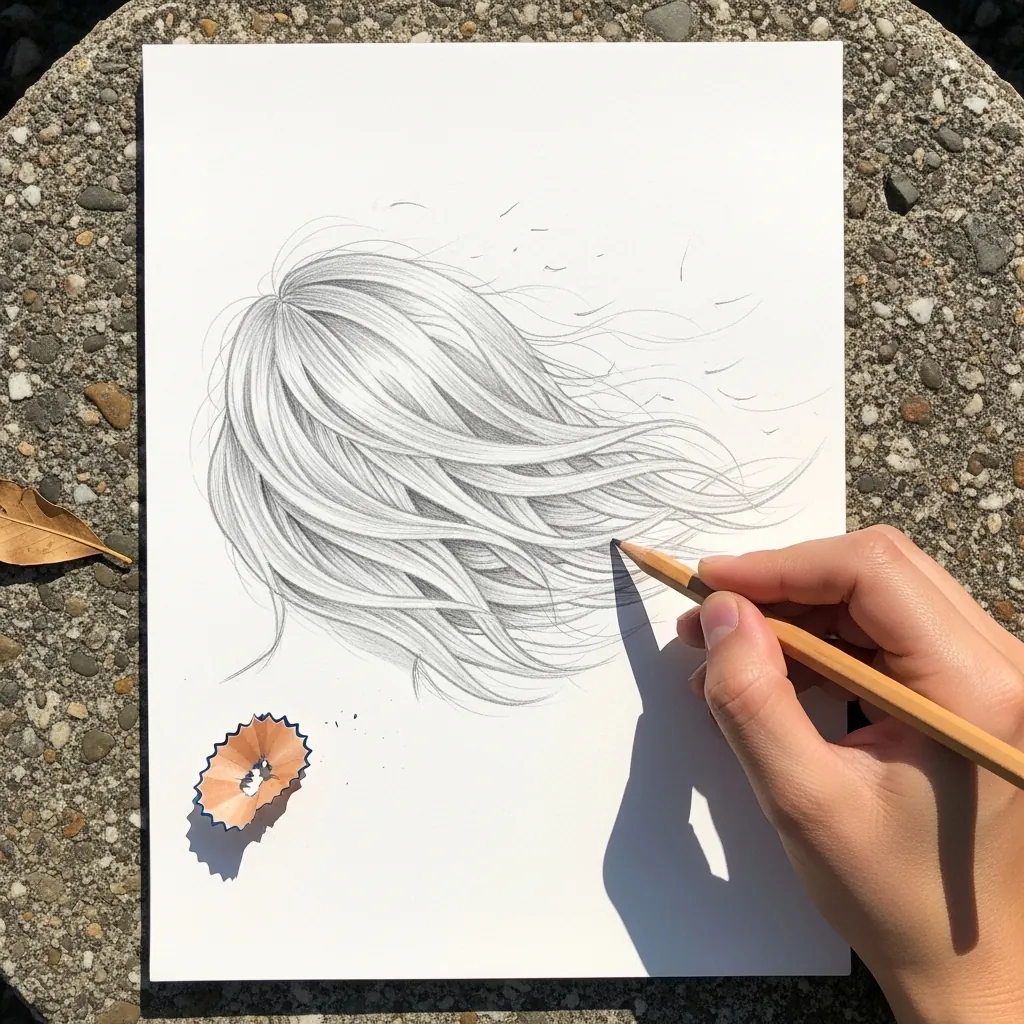
Wind gives every strand one direction. Sweep the whole mass the same way, lift it clear of the skull on the windward side, and leave a gap between the hair and the head there; a few strands flying loose finish it.
25. Zigzag Curl Pattern
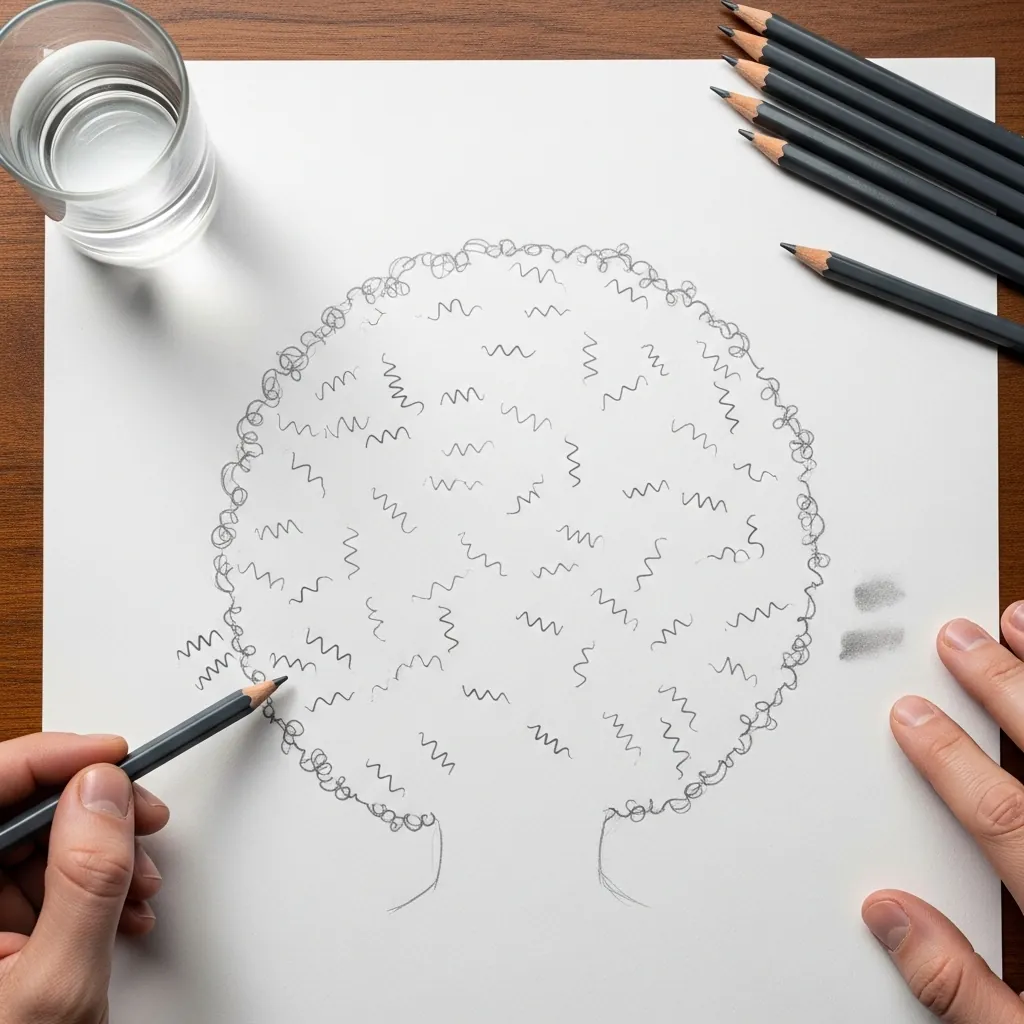
Some hair textures are best drawn as pattern. Fill the mass with a consistent zigzag mark, keep the marks smaller near the outline and looser in the middle, and let the pattern itself supply the tone. No extra shading is needed.
26. Braided Rose Bun
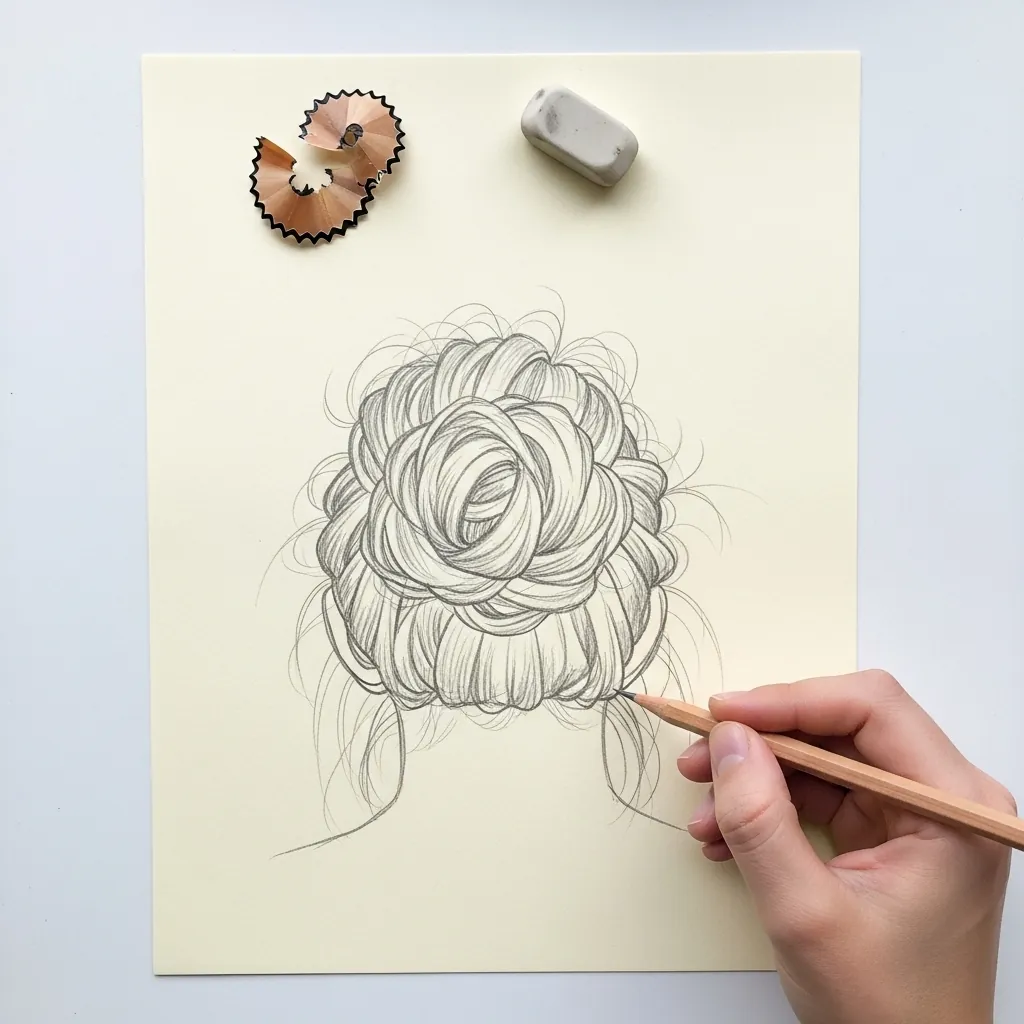
This is a braid and a spiral at once. Draw the braid as a long strip first, then coil that strip inward like a rose, and darken every point where one coil passes behind another. The overlaps are what make it read as woven.
27. Center Parting
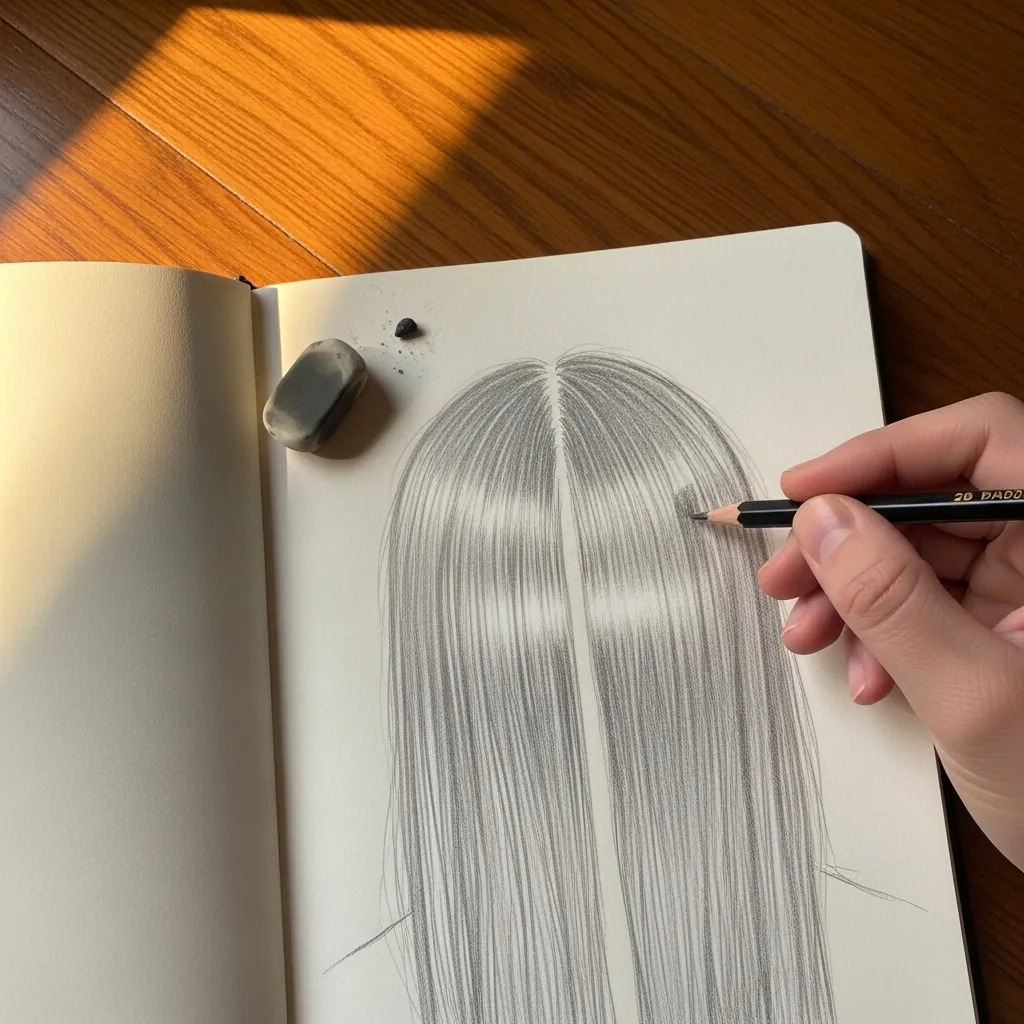
A parting is a narrow strip of visible scalp. Draw it as a thin light line rather than a hard dark one, angle the strokes away from it on both sides, and make the hair thickest immediately either side. The parting is never a straight rule line.
28. Layered Cut
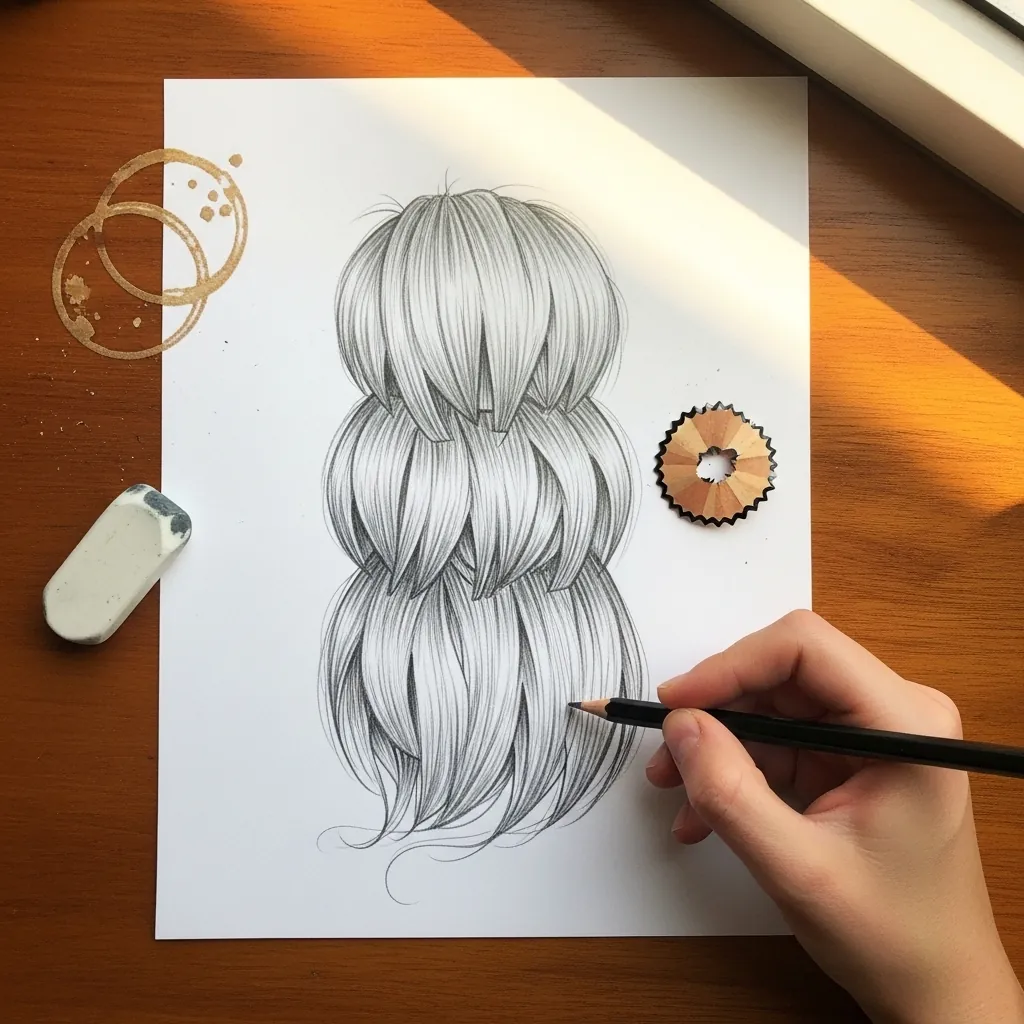
Layers show as edges inside the mass. Draw two or three horizontal-ish lines across the hair where the shorter layers end, darken just below each one, and let the strokes below start again from there rather than running the full length.
29. Sharp Graphic Bob
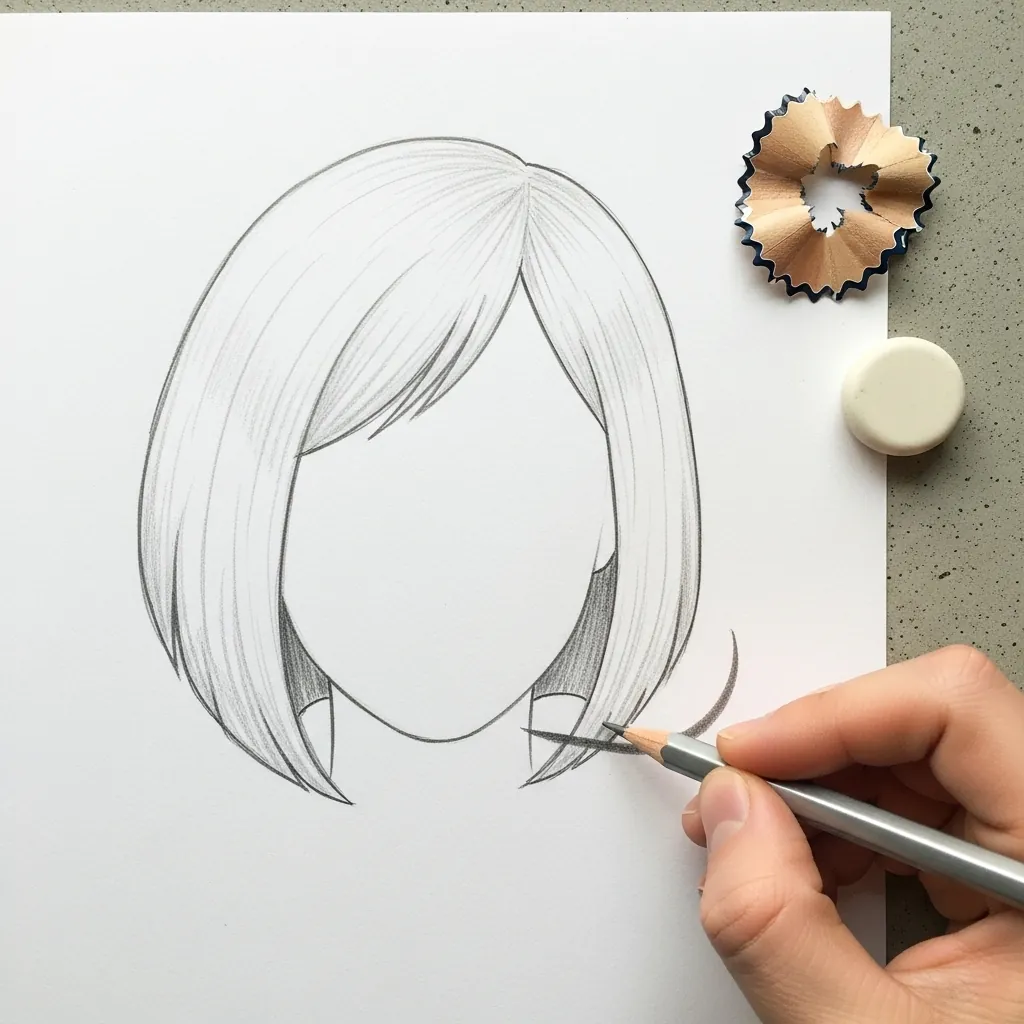
A pure line drawing needs no shading at all. Keep the outline confident and unbroken all the way round, add only three or four internal lines to indicate the parting and the main separations, and then stop. More lines will only weaken the shape.
30. Tucked Behind the Ear
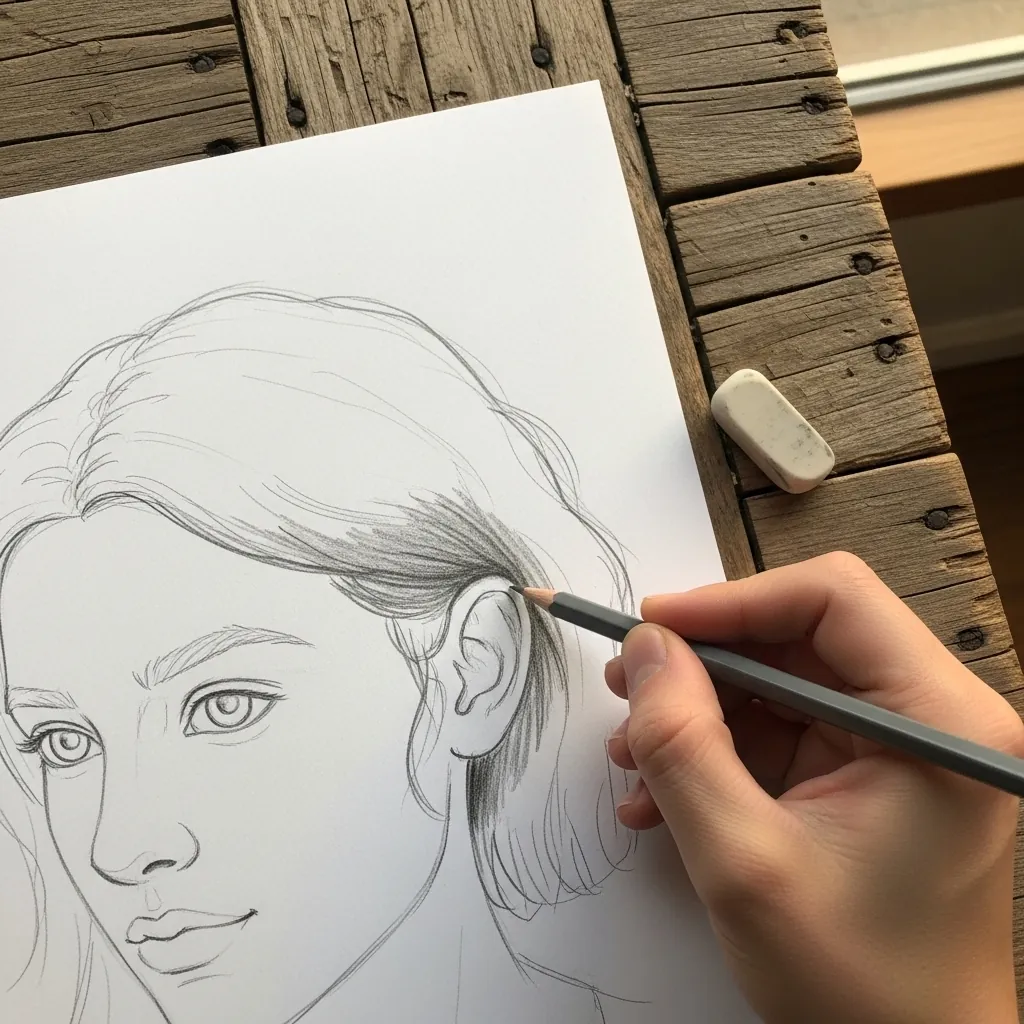
Tucking hair back exposes the ear and changes the flow completely. Run the strokes back and up toward the ear, darken sharply at the point where they disappear behind it, and let one shorter piece fall loose in front of the face.
31. Short Boyish Cut
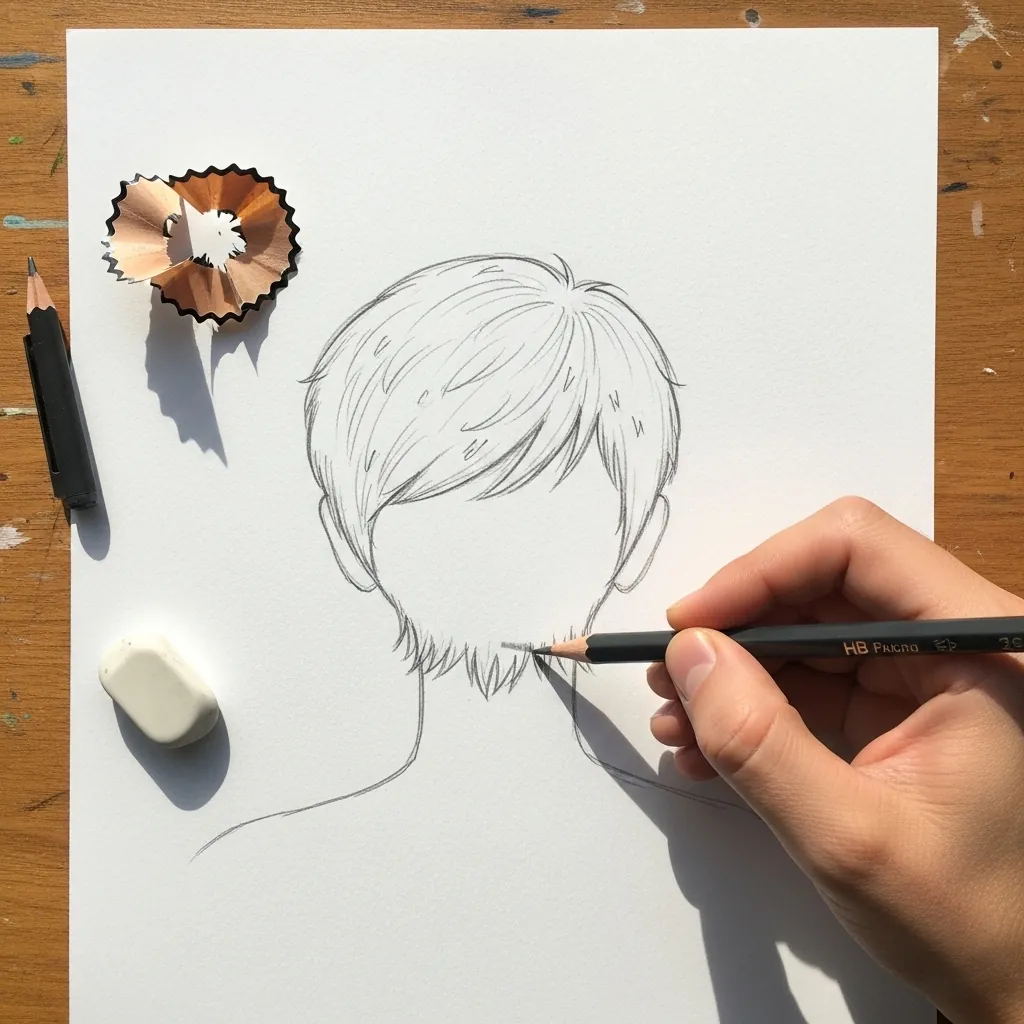
Short hair is mostly about the hairline. Draw where it meets the forehead and the temples accurately, keep the mass close to the skull with only a few millimeters of thickness, and use short strokes that all point away from the crown.
32. Braid on Toned Paper
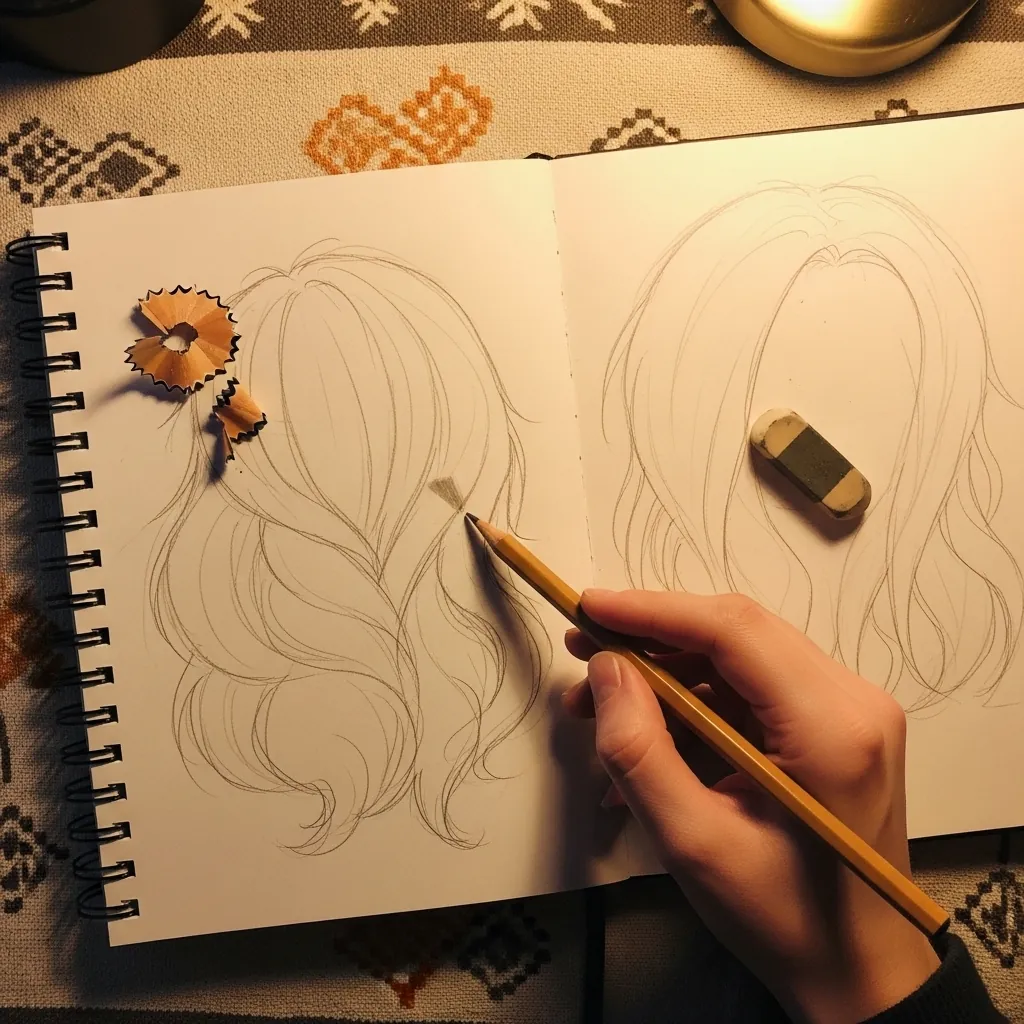
Toned paper gives you the mid value for free. Draw only the darks between the wedges and add a white pencil highlight along the top of each one; the paper does everything in between, and the braid appears in half the time.
33. Shaggy Layers
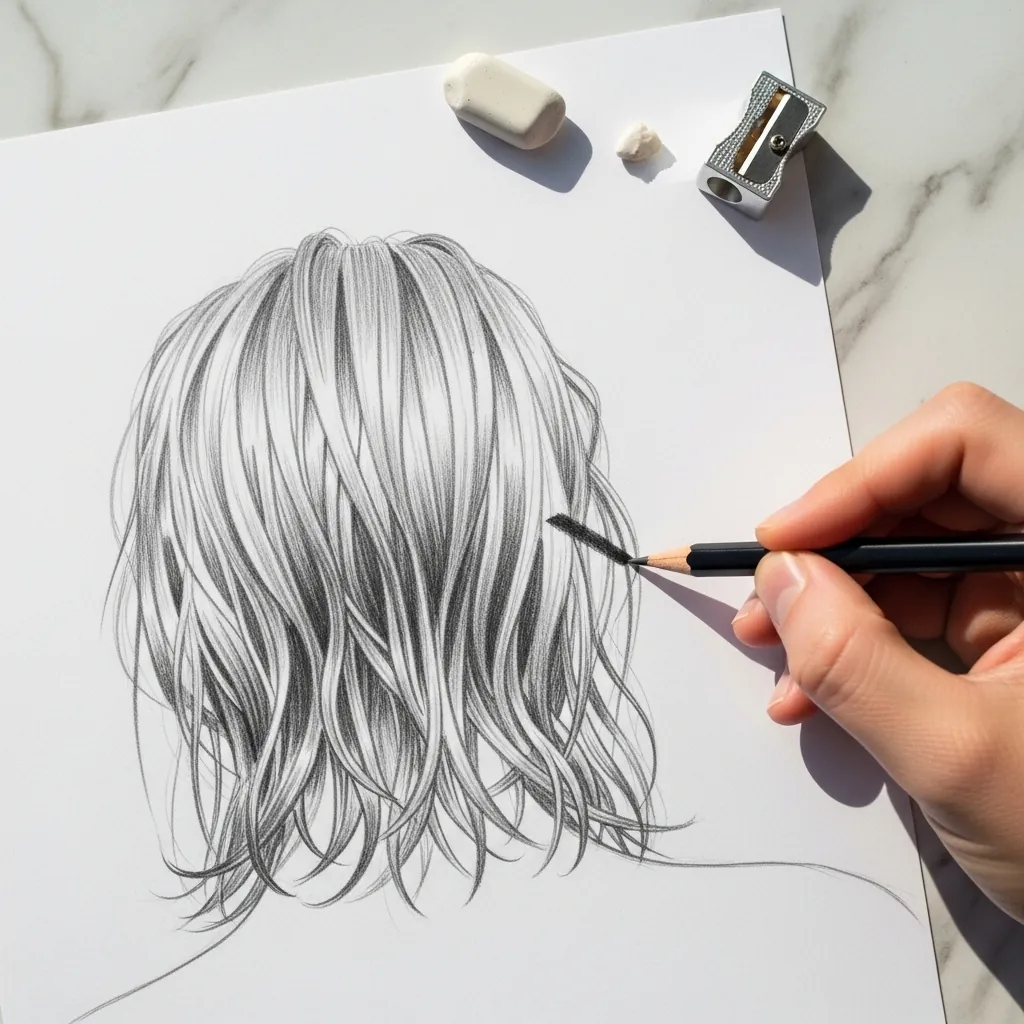
A shaggy cut is defined by its broken outline. Let the ends split into small forks, vary the length across the bottom edge by a good centimeter, and keep the tone lightest at those ragged ends. Never close the silhouette.
34. Dense Curl Mass
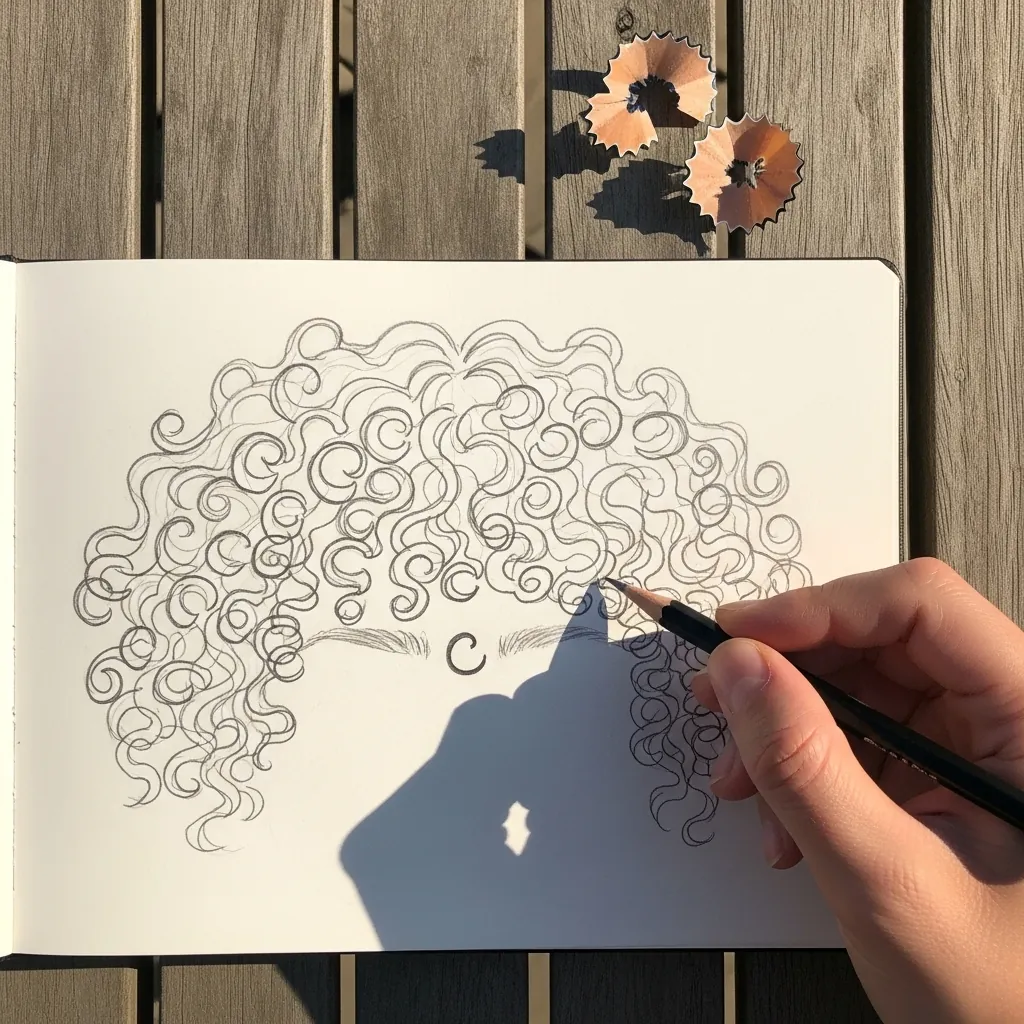
When curls are dense, do not draw them all. Fully render the curls around the edge and near the parting, then let the middle fall away into soft tone with only a few suggested shapes; the eye fills in the rest.
35. Hair Over One Eye
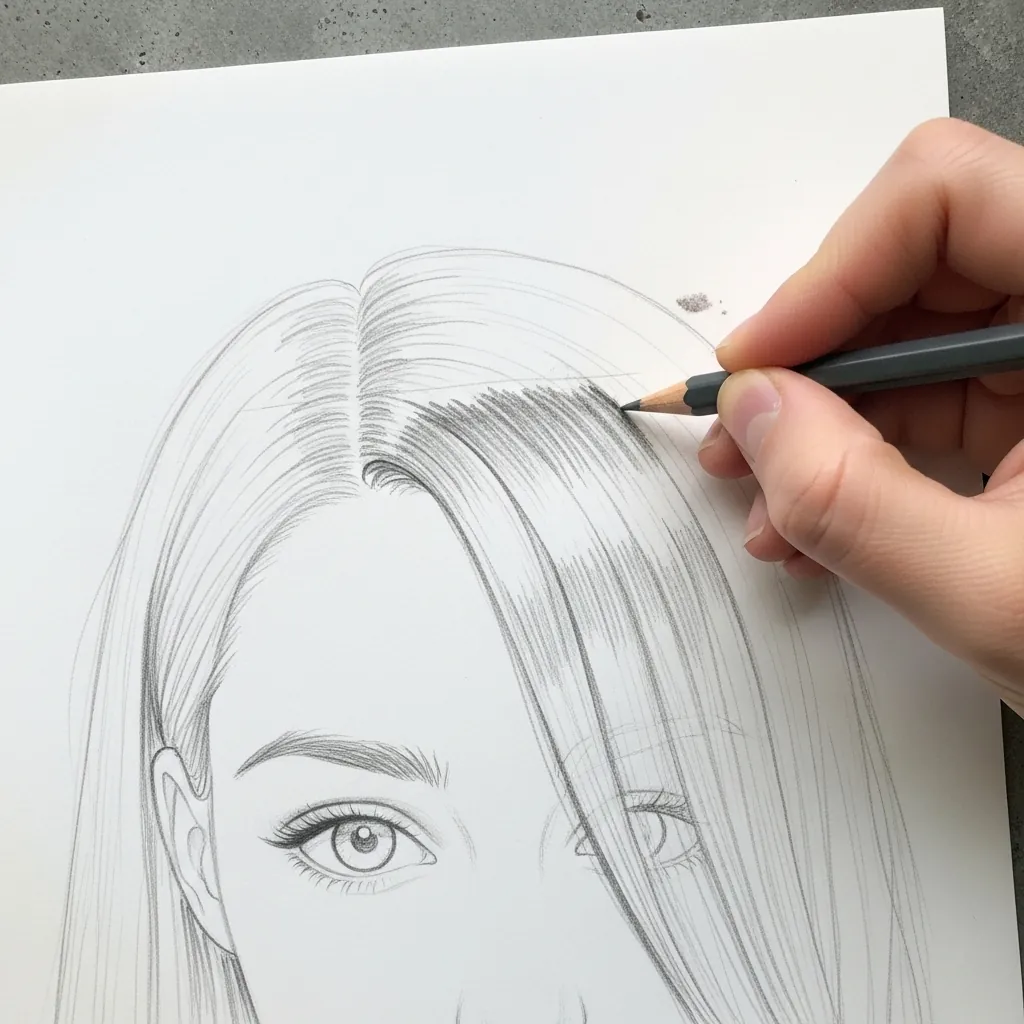
Covering half the face is a composition decision, not an accident. Bring the hair right down over one eye, keep the visible eye sharp and fully detailed by contrast, and let the covering hair stay soft. That imbalance is what makes the portrait interesting.
36. Long Flowing Wave
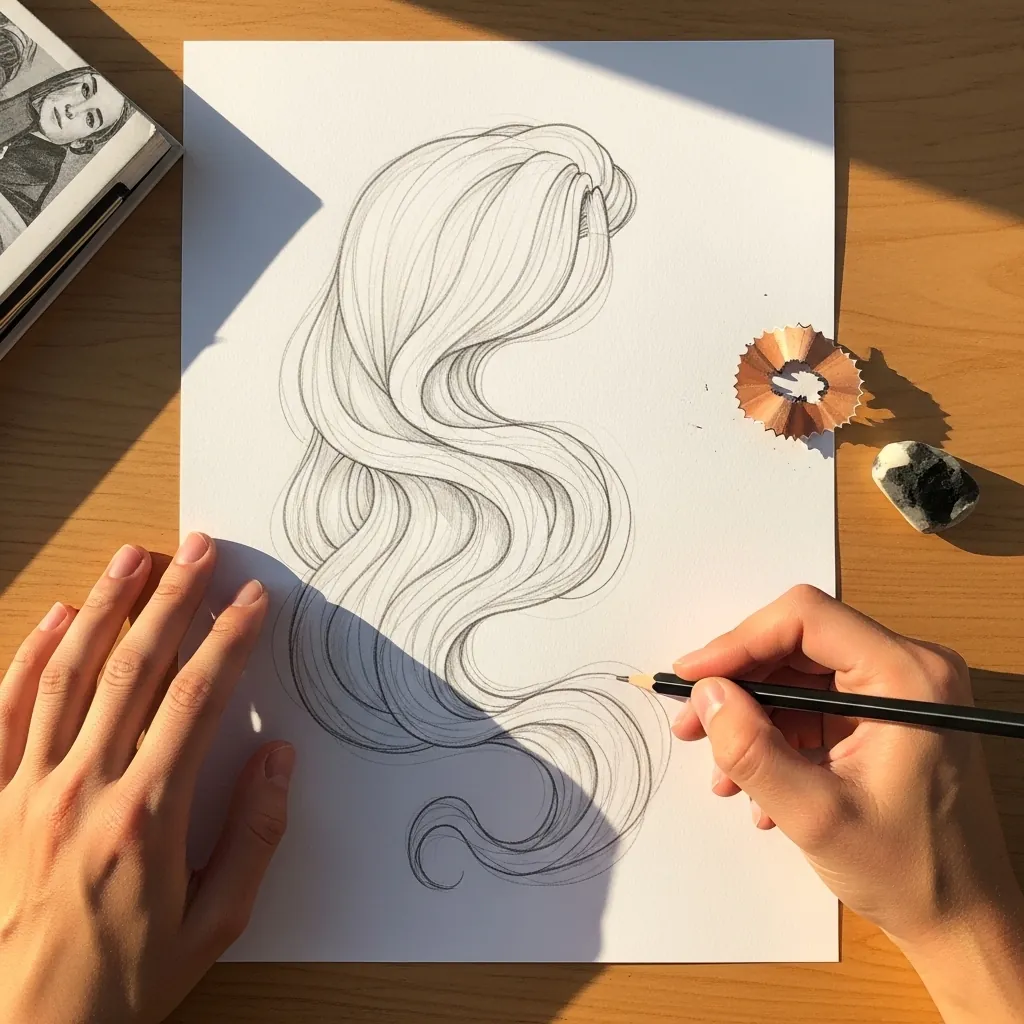
A single dominant wave organizes the whole drawing. Draw it first as one confident S running from the crown to the tip, build every other ribbon to follow it at a distance, and keep the darkest separation on its inside curve where it turns.
37. Fringe Above the Eyes
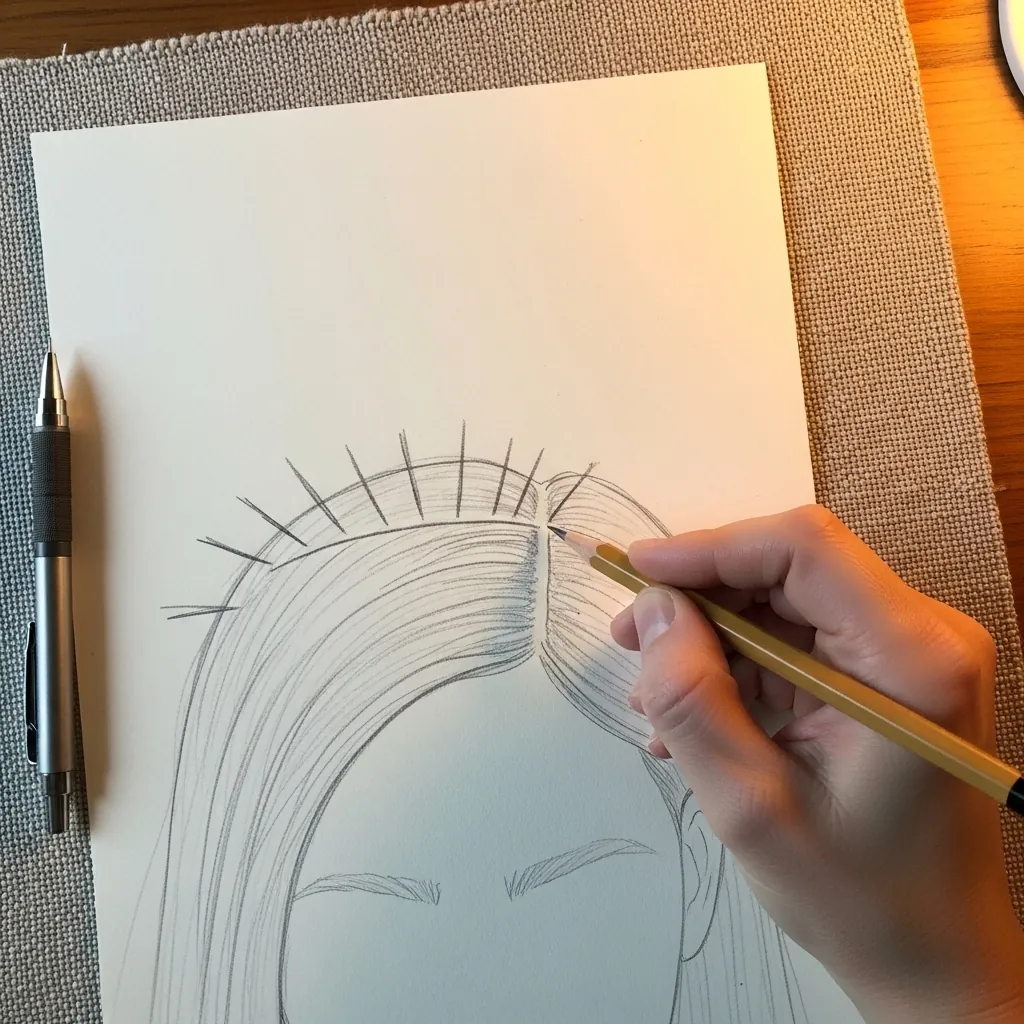
The gap between fringe and eyes matters more than the fringe itself. Leave enough forehead visible for the brows to sit, let the ends break into small clumps rather than one solid edge, and cast a faint shadow from the hair onto the skin.
38. Heavy Side Fringe
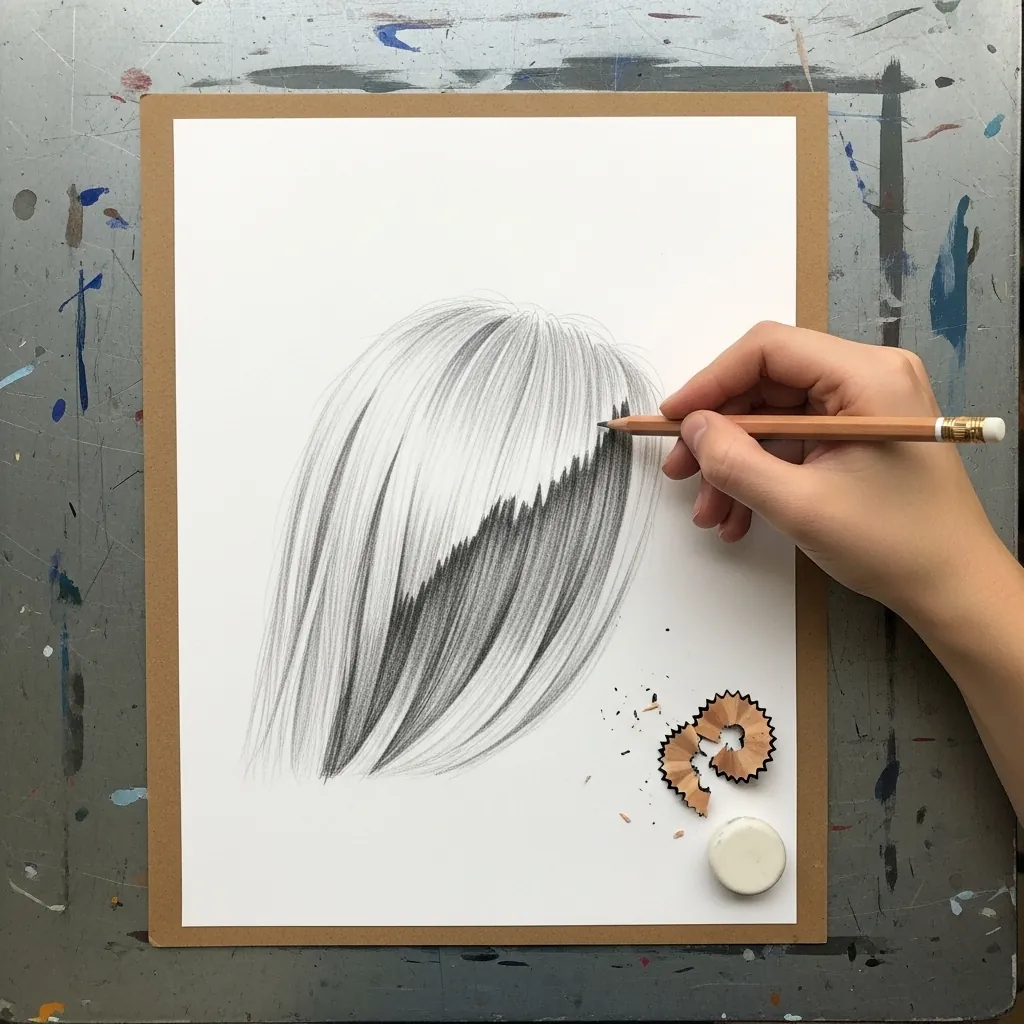
A thick side fringe is the darkest area of most portraits. Push the tone right down where it crosses the forehead, keep the edge that meets the face sharpest, and soften the top where it joins the rest of the hair.
39. Faint Braid Guide Lines
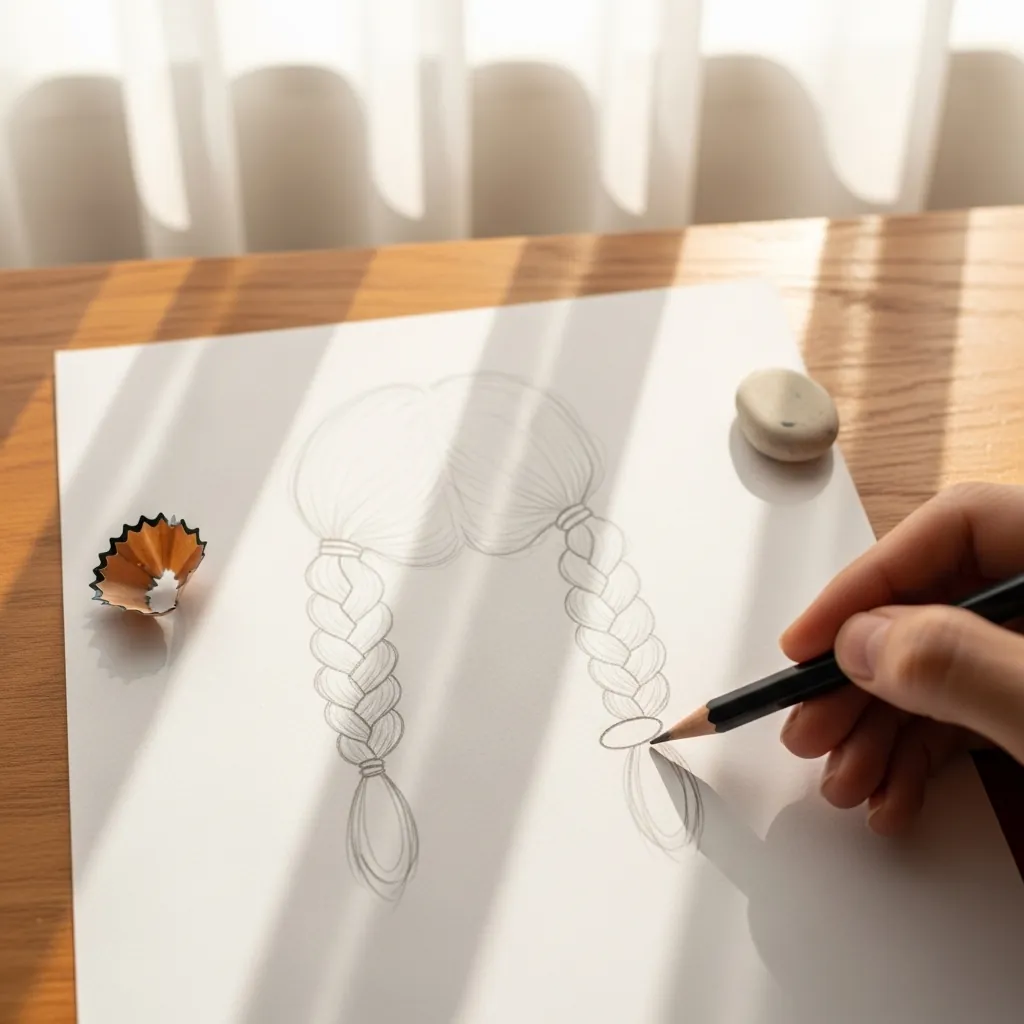
Guide lines save braids from wandering off course. Draw the two center lines and the outer edges of each braid before a single wedge goes in, check that both stay the same width all the way down, and only then start filling them.
40. Swept Over the Shoulder
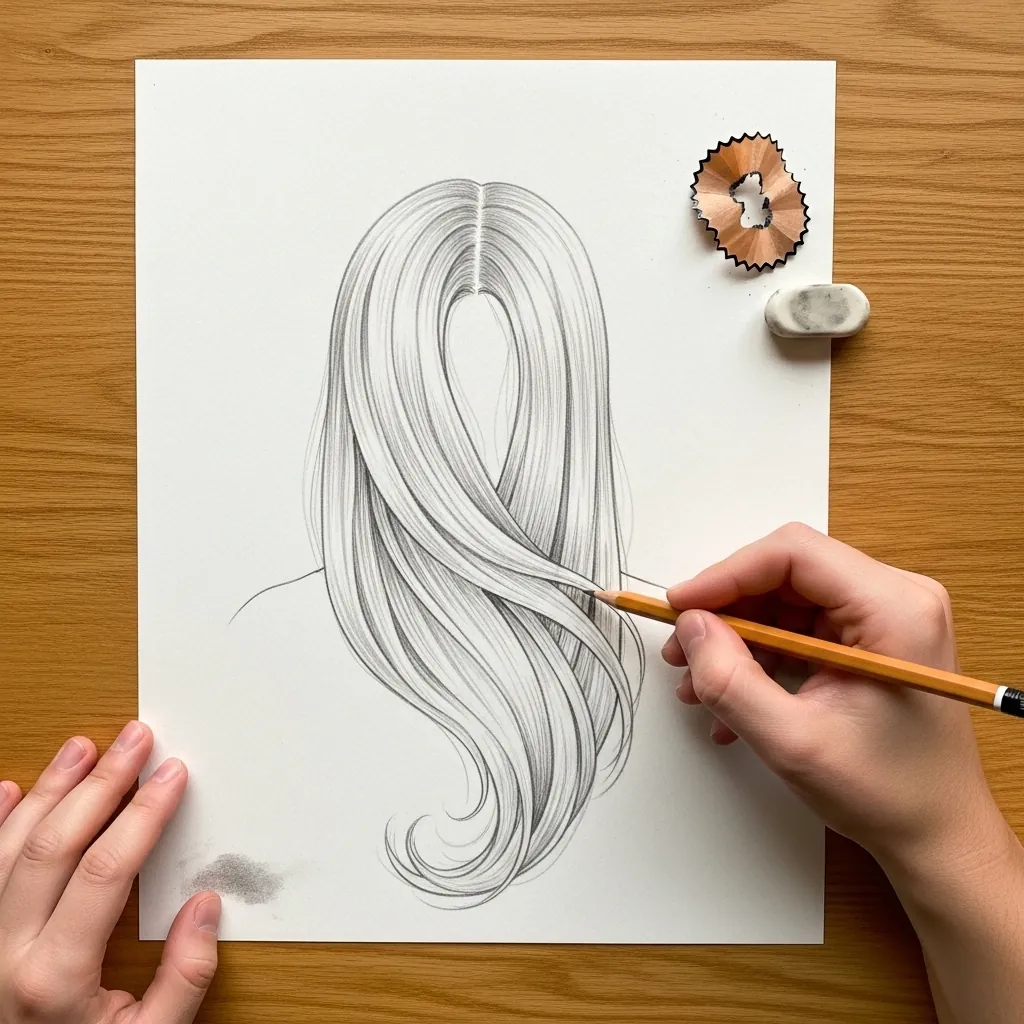
Finish with everything at once. Set the parting, run the ribbons from it over the shoulder, shade the gaps rather than the strands, and lift a broken shine band where the skull is widest; the hair should sit clearly outside the head line.
Frequently Asked Questions
Why does my drawn hair look like wire?
Because you are drawing individual strands on white paper. Real hair reads as a mass with dark separations, so shade the gaps between clumps instead and let the untouched paper become the lit hair. The strands emerge from the negative space.
How do I draw the shine in hair?
Leave it, do not draw it. Shade the whole mass to a mid tone first, then lift a broken band with a shaped eraser where the skull is widest. The band wraps around the head like a ring and should never be a solid unbroken stripe.
How do you draw a braid?
As a stack of overlapping leaf shapes alternating left and right down a central line. Draw the center line first as a gentle curve, fill it with wedges that get smaller toward the end, and darken the point where each wedge tucks under the next.
Why does the hair look flat against the head?
Because it is drawn along the skull outline rather than outside it. Hair has real thickness, so sketch the skull as a light circle and place the hair shape a few millimeters beyond it, thickest wherever the style piles up.
Which pencil is best for hair?
A 2B for the mid tones and a 4B for the darkest gaps. An HB cannot reach the depth hair needs, and the contrast between the dark separations and the pale clumps is exactly what makes hair look like hair.
References and Further Reading