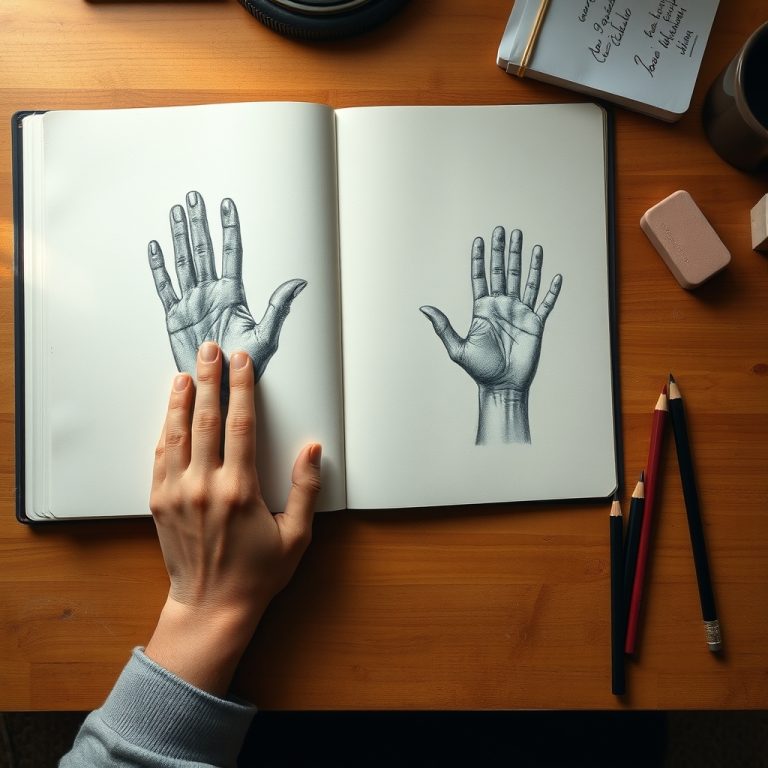

Short answer: Stop drawing a hand and start drawing simple shapes instead. Sketch a flat, squarish block for the palm, add a wedge on the side for the thumb, then draw each finger as a short chain of cylinders. That one shift, practised on your own hand for ten minutes a day, is what turns stiff, confusing hands into believable ones.
Hands tell the stories our characters’ faces cannot, conveying emotion, intent, and personality with a single gesture. They are one of the most expressive tools in an artist’s arsenal, capable of transforming a simple portrait into a powerful narrative.
Yet, for many artists, learning how to draw hands feels like an insurmountable challenge. Their complex anatomy, with its intricate network of bones, muscles, and joints, can be incredibly intimidating to capture on paper.
But what if you could unlock the secrets to drawing hands with confidence and flair? The journey begins by seeing them not as a puzzle, but as a series of simple, elegant forms that flow together in a natural rhythm.
This guide is filled with hand drawing ideas designed to break down that complexity. We’ll explore foundational techniques and creative prompts that will build your skill, sharpen your eye, and empower you to draw hands that are both accurate and full of life.
At a glance: A hand has 27 bones, but you only need three shapes to begin: palm block, thumb wedge, finger cylinders. The middle finger is the longest, and the fingertips form a gentle arc. This guide keeps all 21 original hand-drawing studies, adds a simple anatomy starter, the five mistakes that flatten most hand drawings, a medium-and-pose picker, and answers to the questions beginners ask most.
In this guide
- 1. What is the simplest way to start drawing a hand?
- Mastering the Fundamentals: A Simple Approach (original guide)
- 2. How do you fix the 5 most common hand-drawing mistakes?
- Creative Practice: Drawing Hands in Action (original guide)
- 21 hand-drawing studies, from prayer hands to a working-hand portrait
- 3. Which medium and pose should you try first?
- 4. Frequently asked questions about drawing hands
1. What Is the Simplest Way to Start Drawing a Hand?
Start with your own hand, held flat in front of you, and copy its big shapes before any detail. Draw the palm as one block, mark where the wrist enters it, then place the thumb wedge on the side. Only then add the fingers as cylinders, longest in the middle, shortest at the little finger. If the block looks right, the finished hand usually looks right too; if the block is wrong, no amount of shading will save it.
A little real anatomy makes this much easier, and it is worth learning once. Each hand has 27 bones: 8 small carpal bones in the wrist, 5 metacarpal bones forming the palm, and 14 phalanges in the fingers. Each finger has three phalanges, while the thumb has two, which is why the thumb bends and grips so differently. For a deeper artist-focused walkthrough of hand bones and muscles, see Proko’s guide to drawing expressive hands.
| Part of the hand | What to draw first | Easy check |
|---|---|---|
| Palm | A flat, squarish block | About as long as the fingers from knuckle to tip |
| Thumb | A wedge on the side of the block | It moves from the wrist, not from the fingers |
| Fingers | Three short cylinders each | Fingertips form a gentle arc, middle finger longest |
| Wrist | A short, wider block behind the palm | It anchors the hand so it does not float on the page |
Try this today: Draw your non-drawing hand five times in five minutes, one minute each, as blocks and cylinders only. Do not shade. On the sixth try, slow down and add knuckles and nails. Most beginners see a clear jump between sketch one and sketch six.
Mastering the Fundamentals: A Simple Approach
The secret to drawing realistic hands is to stop seeing a hand and start seeing shapes. By simplifying the anatomy into basic geometric forms, you can build a solid foundation for a detailed and proportionate drawing every time.
- Begin by drawing a flat, squarish block for the palm, adding a wedge shape on the side where the thumb will attach. This creates the foundational mass of the hand.
- Use simple lines to map out the direction and length of each finger. Observe how the fingertips form a gentle arc, with the middle finger typically being the longest.
- Visualize each segment of the fingers as a 3D cylinder. This simple trick helps you think in three dimensions and makes it easier to draw fingers in any position.
- Once your basic structure is mapped out, connect the shapes with smooth, confident lines to form the final contour before adding details like knuckles and nails.
2. How Do You Fix the 5 Most Common Hand-Drawing Mistakes?
Almost every flat or awkward hand drawing comes down to one of these five habits. They are easy to spot once you know them, and each one has a one-line fix you can apply on your very next sketch.
| Mistake | Why it looks wrong | Fix |
|---|---|---|
| All fingers the same length | The hand looks like a rake, not a hand | Step the fingertips down in an arc from the middle finger |
| Thumb stuck onto the fingers | The grip looks impossible | Attach the thumb wedge at the wrist side of the palm |
| Fingers drawn as flat sausages | No sense of bending or depth | Draw each finger segment as a cylinder with a visible joint |
| Hand floating with no wrist | The hand looks pasted onto the page | Always draw the wrist block, even in a close crop |
| Detail before structure | Wrinkles and nails sit on a wrong shape | Finish the palm block and finger cylinders before any detail |
A practical example
Take the open-palm study in this guide (idea 17). Its palm reads clearly because the flat planes of the palm are shaded as one surface first, and the fingers fall away from it in a natural arc. Now compare it with a quick contour sketch (idea 13): even with almost no shading, it works, because the contour follows the palm block and the finger cylinders. Structure first, detail second, in both cases.
Creative Practice: Drawing Hands in Action
Once you are comfortable with the basic structure, the next step is to bring your hands to life by drawing them in dynamic and expressive poses. Practice is key, and these creative prompts will challenge you to think beyond static gestures.
- Draw hands interacting with different objects to understand grip and weight. Sketch a hand holding a coffee cup, resting on a book, or gently cradling a small animal.
- Focus on storytelling through gestures. Try drawing hands that convey specific emotions, such as a clenched fist for anger, clasped hands for contemplation, or an open palm for sincerity.
- Practice drawing hands interacting with each other. Sketch two hands shaking, holding, or one hand resting on the other to master the complexities of overlapping forms.
- Challenge your understanding of perspective by drawing hands in foreshortened poses, like a hand reaching out directly toward the viewer or resting on a table as seen from above.
Ready to turn the most challenging subject into your greatest strength? Grab your pencil and let these ideas guide your hand to create something truly expressive.
1. Hands in Prayer on Graphite on Paper

As a universal gesture, hands in prayer carry a quiet power. In this study, the artist focused on capturing the serene form and the subtle interplay of light and shadow across the knuckles and palms. The soft, blended graphite work gives the hands a feeling of reverence, creating a beautiful piece that speaks of peace, gratitude, and spiritual contemplation.
2. Gestural Hand Study on Pencil on Paper

This is a fantastic example of a quick, gestural sketch. The artist’s main goal here wasn’t tiny details, but capturing the overall form, energy, and weight of the hand. The confident lines and bold blocks of shadow masterfully define the planes of the palm and fingers, showing a great understanding of fundamental structure and capturing the hand’s essential character.
3. Elegant Line Art Hand on Digital Line Art

The striking beauty of this piece lies in its pure, clean linework. The artist defined every curve and contour of the hand with a single, confident weight, creating a feeling of effortless grace and elegance. This minimalist style is a wonderful exercise in economy of line—saying the most with the least—perfect for a tattoo design or modern illustration.
4. Expressive Hand Portrait on Graphite on Paper

Hands like these are full of stories. The artist did a wonderful job using soft, blended graphite to render the delicate wrinkles, veins, and subtle skin textures that speak of a life well-lived. This is more than a simple anatomical study; it’s a true character portrait, where every line and shadow contributes to a silent narrative of strength and experience.
5. Holding Hands Study on Graphite on Paper

This drawing beautifully captures a single, intimate moment of connection. The artist’s skillful use of soft graphite shading creates a tangible sense of warmth and tenderness in the interlocking fingers and palms. It’s a quiet but powerful piece about support, trust, and the profound, unspoken language of the simple, universal gesture of holding on to someone.
6. Hand Resting on a Book on Graphite on Sketchbook Paper

The level of realism achieved in this sketchbook drawing is just incredible. The artist has masterfully rendered the soft, subtle values of the skin, perfectly capturing the way light falls across the form. You can almost feel the tangible weight of the hand as it rests upon the open book, creating a beautiful study in texture and quiet contemplation.
7. Anime Style Hand Studies on Pencil on Paper

This is a great page of stylized anatomy studies. The artist used the clean, elegant lines typical of anime and manga to define the slender forms, focusing on graceful gestures rather than strict realism. These sketches are a perfect example of how to convey character and emotion through hands in a dynamic, illustrative format, capturing motion and personality beautifully.
8. Classical Hand Study on Charcoal on Paper

This piece feels like a study from a classical master’s studio. The artist likely used charcoal or soft graphite to create the dramatic, high-contrast shading, which masterfully emphasizes the powerful musculature and underlying anatomy of the hand. It’s a fantastic academic drawing that explores form, volume, and the raw, potential energy conveyed through a clenched fist.
9. The Pinky Promise on Graphite on Paper

What a beautifully tender and symbolic moment captured in graphite. The artist did a wonderful job contrasting the larger, more detailed adult hand with the soft, smooth forms of the child’s hand. The gentle shading enhances the intimate nature of the pinky promise, creating a heartwarming piece about trust, innocence, and promises kept across generations.
10. Expressive Reaching Hand on Charcoal or Pencil on Paper

There is so much raw emotion in this drawing. The artist used strong, expressive shading to emphasize the sharp, bony structure of the hand, giving it a feeling of intense longing or desperation. The gesture of reaching is already powerful, but the dramatic lighting makes it even more compelling—a fantastic example of using anatomy to convey a deep, unspoken feeling.
11. A Study of Aged Hands on Graphite on Paper

These hands are a powerful testament to a life fully lived. The artist has meticulously rendered every wrinkle, vein, and age spot with incredible realism, turning the skin into a beautiful map of time and experience. This is more than a simple anatomical study; it’s a profound and respectful portrait of the silent stories our hands tell.
12. “OK” Gesture in High Contrast on Charcoal or Ink on Paper

What a dynamic drawing. The artist used a high-contrast technique, likely with charcoal or a dry brush, to create a gritty and expressive texture across the hand. This approach transforms the simple and positive “OK” gesture into something much more forceful and energetic. It’s a great example of how artistic technique can add raw power to a familiar sign.
13. Minimalist Contour Hand Sketch on Pencil on Paper

Sometimes, the most elegant drawings are the simplest. This is a beautiful example of a pure contour sketch, where the artist has captured the essential shape and gesture of the hand with just a few confident, flowing lines. It’s a quick, intuitive study that celebrates the pure form of the hand without getting lost in unnecessary detail.
14. Peace Sign in Soft Focus on Graphite or Charcoal on Paper

The soft-focus, almost blurry quality of this drawing gives it a wonderfully dreamy and atmospheric feel. The artist used smooth, blended shading to create the form of a hand making a peace sign, but the soft edges make it feel like a gentle memory. It’s a beautiful, subtle piece that conveys its powerful message with quiet grace.
15. Delicate Hand Gesture on Graphite on Paper

The subtlety and control in this drawing are just wonderful. The artist used soft, carefully blended graphite to capture the delicate form of the hand and the gentle pressure between the fingers. The quiet, tonal background and soft shadows give the piece an intimate and focused feel—a masterful study in rendering soft light on a complex form.
16. The Artist’s Hand on Charcoal on Paper

This is a classic and powerful self-referential piece about the act of creation. The artist has drawn the hand holding the very tool of its trade, using strong, confident shading to capture the focus required for drawing. It’s a personal and profound statement about the intimate, essential connection between the artist, their hand, and their art.
17. Open Hand Portrait on Graphite on Sketchbook Paper

An open, upturned palm is such an inviting and vulnerable gesture. In this beautifully realistic drawing, the artist used smooth shading to capture the soft planes of the palm and the intricate details of the woven bracelet. It’s a piece that speaks of honesty, receptiveness, and genuine connection, rendered with a wonderful sense of warmth and lifelike detail.
18. Expressive Hand Gesture Studies on Charcoal on Sketchbook Paper

A sketchbook page like this is where an artist’s real practice shines. This is a fantastic exploration of the incredible expressive range of the human hand, from gentle and questioning to tense and dramatic. Each small sketch is a rapid study in anatomy, gesture, and storytelling, showing the process of learning one of art’s most challenging subjects.
19. Confident Ink Gesture Sketch on Ink on Paper

I absolutely love the raw confidence in these lines. The artist likely used a brush pen to capture the hand’s gesture with bold, fluid strokes, varying the line weight to suggest form and shadow. This sketch isn’t about perfect anatomy; it’s about capturing a moment of movement and character with energy, style, and beautiful, expressive ink work.
20. Cross-Hatched Hand Study on Pencil on Paper

This piece is a fantastic technical study in using cross-hatching to build form. Instead of smooth blending, the artist has used layers of intersecting lines to carefully sculpt the planes of the hand, giving it a unique texture and a sense of deliberate construction. It’s a wonderful example of a more classical, linear approach to realistic figure drawing.
21. Portrait of a Working Hand on Graphite and Charcoal on Paper

This drawing is a powerful portrait of a hand that has lived a full life. The artist used a masterful range of values, from deep charcoal to soft graphite, to meticulously render every crease, wrinkle, and tendon. This isn’t just an anatomical study; it’s a beautiful and respectful tribute to resilience, history, and the quiet dignity of age.
3. Which Medium and Pose Should You Try First?
Pick by what you want to practise, not by what looks hardest. Each medium in this guide teaches a different skill, so match the medium to the lesson you need most right now.
If you are a complete beginner, start here
Soft graphite pencil on sketchbook paper, drawing your own resting hand (like idea 6, the hand resting on a book). Graphite forgives mistakes, blends easily, and lets you fix the palm block before you commit. A simple contour sketch (idea 13) is the best warm-up, and a gestural study (idea 2) is the best second step.
If your hands look flat, try charcoal
Charcoal forces bold light-and-shadow thinking, which is exactly what the classical study (idea 8) and the reaching hand (idea 10) show. Work big, shade the palm as one dark-to-light surface, and leave the lightest planes almost white.
If your hands look stiff, try ink
Ink removes the safety net: you cannot blend your way out of a wrong shape, so you must commit to the gesture. The confident ink sketch (idea 19) is the model here. Vary your line weight, thick on the shadow side, thin on the lit side, and keep each stroke decisive.
If you want feeling, not just accuracy, draw a gesture
Choose a pose with a story: hands in prayer (idea 1), holding hands (idea 5), a pinky promise (idea 9), or aged hands (idea 11). Before you draw, name the feeling in one word, such as trust, longing, or patience, and let that word decide whether the fingers are tense, relaxed, or gently curled.
4. Frequently Asked Questions About Drawing Hands
Why are hands so hard to draw?
Because a hand is 27 bones, many small muscles, and skin that folds differently at every joint, all moving in three dimensions. The fix is to simplify first: palm block, thumb wedge, finger cylinders, and only then the details.
How long does it take to get good at drawing hands?
Most beginners see a clear improvement within a few weeks of short daily practice, such as five one-minute gesture sketches of their own hand each day. Steady short sessions beat one long session a month, because hand shapes need to become familiar, not just understood.
Should beginners draw their own hand or use photos?
Start with your own hand, because you can turn it, bend it, and see exactly how the fingers overlap from any angle. Photos are a great second step for poses you cannot hold yourself, such as two hands interacting.
What is the best pencil for drawing hands?
A standard graphite pencil set works well: a harder pencil such as 2H for the light construction lines, and a softer one such as 4B or 6B for shading. The pencil matters far less than getting the palm block and finger proportions right first.
How do you draw fingers that look natural, not stiff?
Let the fingertips form a gentle arc with the middle finger longest, give each finger visible joints instead of one straight tube, and curve the fingers slightly even at rest. Real fingers are almost never perfectly straight or perfectly parallel.
More drawing guides from GS Art Zone: Continue the anatomy series with How to Draw Feet and How to Draw Lips, practise faces and hair with Curly Hair Drawing Ideas, and pick your tools from Best Sketchbooks for Beginners and Best Erasers for Drawing.
Keep this guide open beside your sketchbook, pick one idea, and draw it today. Hands stop feeling impossible the moment you stop drawing a hand and start drawing its shapes.