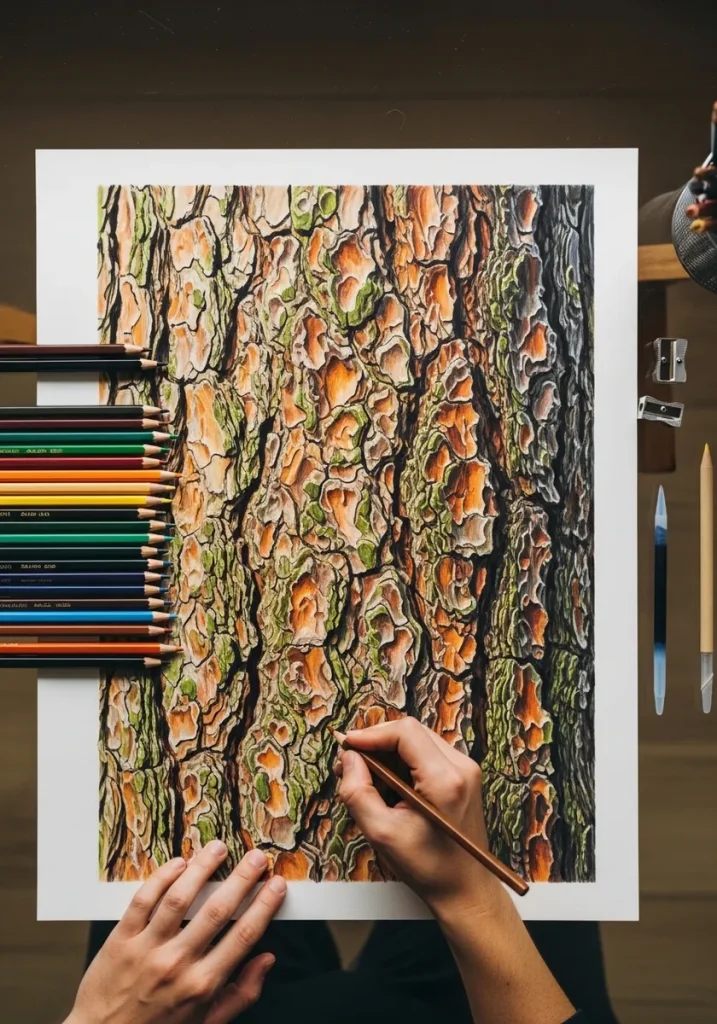
Bark cracks vertically because the trunk expands outward from a living layer inside while the dead outer bark cannot stretch. Every fissure you draw should also curve slightly around the trunk and compress toward its edges.
Key takeaways
- Bark splits because the trunk grows in circumference and the dead outer layer cannot stretch|Fissures run vertically, so horizontal cracks read as damage rather than normal bark|Curve every ridge around the cylinder and compress the spacing toward the trunk edges|Birch and cherry show horizontal lenticels, the pores that give them their banded look|Oak furrows deeply, plane trees flake in plates, and eucalyptus peels in long ribbons
Bark is the easiest texture in nature to draw badly, because it looks like random cracks. It is not random at all. A tree grows outward from a thin living layer just beneath the surface, and the outer bark is already dead and cannot stretch. As the trunk thickens, that rigid shell splits.
That single fact tells you which way the cracks go. The trunk is expanding in girth, so it tears along its length, which is why bark fissures run vertically. A horizontal crack reads as an injury rather than normal growth, and drawing a grid of both is the fastest way to make a tree look wrong.
The second rule is what most drawings miss. Bark wraps a cylinder, so every ridge has to curve slightly around the form and compress toward the edges of the trunk. Draw the fissures as evenly spaced parallel lines and the tree flattens into a plank, however good the texture itself is.
The thirty studies below cover ink, charcoal, sumi-e, impasto and watercolor, from birch and eucalyptus to cork oak and burl. For whole trees rather than surfaces, see tree drawing ideas, and for the painted version, watercolor tree ideas.
Compiled by the GS Art Zone editorial team. Last updated August 2026. Each idea is paired with the specific step that produces the effect, so you can go from the reference straight to paper.
What You Need Before You Start
- A 6B or softer for the deep fissure darks, which need to go genuinely black
- A kneaded eraser pulled to a chisel edge for lifting the lit ridges back out
- A fan brush or an old frayed brush, which breaks a stroke the way bark breaks light
- Rough or cold press paper, since the tooth does half the texture work for you
- A real piece of bark on the desk, because invented bark always repeats itself
1. Acrylic Brown Bark Panel
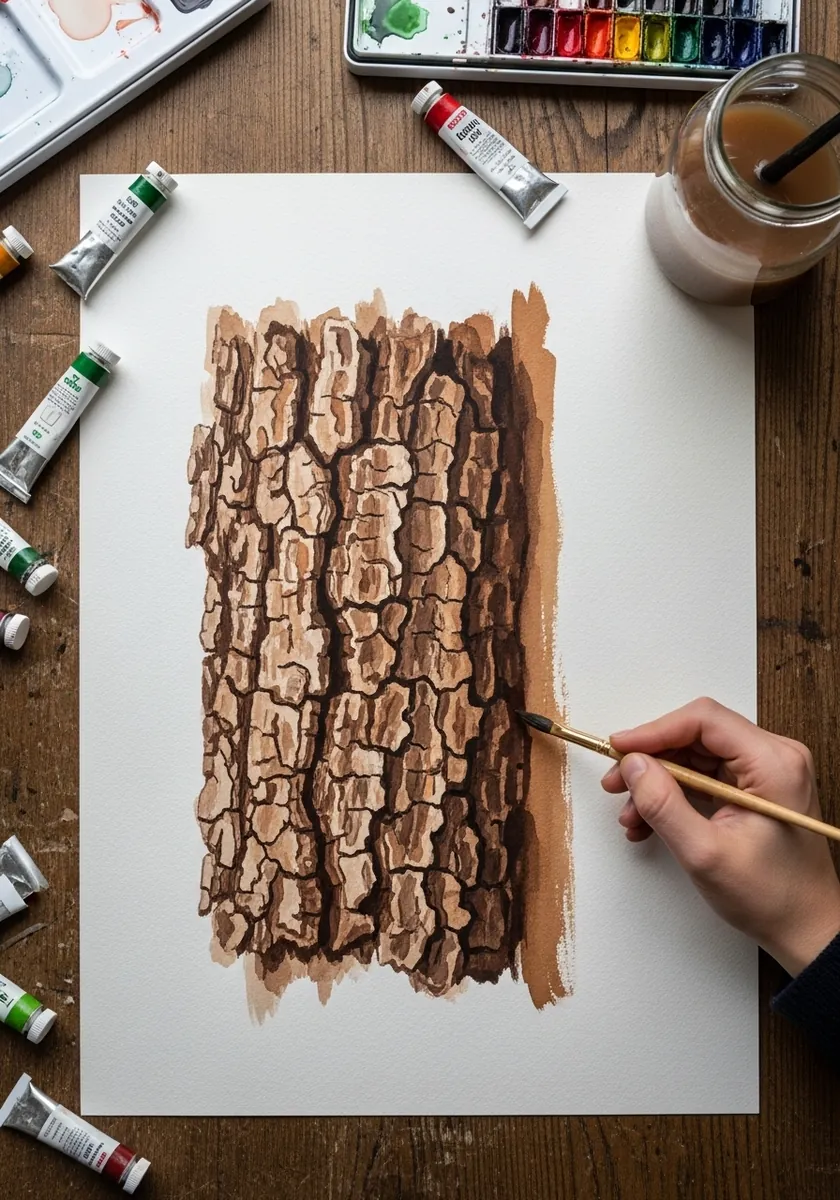
Acrylic dries fast enough to build ridges physically rather than paint them. Drag a stiff brush downward through half-dry paint so it skips and breaks, then let those broken ridges stand as genuine relief once the surface has cured hard.
2. Tall Ink Trunk Study
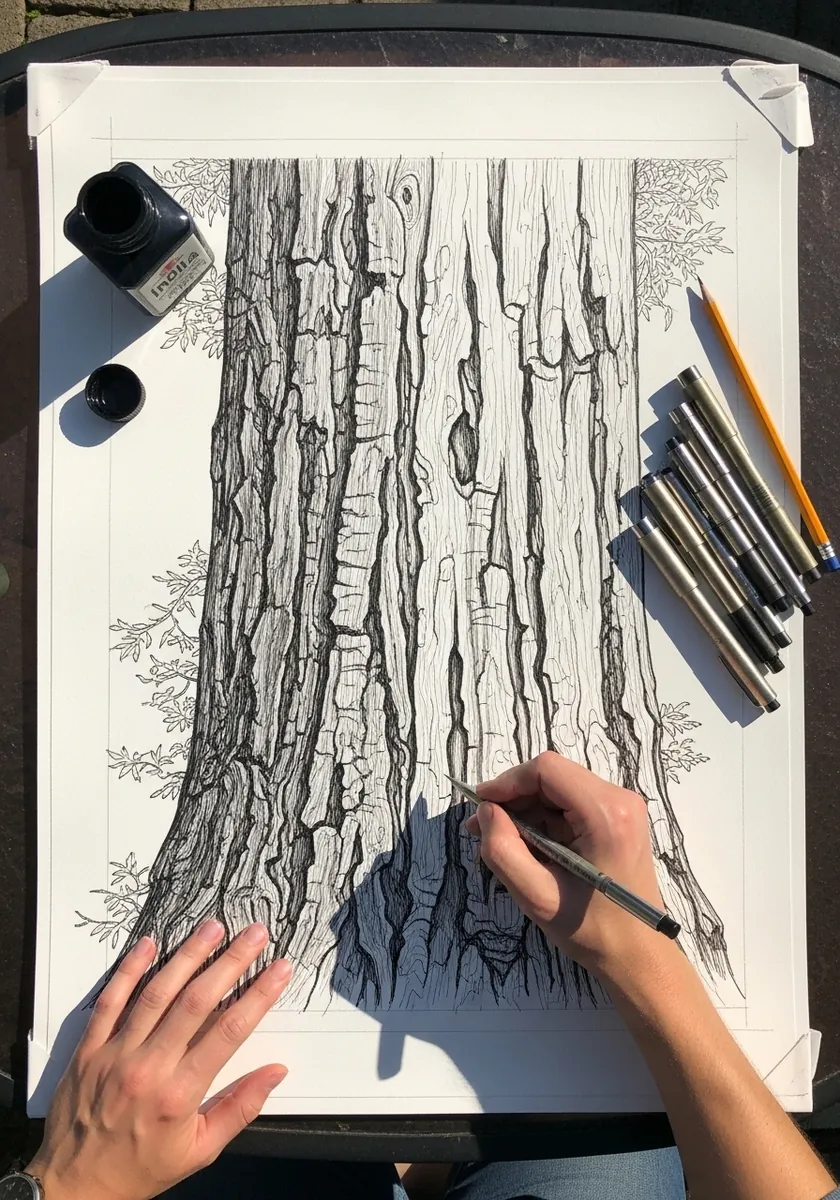
A tall narrow subject needs its rhythm varied or it becomes wallpaper. Group the fissures into clusters with wider calm gaps between them, and let two or three run the full height while the rest stop and restart. Bark is never evenly spaced across a whole trunk.
3. Birch Bark With Dark Eyes
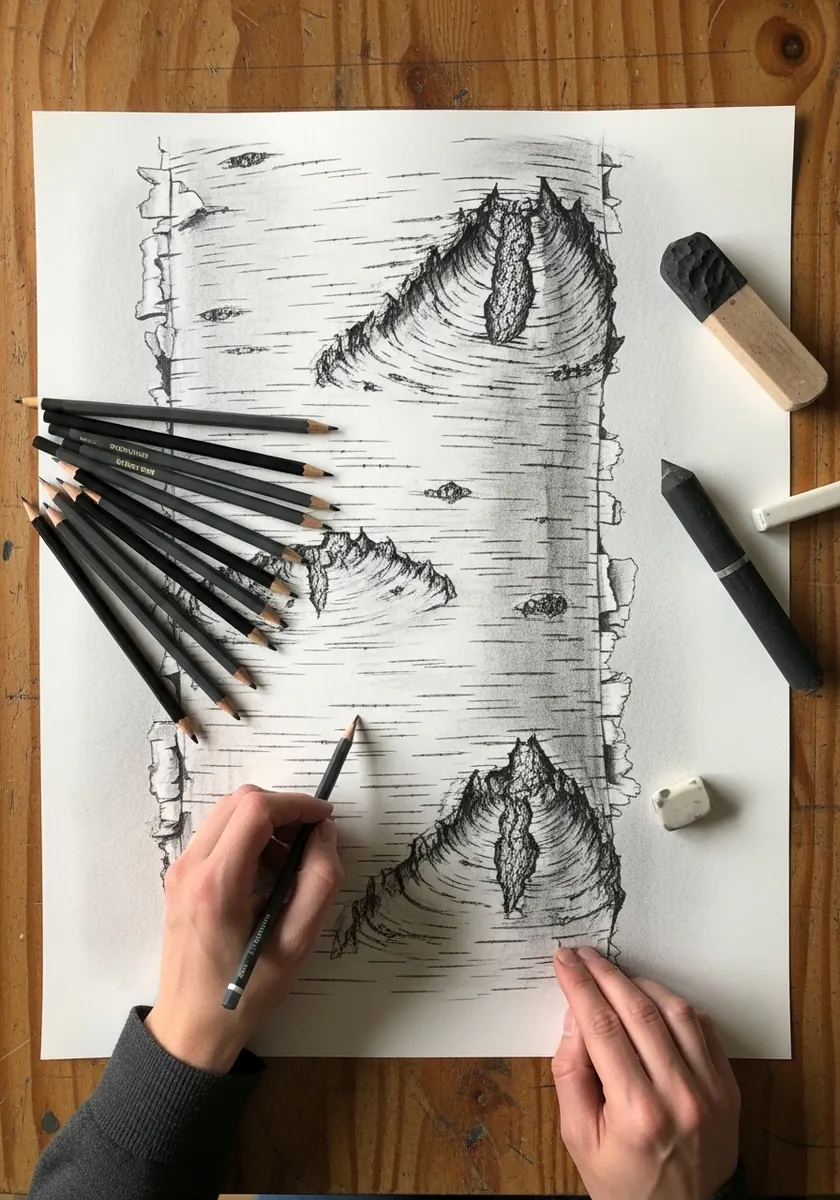
Those dark almond shapes are old branch scars, and they are the whole character of a birch. Set them at irregular heights, angle each one slightly differently, and darken the underside more than the top so the scar looks recessed into the trunk. Keep the peeling edges slightly translucent where the paper-thin bark lifts away.
4. Lichen Covered Branch
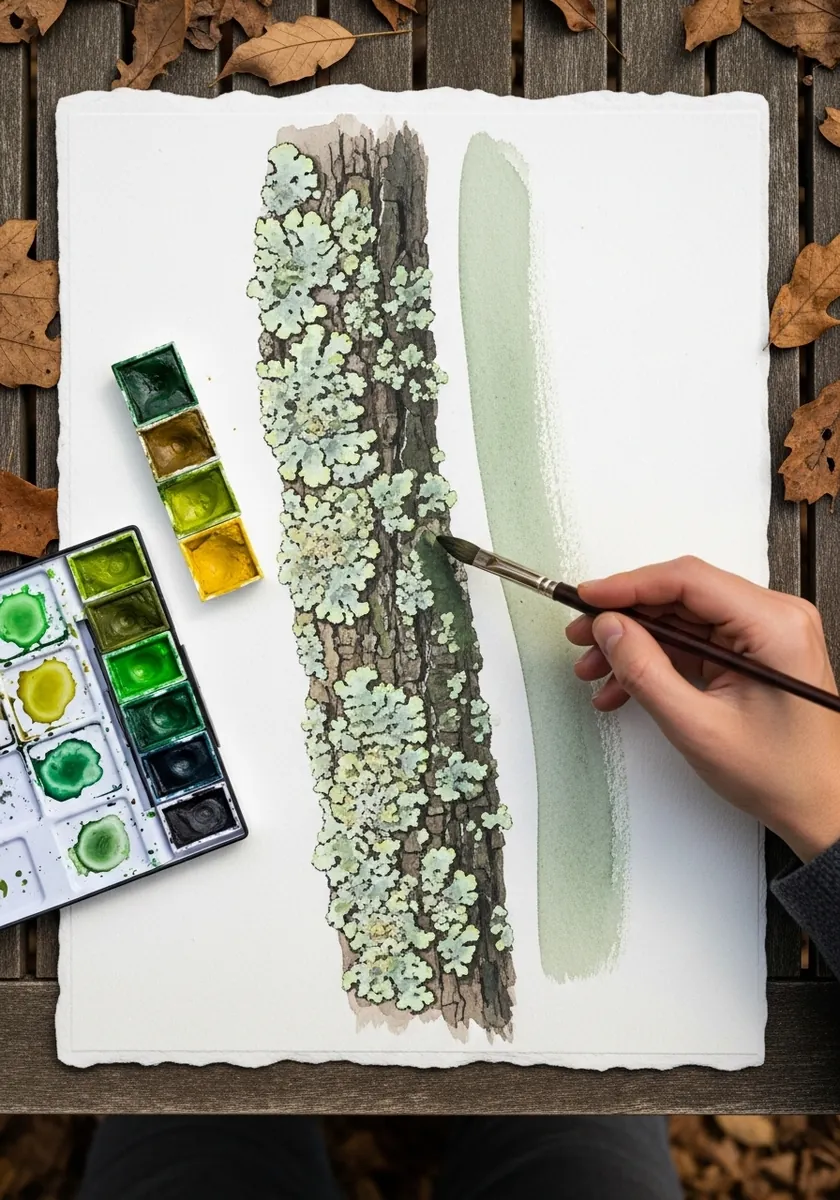
Lichen grows in patches, not an even coating. Paint the bark first and let it dry, then drop the pale green in as separate irregular colonies that cluster on one side of the branch where the light and damp favor them.
5. Dark Charcoal Bark
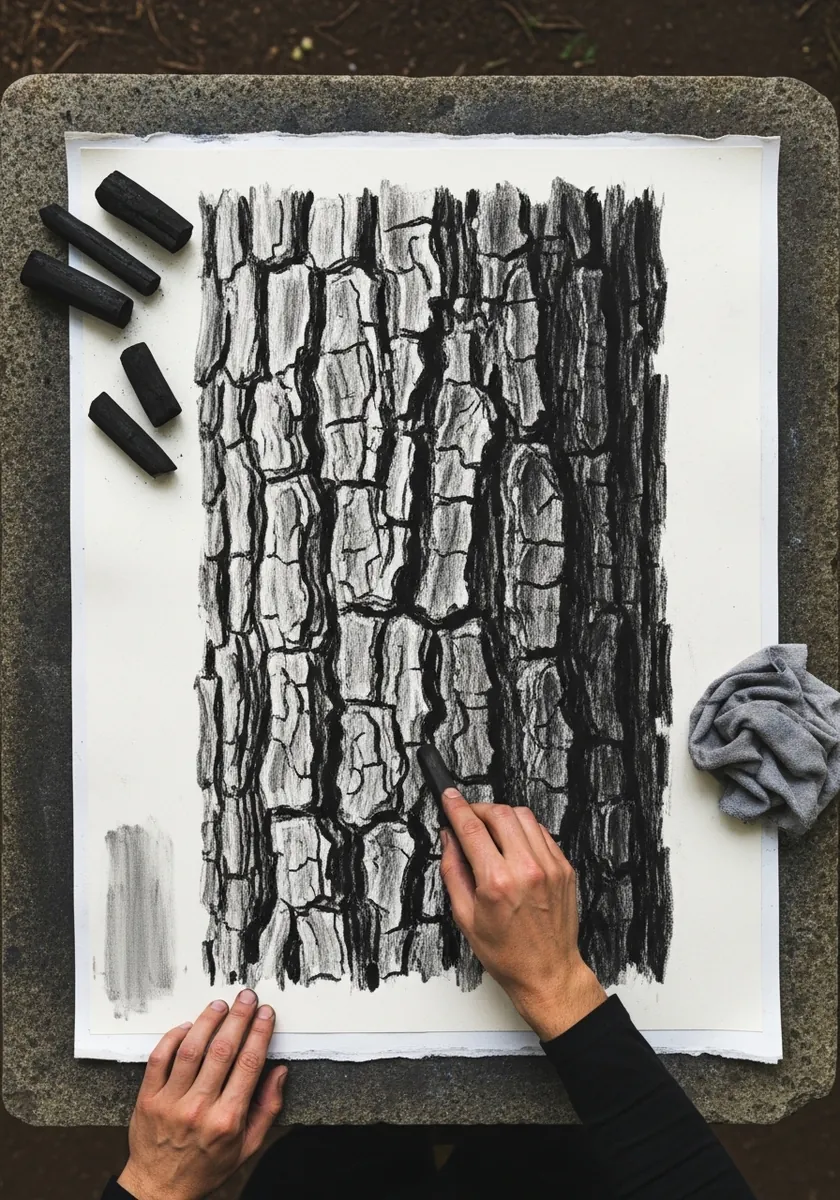
Charcoal is the right tool because you can take it back out. Cover the whole area in a solid mid tone, then lift the raised ridges with a kneaded eraser and push only the deepest fissures darker. Working light-to-dark in charcoal wastes most of what the material can do. A single bright ridge left almost white gives the eye somewhere to land.
6. Minimal Sumi-e Trunks
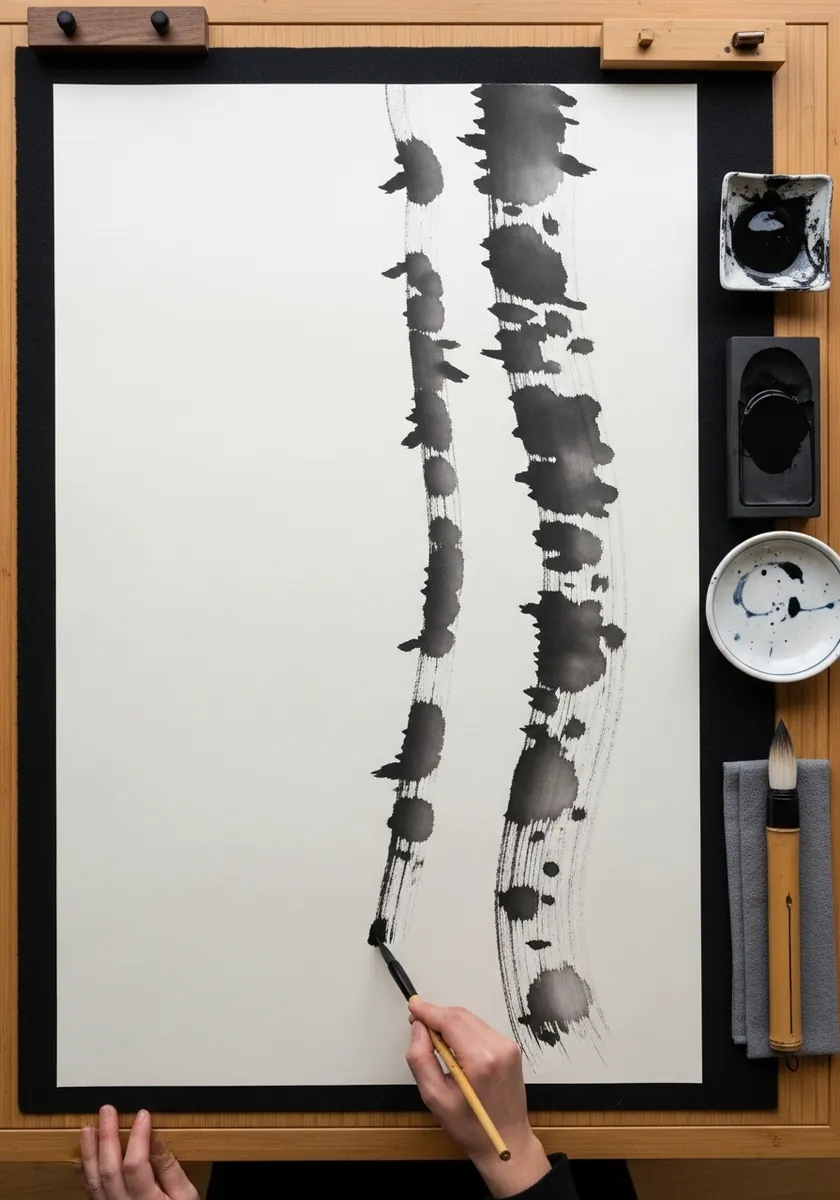
Two strokes can carry a whole page if the loading is right. Charge the brush fully at the top and let it run dry toward the bottom so the mark breaks apart naturally, then stop and add absolutely nothing else to the sheet.
7. Loose Ochre Bark Wash
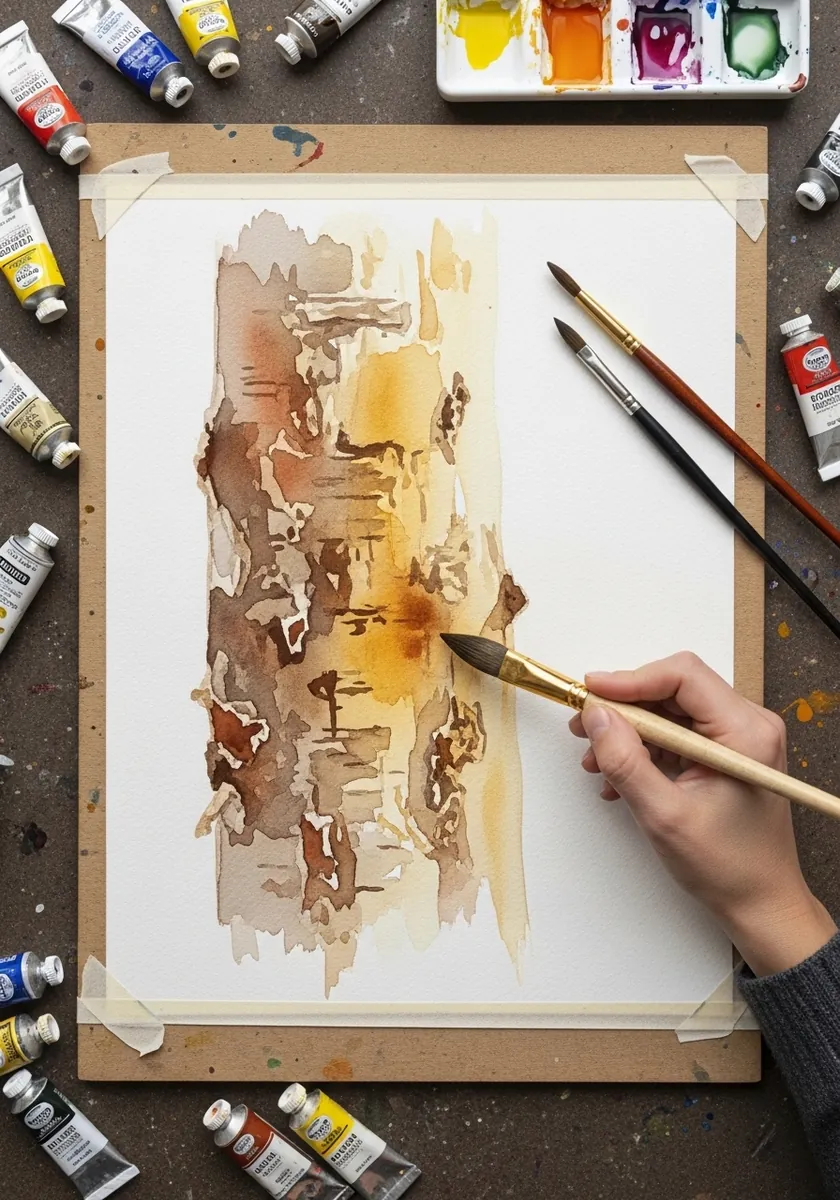
Working loose means the marks have to imply structure without describing it. Keep the vertical direction absolutely consistent even while every edge stays soft, and let two or three darker accents settle exactly where the deepest fissures would fall. Let one soft edge bleed off the paper entirely so the study feels like a fragment.
8. White Ink on Black Paper
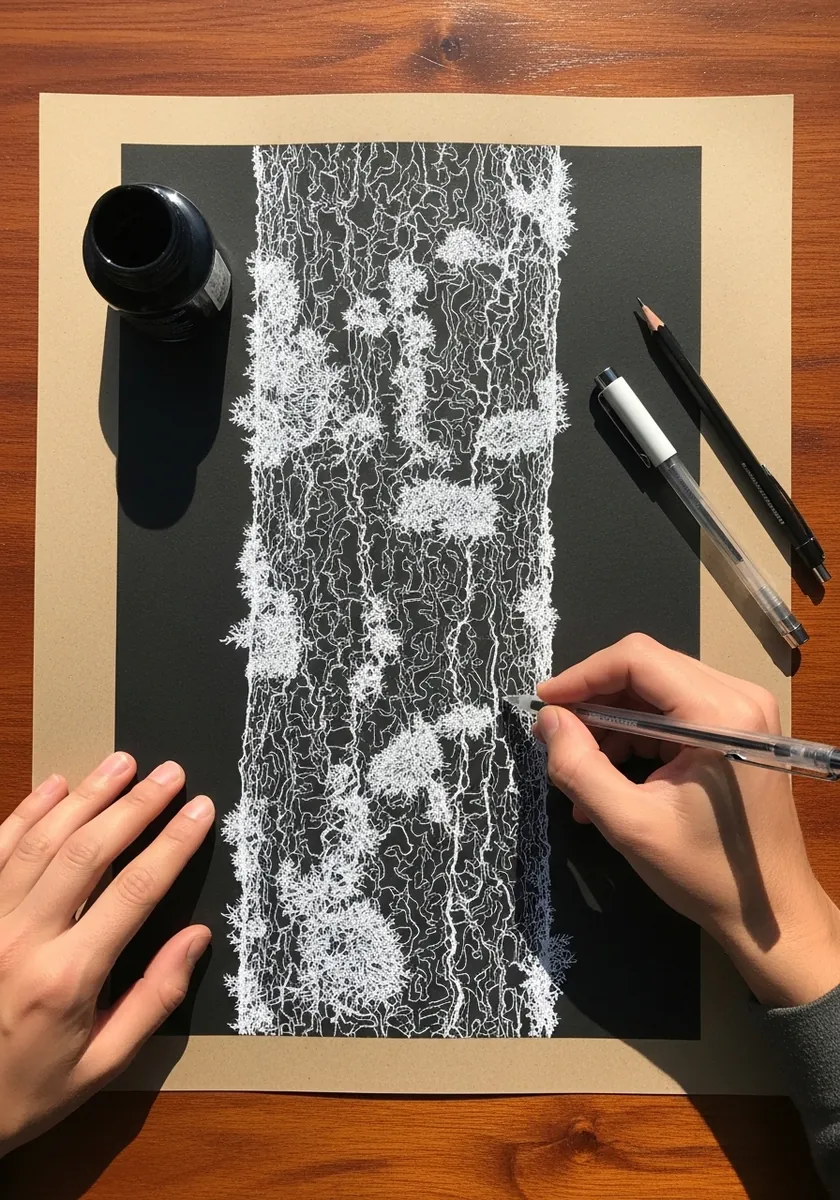
Reversing the values makes you think hard about what actually catches the light. Draw only the lit ridge edges and the pale lichen colonies, leave every fissure as completely untouched black, and the whole drawing builds itself in the negative.
9. Pale Tan Vertical Strokes
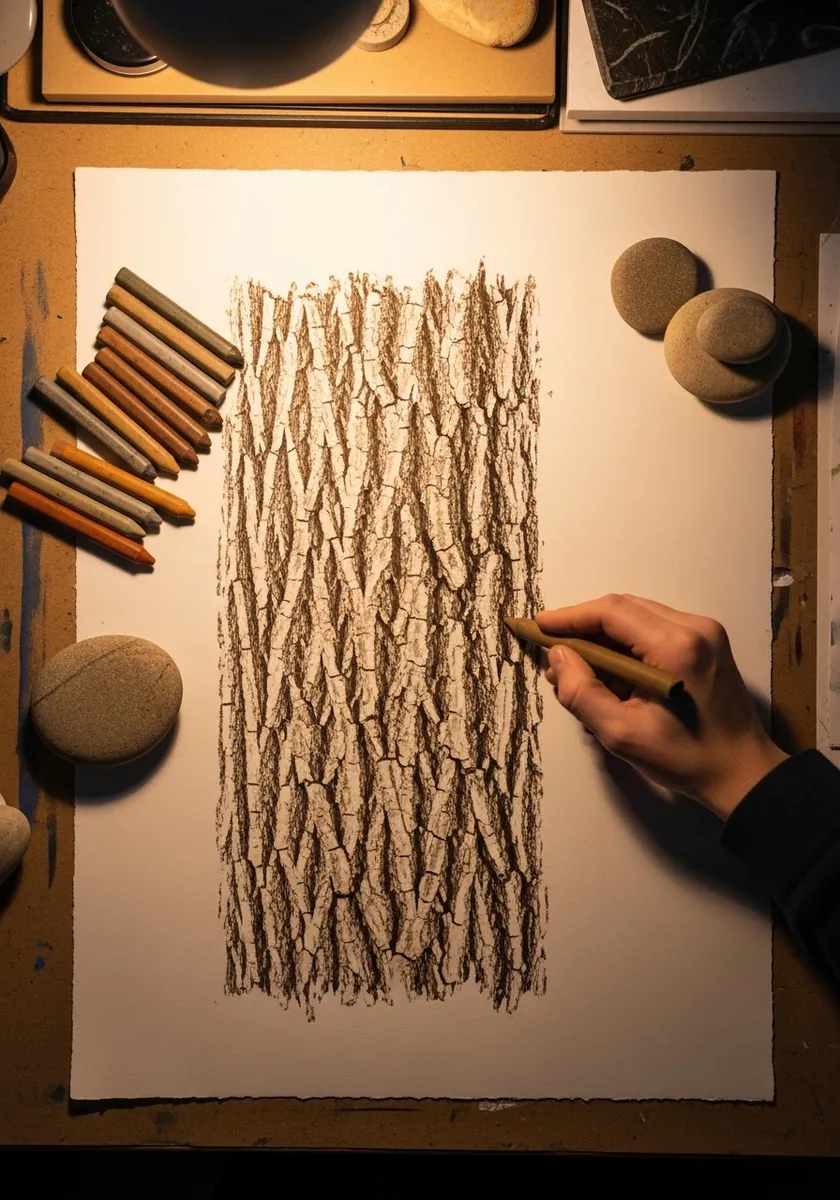
Repeated marks need variation in three separate things at once. Change the pressure, the length and the spacing as you move across the panel, and let a few strokes overlap while others leave a clear strip of bare paper between them.
10. Knot and Burl Study
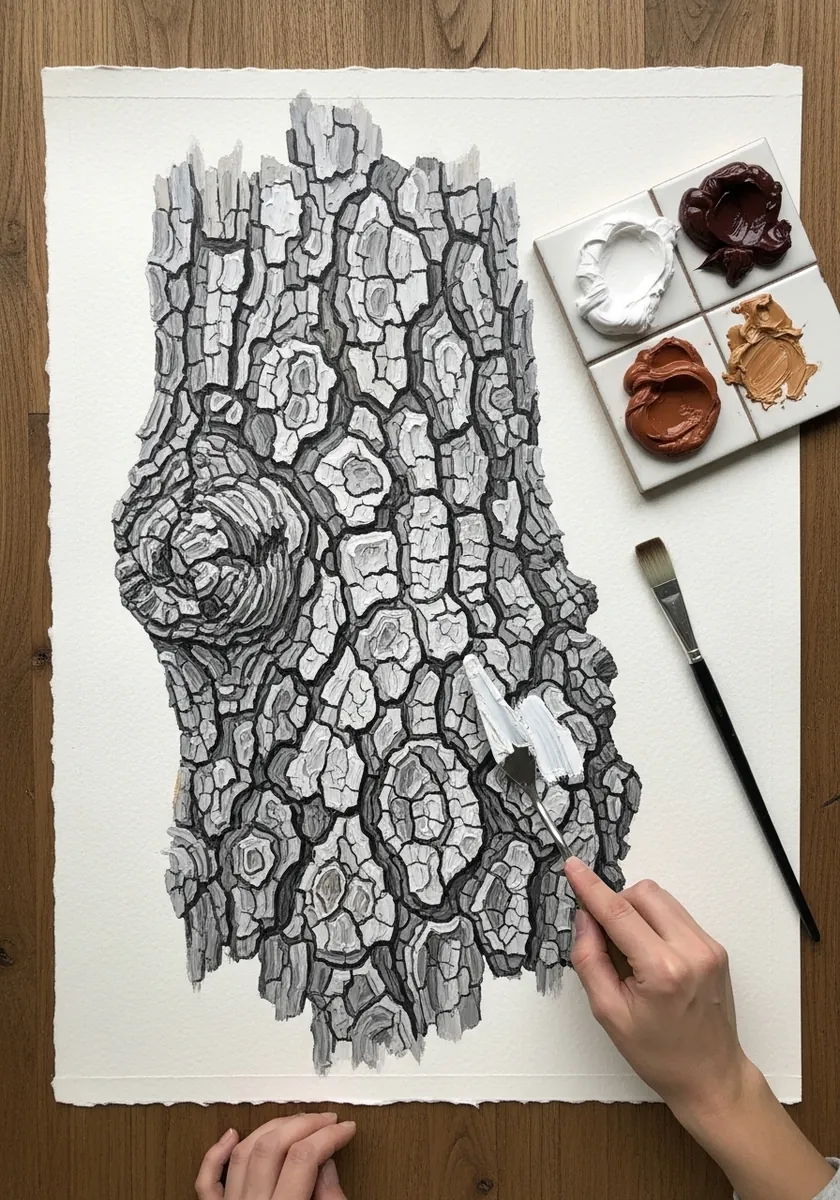
A knot is where a branch once grew, and the grain flows around it like water around a stone. Draw the concentric rings tight at the center, then let the surrounding fissures divert and rejoin above and below rather than running straight past. Knots also sit slightly proud of the surface, so shadow the lower edge.
11. Fine Liner Cracked Bark
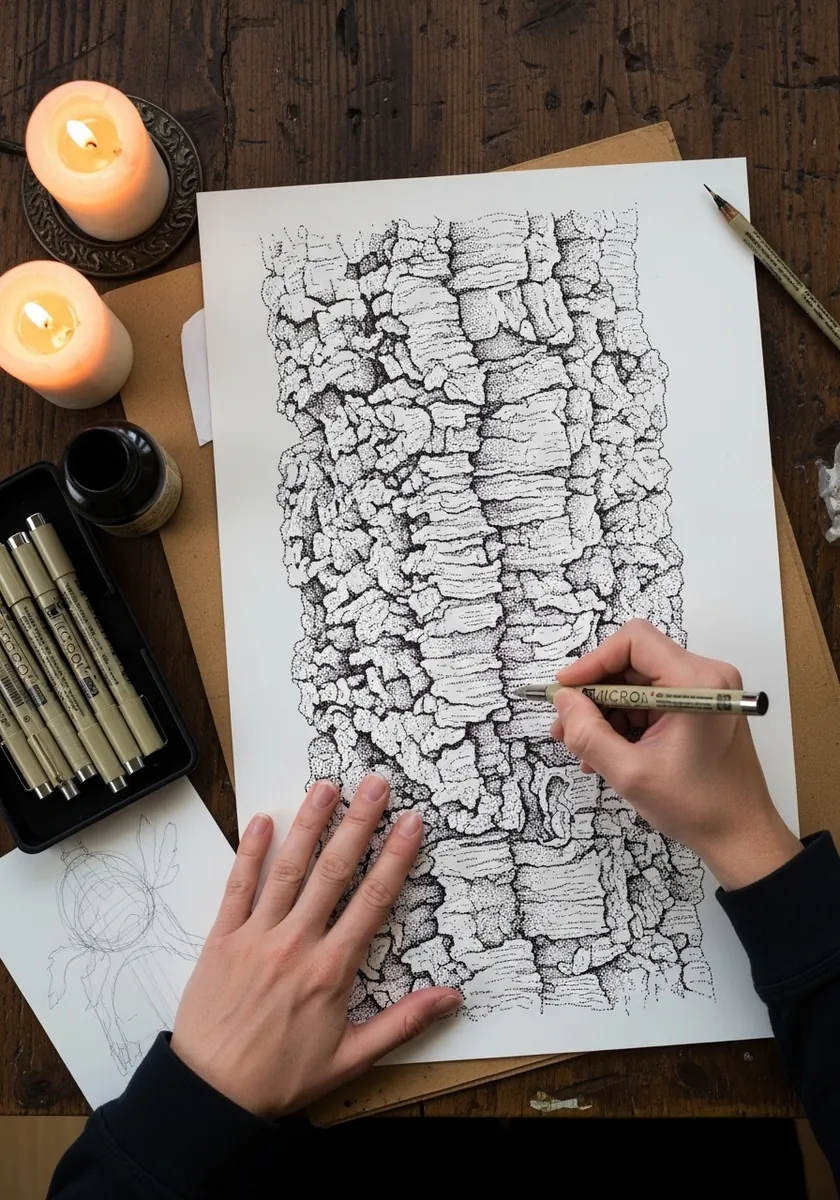
Cracked bark divides into plates rather than into lines. Draw the outline of each plate first as an irregular quadrilateral of varying size, then shade inside every one separately so they read as individual pieces lifting away from the trunk.
12. Peeling Eucalyptus Ribbons
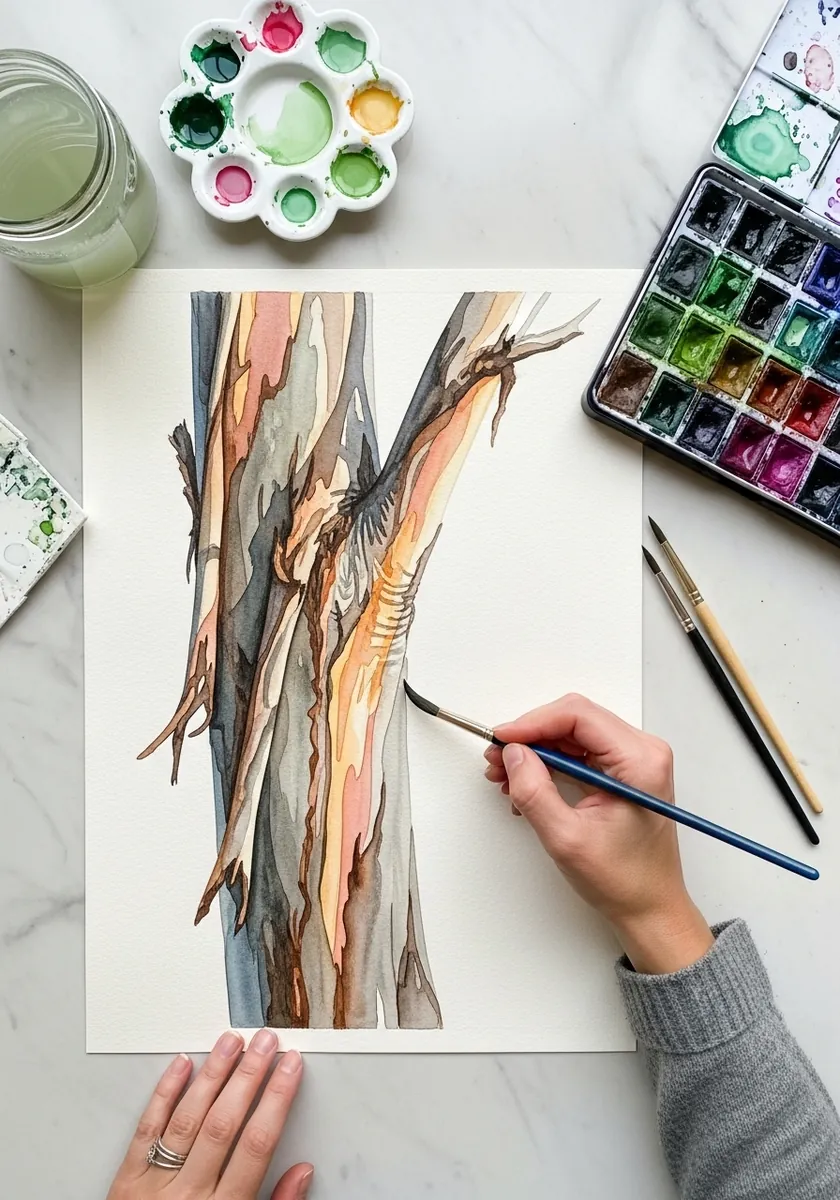
Eucalyptus sheds long ribbons and exposes fresh smooth wood underneath, which is why it carries so much color. Paint the pale new surface first, then lay the curling strips over it with a hard edge on one side and a soft edge where they lift away.
13. Stylized Branching Trunk
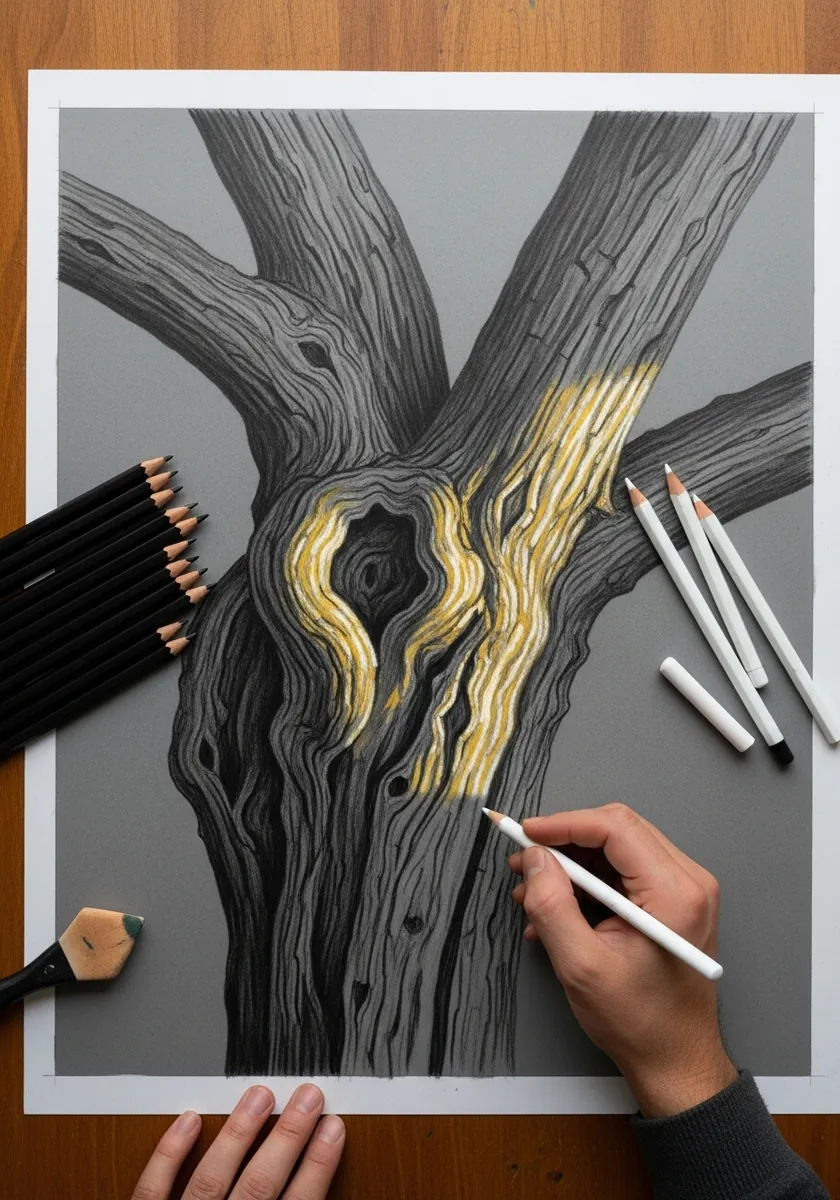
Stylizing bark means choosing one rule and then applying it everywhere without exception. Reduce every fissure to a smooth flowing line that follows the branch direction, drop all the small detail entirely, and add color only where two branches meet.
14. Red Bark in Colored Pencil
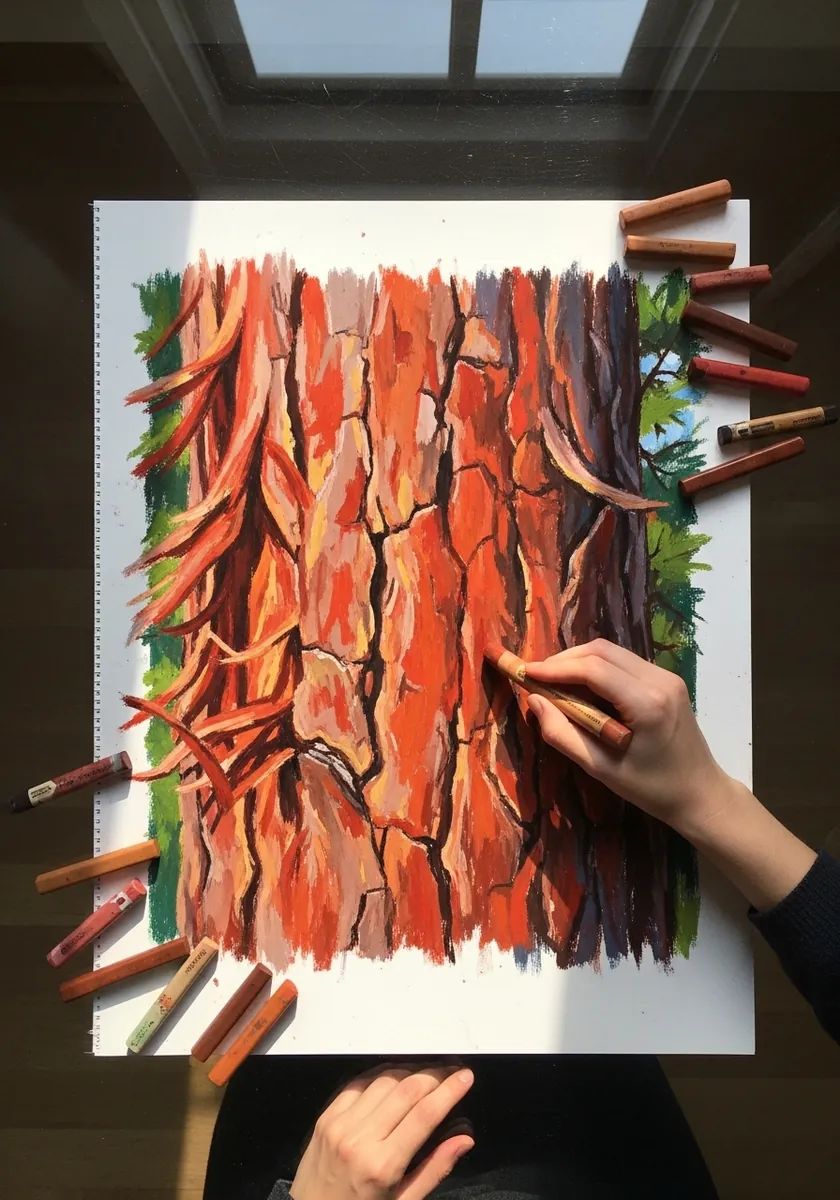
Warm bark needs a cool note somewhere or it stops being believable. Build the reds up in several light layers, then glaze a muted green into the deepest fissures so the shadows are not simply darker versions of the same orange.
15. Crackled Plate Bark
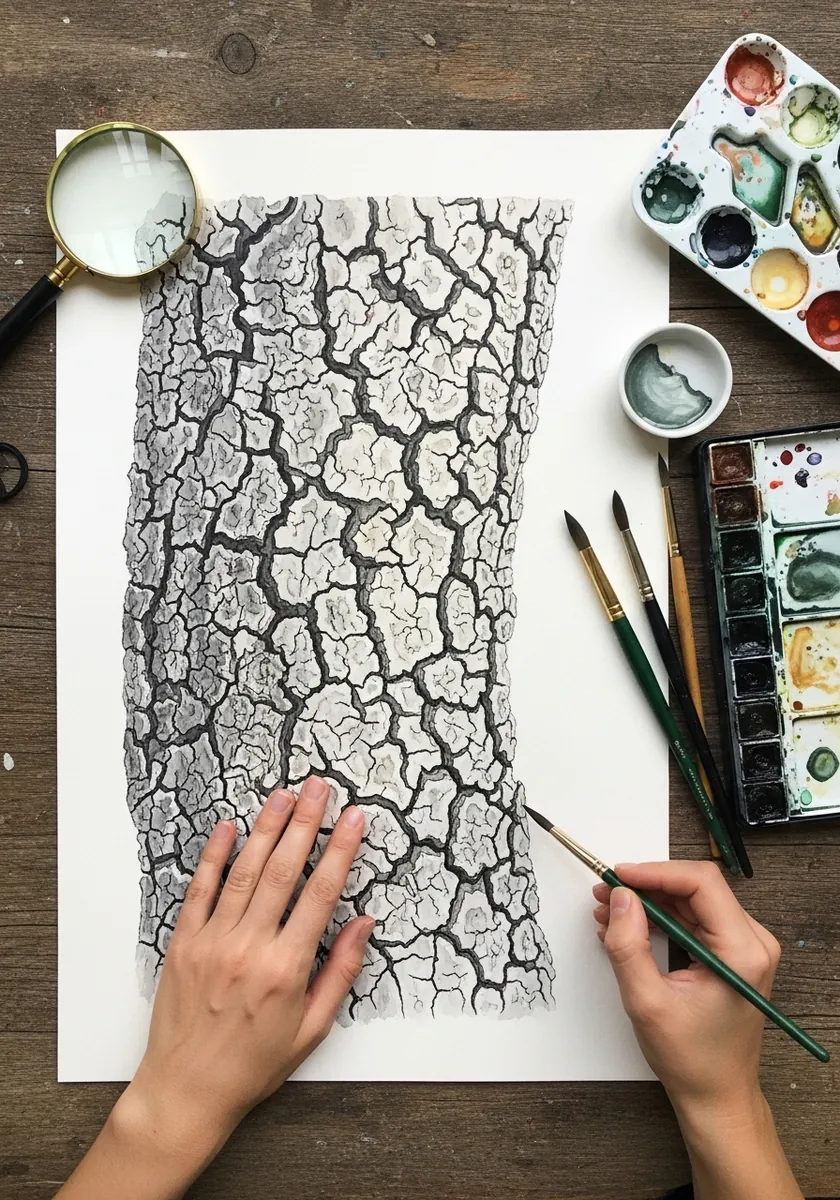
Small plates read as a mosaic, and mosaics need irregular cells. Keep no two plates the same size or shape, thicken the line where two plates meet at a deeper crack, and let the pattern get finer toward one edge so it does not tile evenly.
16. Graphite Bark With Knots
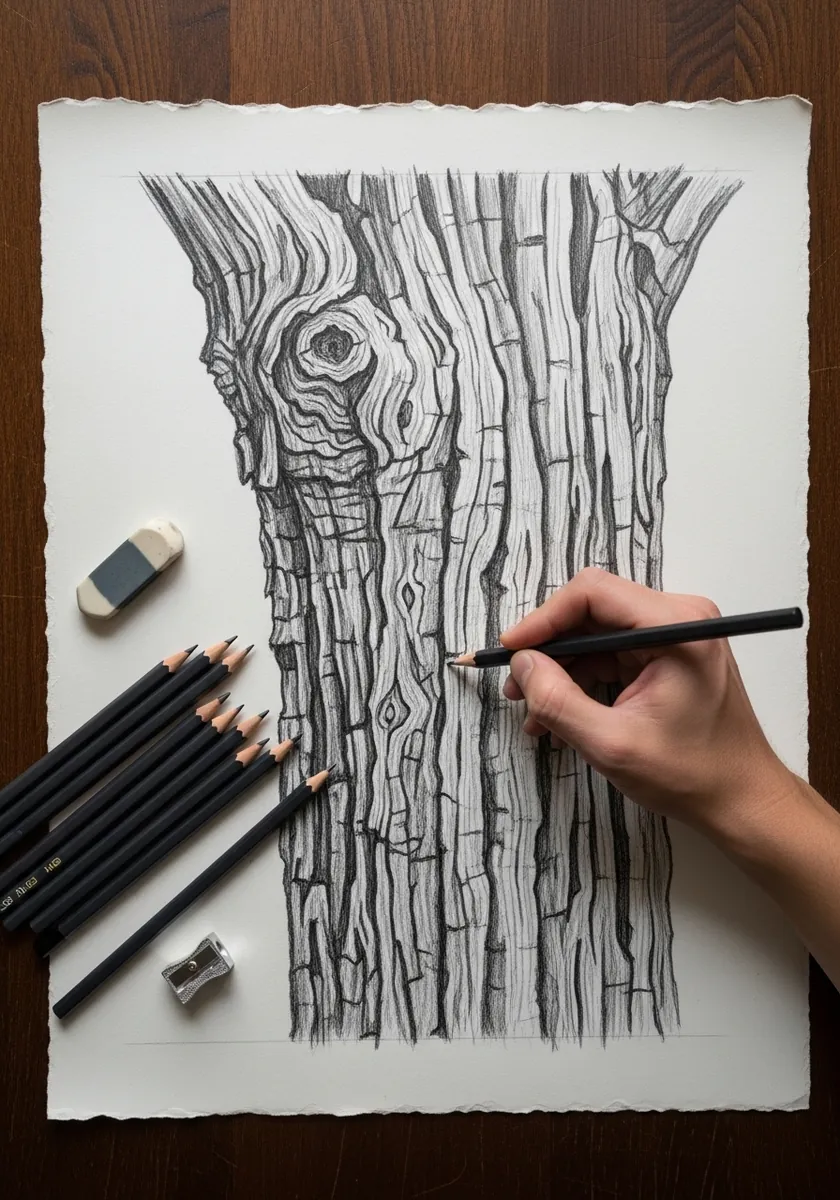
Swirling grain is the trunk record of everything that happened to the tree. Let the lines compress where they pass a knot and open out again once past it, exactly the way contour lines crowd around a steep hill on a map.
17. Sepia Birch Panel
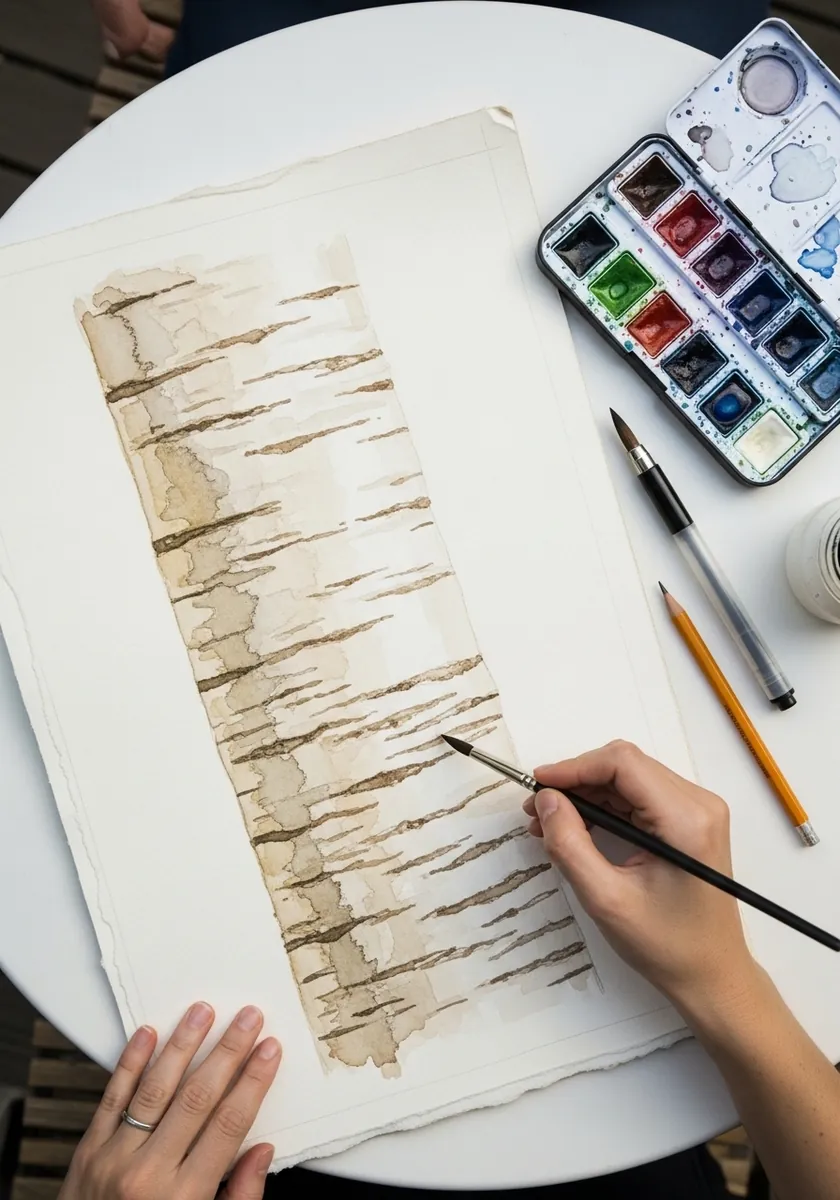
Those horizontal dashes are lenticels, breathing pores, not cracks. Draw them as short flat marks of varying length, group them loosely at similar heights, and keep them strictly horizontal even where the trunk curves away. Leave the paper bare between bands, because birch is mostly untouched white.
18. White Line Bark on Black
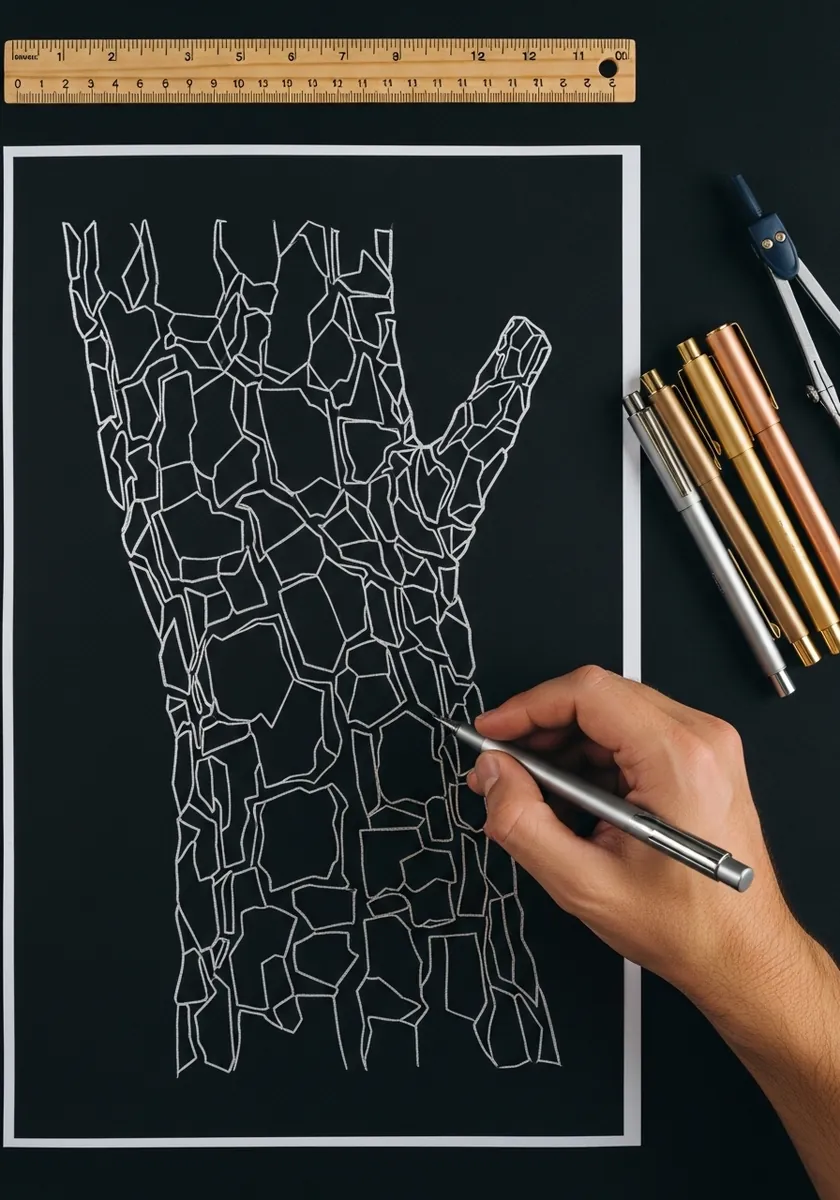
Pure outline with no tone is a map rather than a picture, and it is a genuinely useful exercise. Draw only the boundaries between plates and resist adding a single mark inside any of them. Any tone at all turns it into a picture and defeats the whole purpose.
19. Baobab Trunk in Ink
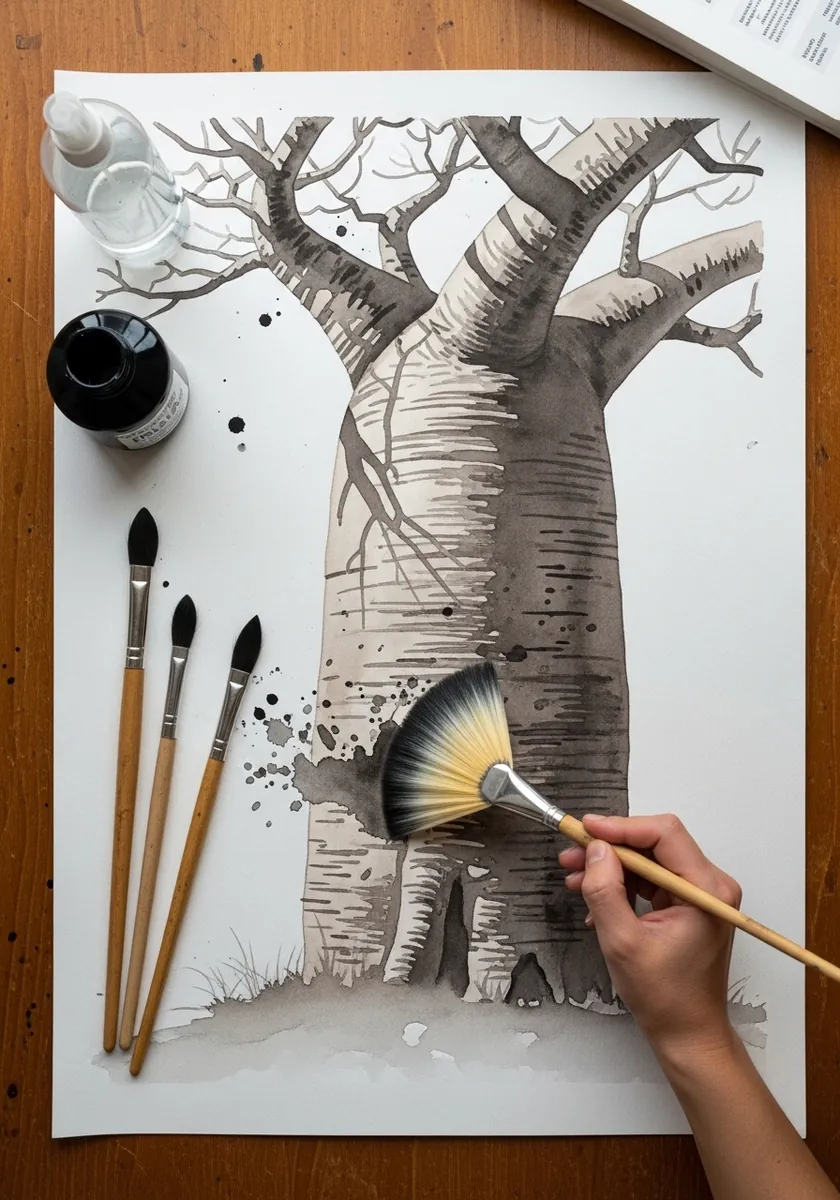
A baobab is almost all trunk, and the bark stretches smoothly rather than cracking. Keep the surface soft with a dry fan brush, let a few long shallow folds run vertically, and put all the hard detail in the branches instead.
20. Sumi-e Wood Grain Scroll
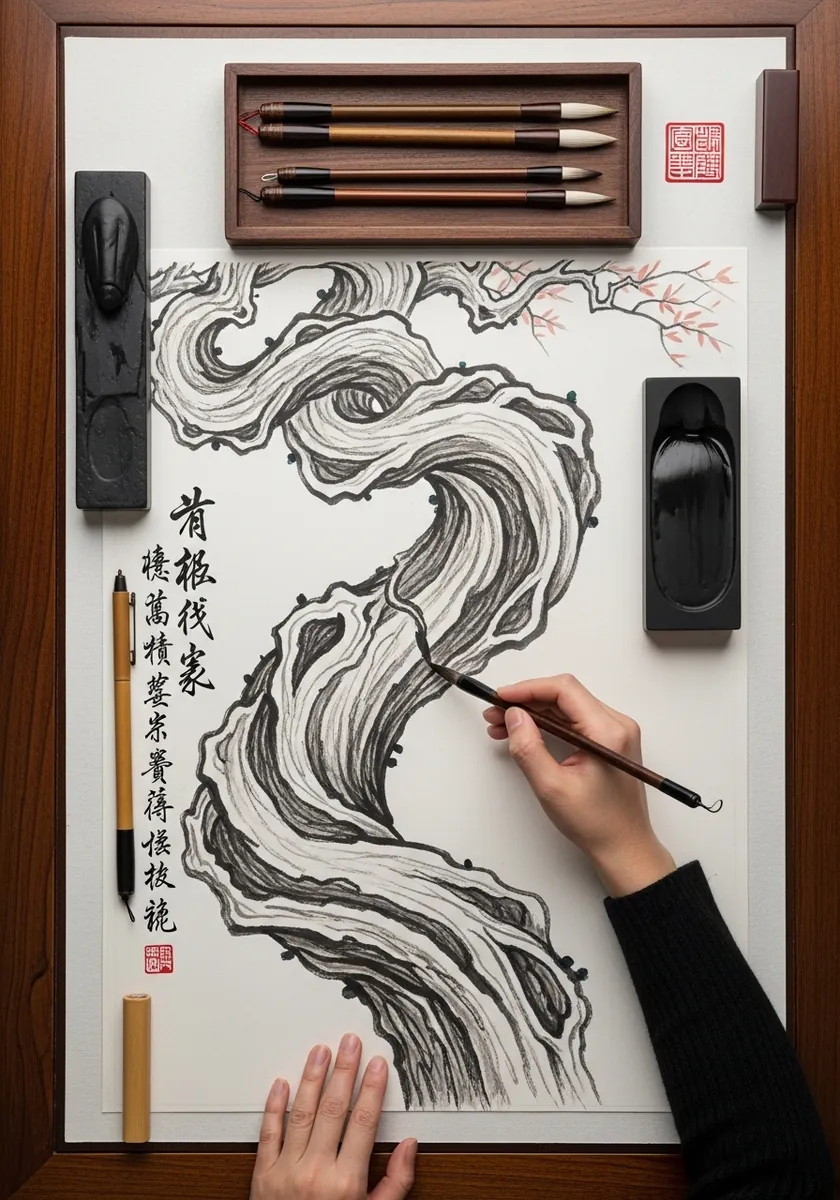
Grain drawn as pure flowing line is closer to calligraphy than to observation. Keep every stroke moving in one continuous direction, vary only the pressure, and let the strokes gather tightly at one point as if flowing around something unseen. End the longest stroke off the edge of the paper rather than inside it.
21. Impasto Palette Knife Bark
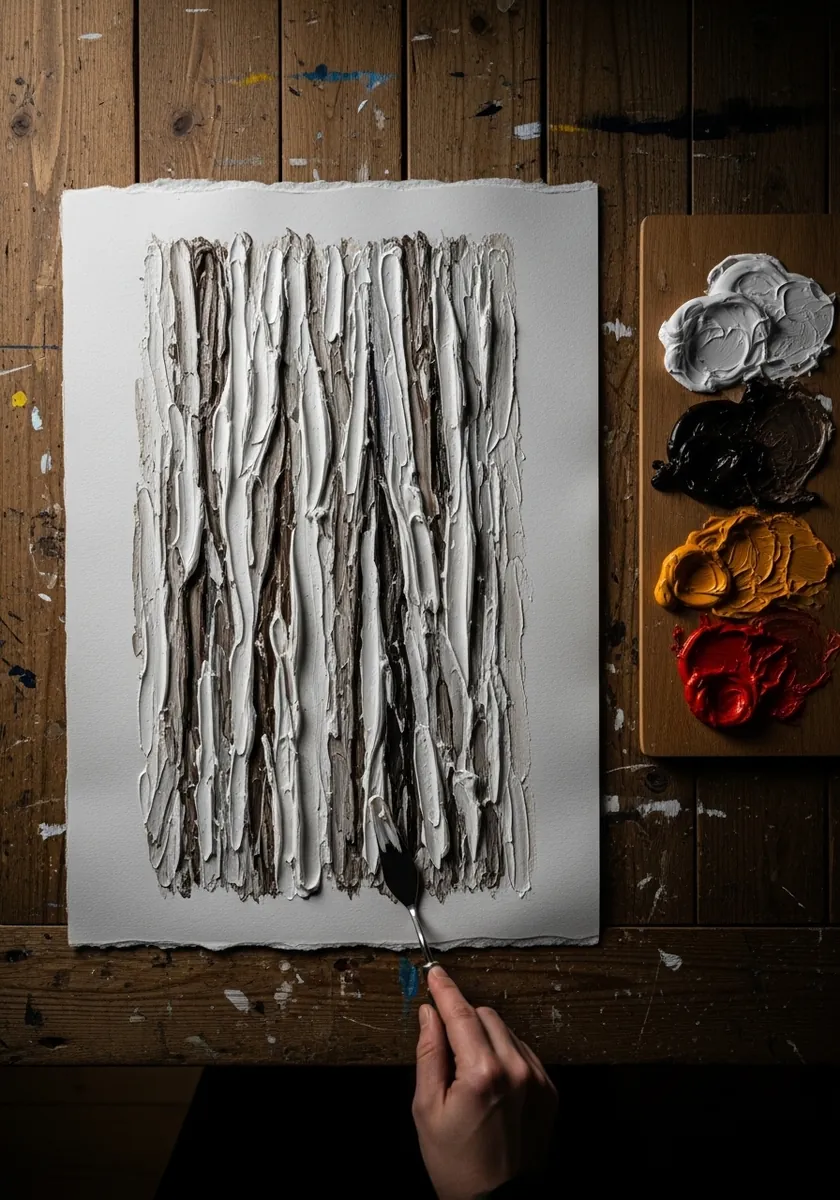
This is the one technique where the texture is genuinely three-dimensional. Load the knife, drag it downward in overlapping passes, and let the ridges of paint cast their own real shadows under the light in the room. Work in one session, because half-dry impasto refuses to bond to fresh paint.
22. Blue Watercolor Birch
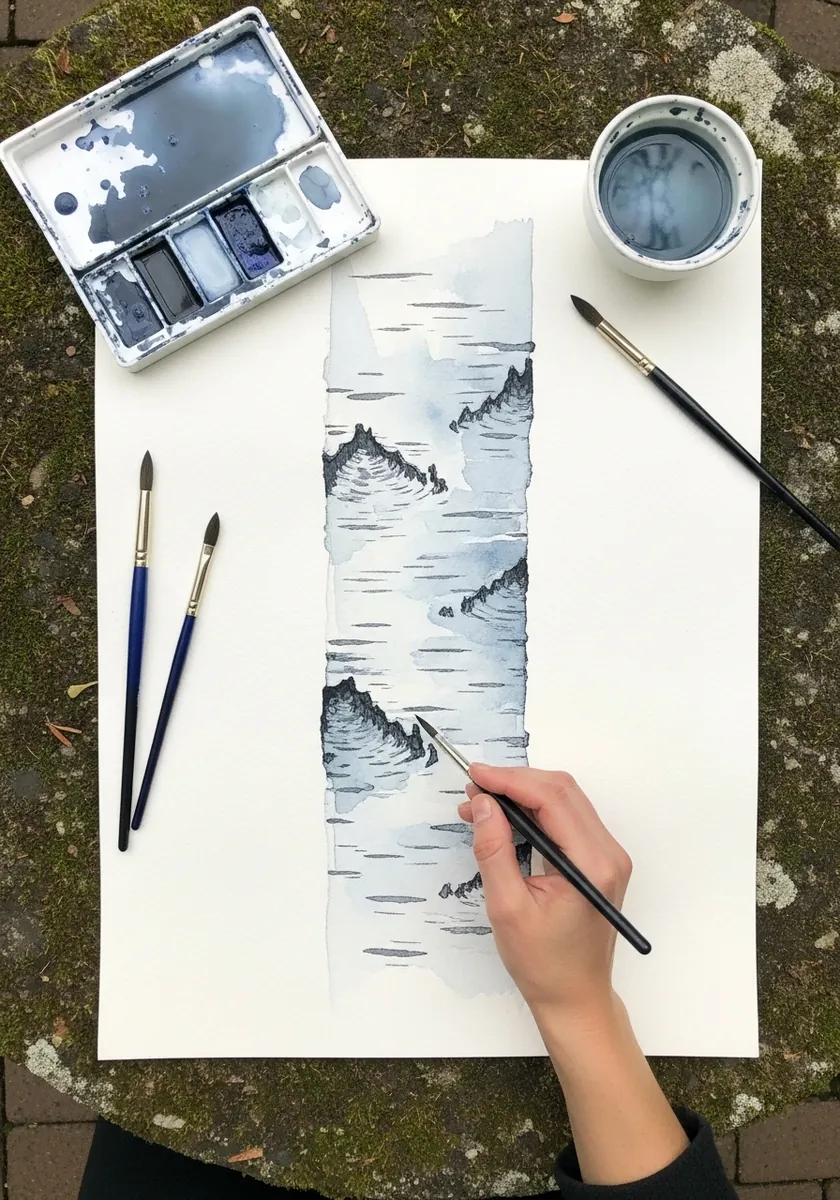
Birch bark is white, which means it is almost entirely reflected color. Paint it in cool blues and grays and leave the paper bare only where direct light hits, because pure white across the whole trunk kills the roundness immediately.
23. Warm Bark on Kraft Paper
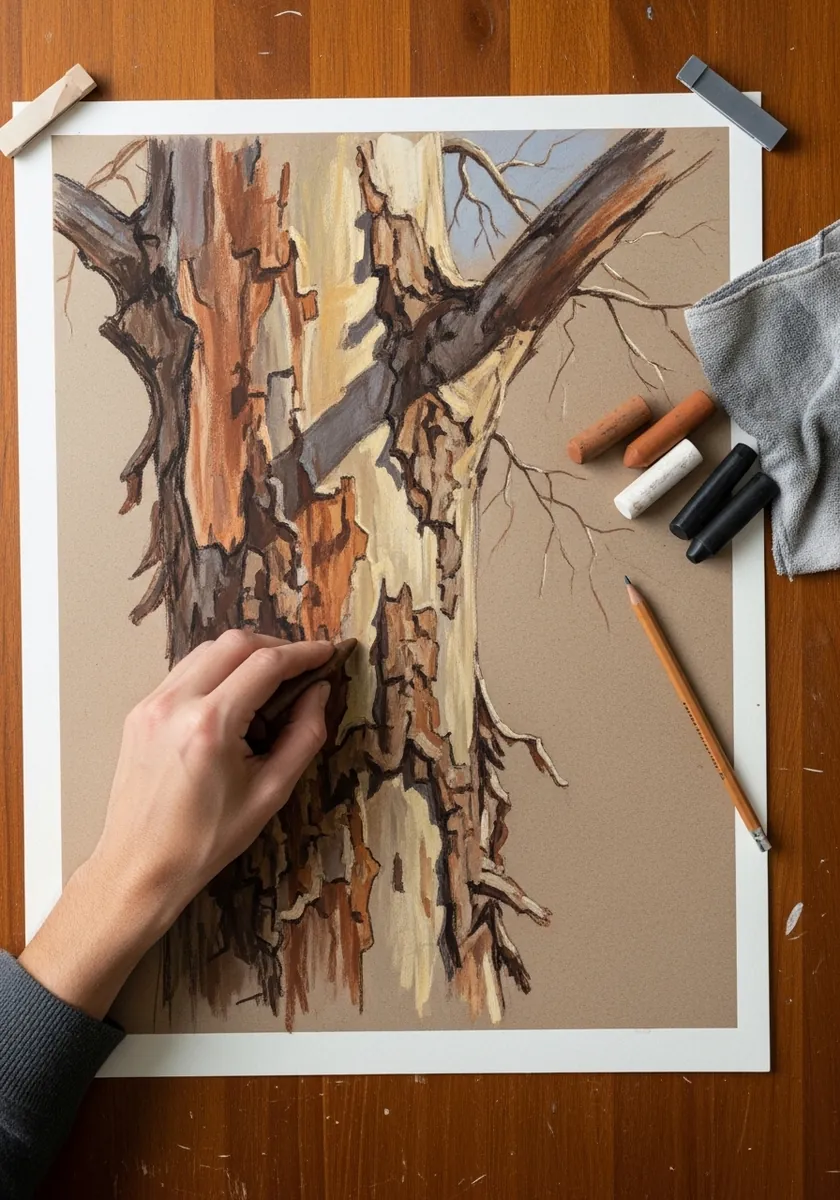
Kraft paper gives you a mid tone that suits bark perfectly. Add the darks in brown and the highlights in white or cream, and leave large areas of the paper showing as the base color of the trunk itself. Let a branch or two cross in front of the trunk to break the vertical monotony.
24. Birch Trunk From Reference
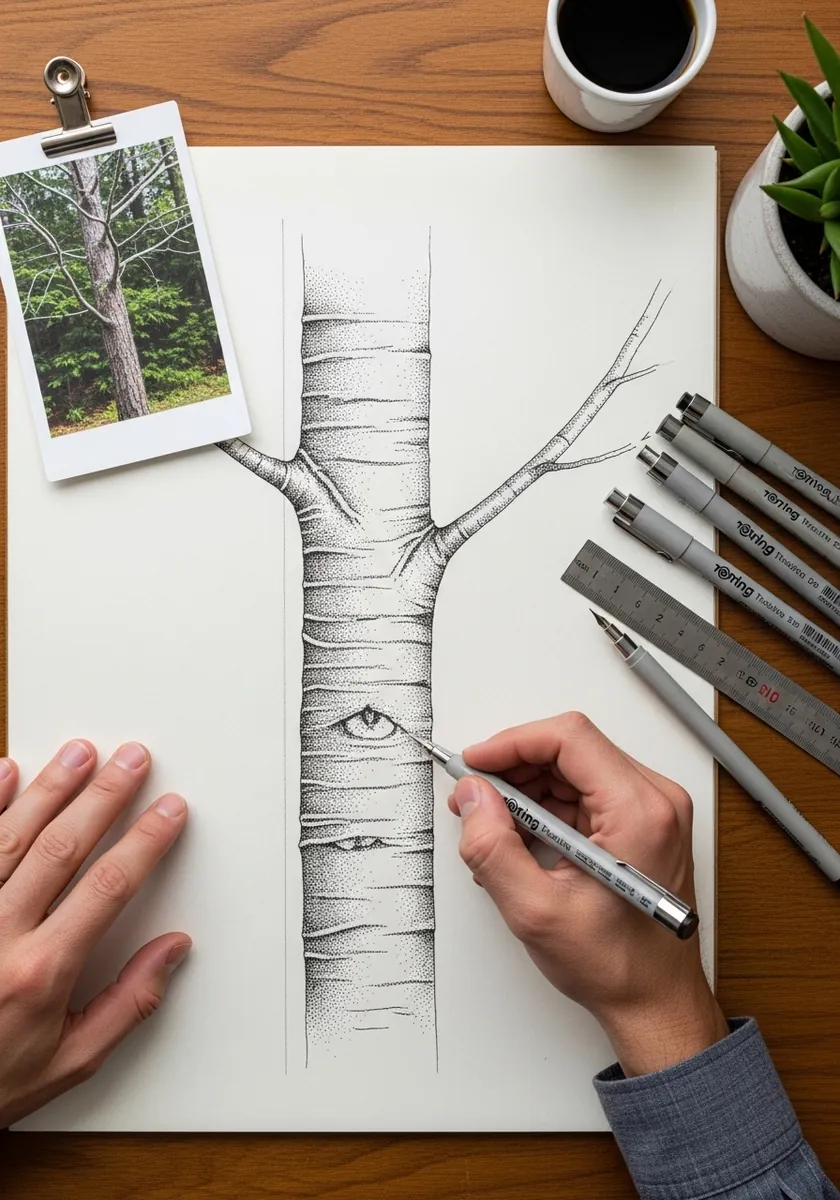
Working from a real photograph fixes the thing invention cannot. Copy the actual spacing of the branch scars rather than distributing them evenly, because real trees are irregular in ways the hand never guesses correctly on its own. Photograph the trunk yourself if you can, so the light matches what you intend to draw.
25. Jungle Buttress Roots
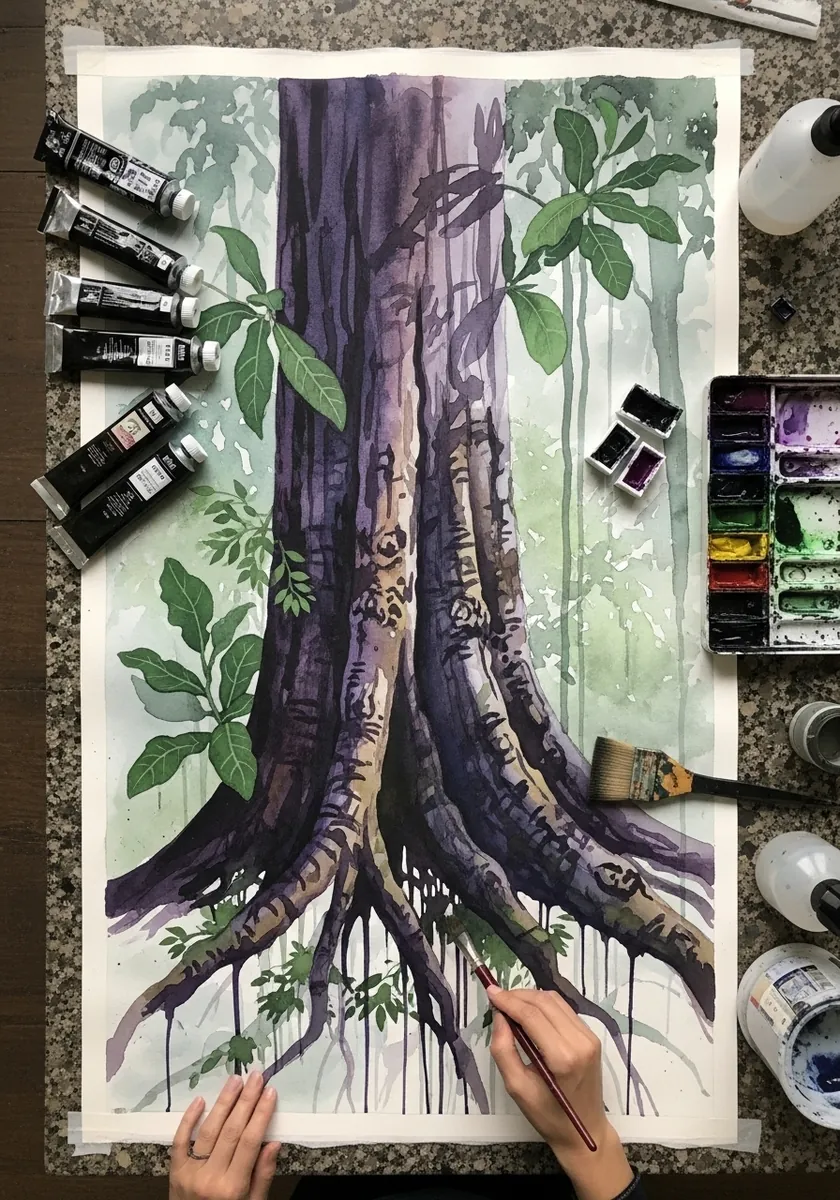
Buttress roots are flat blades rather than round roots, and they flare where they meet the trunk. Draw each one as a thin vertical fin, widen it sharply at the base, and keep the bark pattern running down the fin rather than across it.
26. Mossy Bark in Colored Pencil
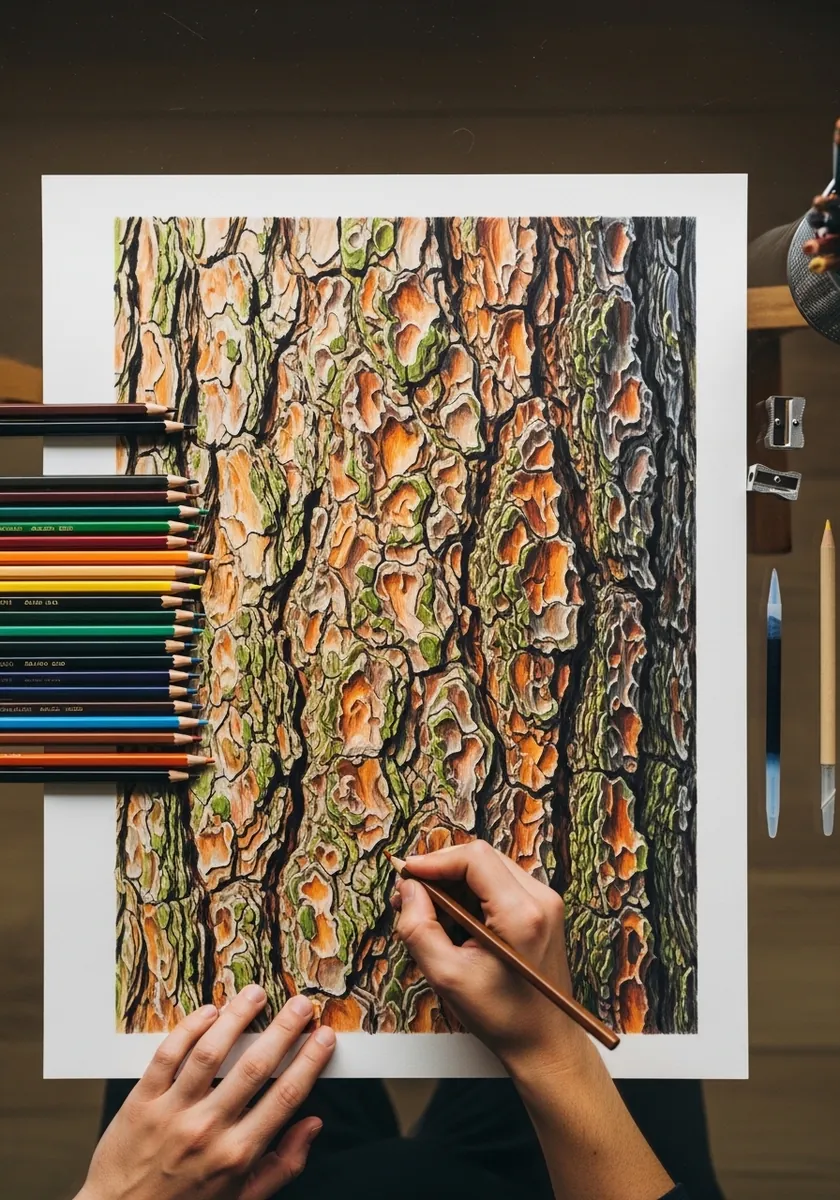
Moss and lichen are different textures and should be drawn differently. Keep the moss as soft clustered dots that break the silhouette, and the lichen as flat crusty patches with a defined edge, so the two never blur into a single green mass.
27. Twisted Driftwood Trunk
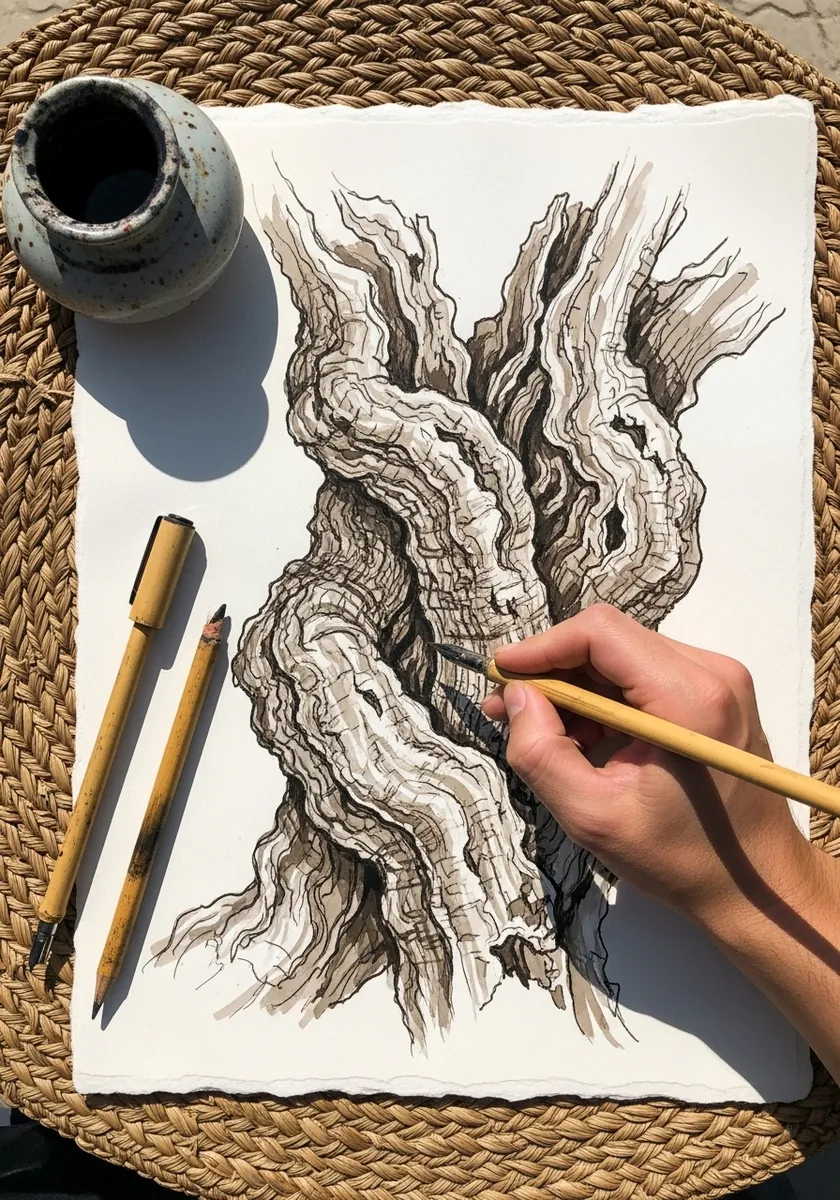
Weathered wood has lost its bark entirely, so the grain becomes the surface. Follow every twist with the grain lines, deepen the shadow inside each hollow, and keep the outer edges hard and slightly splintered. A few pale splinters lifting from the edge sell the weathering more than any texture inside.
28. Cork Oak Layered Plates
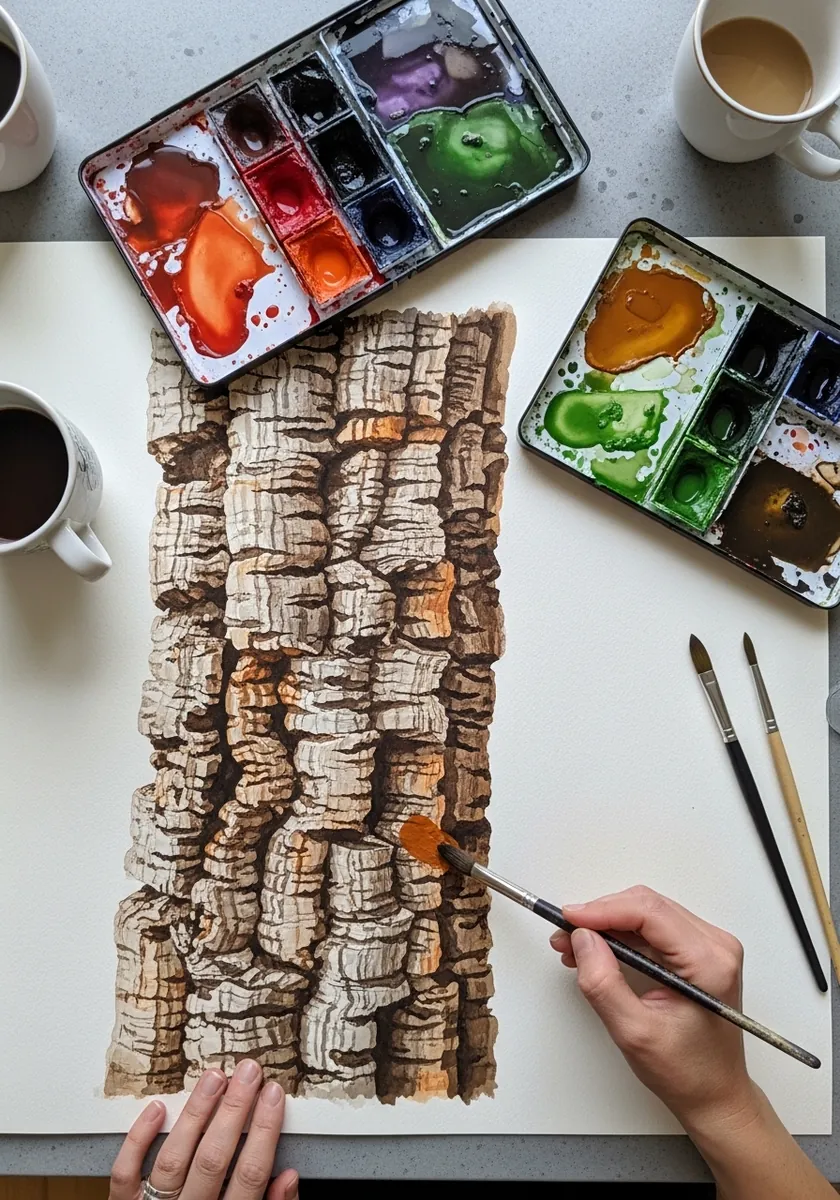
Cork bark is unusually thick, and the drawing should show that depth at the edges. Give every plate a visible side wall where it meets its neighbor, and darken that wall much more than the top surface so the whole layer reads as raised. Cork is also unusually light in tone, so keep the whole study higher key than oak.
29. Narrow Crack Line Study
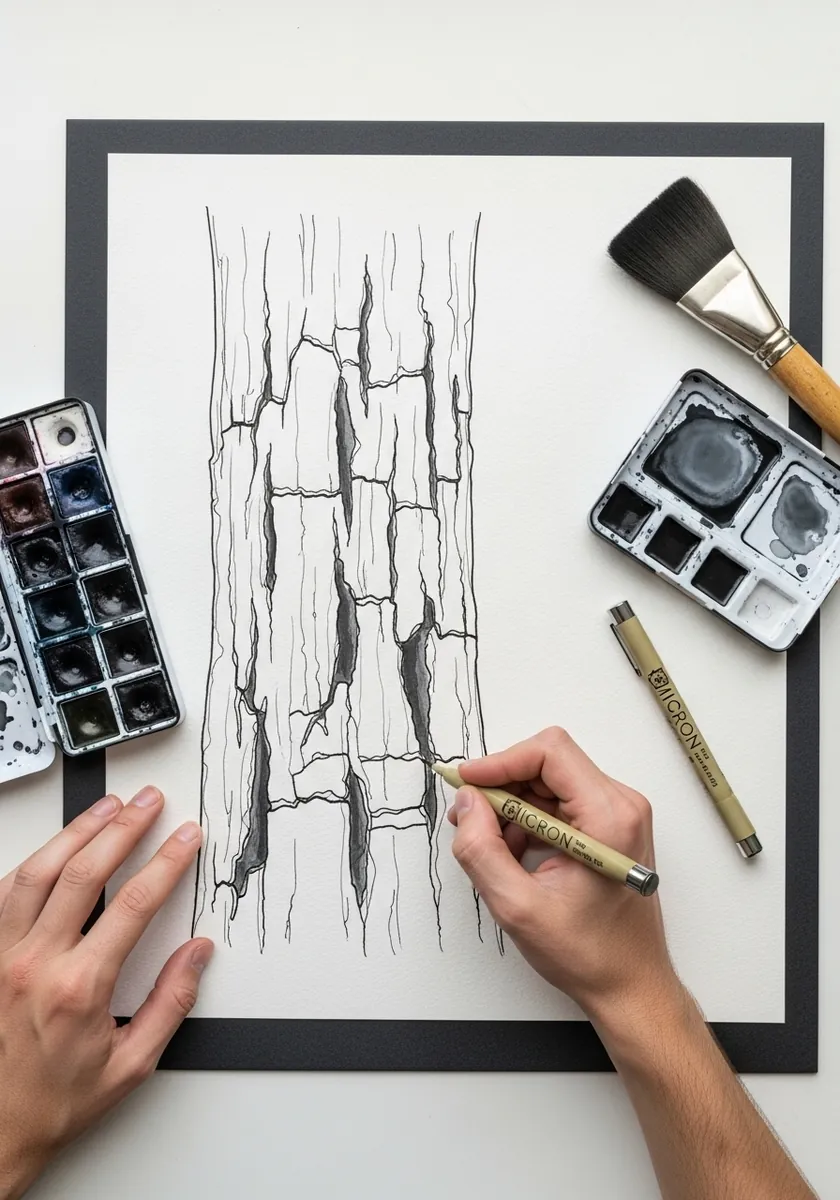
Sometimes the most useful study is the least decorated. Draw nothing but the crack lines themselves, vary their weight and length, and let the empty paper between them stand as the ridges without any shading at all. Leave one crack noticeably wider than the rest to give the eye a starting point.
30. Cherry Trunk in Blossom
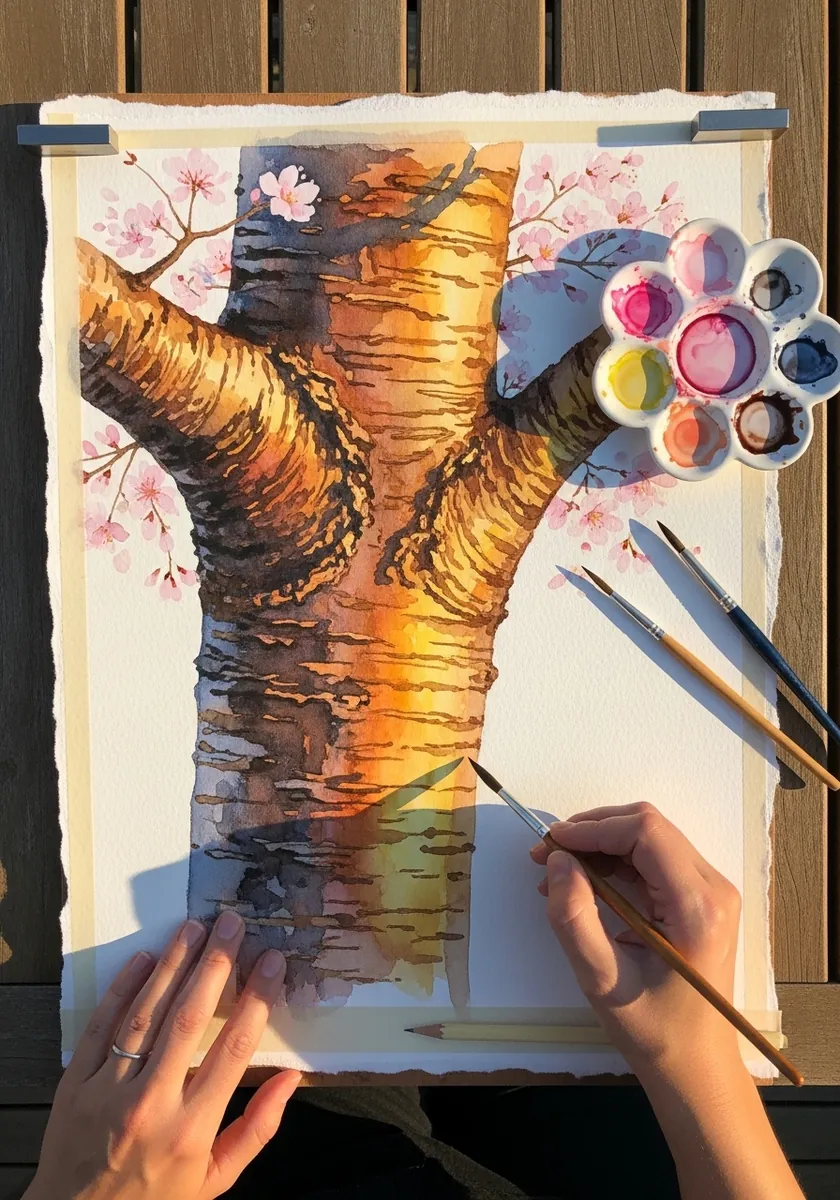
Cherry bark is smooth with strong horizontal banding, which is the opposite of most trunks on this page. Keep the surface glossy with a soft highlight down one side, band it horizontally with lenticels, and let the blossom stay very pale so the trunk still holds the picture. Set the blossom mostly behind the trunk so it never competes for attention.
Frequently Asked Questions
Why does tree bark crack?
Because the trunk keeps growing outward from a living layer just under the surface, while the outer bark is already dead and cannot stretch. As the circumference increases the rigid outer layer splits, which is why the fissures run up and down rather than around.
Should bark lines be vertical or horizontal?
Vertical, in almost every case. The trunk expands in girth, so it splits along its length. The main exceptions are birch and cherry, where horizontal dashes are lenticels, small pores for gas exchange, and those are markings rather than cracks.
How do I stop bark looking flat?
Curve it around the cylinder. Every fissure and ridge should bend slightly, and the spacing between them should compress as it approaches the left and right edges of the trunk. Parallel straight lines flatten a tree instantly, no matter how good the texture is.
How does bark differ between species?
Enough to identify a tree from bark alone. Oak and ash form deep vertical furrows, plane and sycamore flake away in irregular plates, birch peels in thin papery horizontal sheets, and eucalyptus sheds long colored ribbons.
What is the fastest way to draw convincing bark?
Work from dark to light. Lay the deep fissure shadows first as a broken vertical rhythm, then lift the ridges back out with an eraser rather than drawing them in. Bark is mostly shadow with light catching the raised edges.
References and Further Reading