A magical forest needs three depth layers and one light source. Paint the far trees palest, the middle darker, and the nearest almost black, then place a single glow the viewer walks toward. That value ladder is what creates the enchantment.
Key takeaways
- Build the wood in three value layers, each darker than the one behind it, to create real depth.
- Use one light source only, and let everything in the scene take its color from that source.
- Glow is built in two passes: a wide soft halo first, then a small intense core inside it.
- Trunks shrink and crowd together toward the vanishing point, which is what makes a wood feel deep.
- Reserve white paper for the brightest light rather than adding white paint over a dried wash.
An enchanted forest is not made of magic. It is made of three depth layers and one light source. Paint the far trees palest, the middle band darker and the nearest trunks almost black, then place a single glow the viewer travels toward. That value ladder does the work.
The second rule is restraint with color. Choose one dominant cool, usually blue-green or violet, and reserve every warm yellow and orange for the light itself. The eye reads that lone warm note as magic, which is why a limited palette beats a busy one every time.
The thirty scenes below cover firefly woods, lantern paths, glowing portals, snow forests, coral trees and stone ruins, worked in watercolor, stippled ink, charcoal, gouache and oil pastel. For the trees themselves, tree drawing ideas and forest path painting are the closest groundwork.
Several scenes place an animal inside the wood, so fawn and deer sketches and animal drawing ideas are useful, while the botanical detail borrows from leaf tracing practice.
Compiled by the GS Art Zone editorial team. Last updated August 2026. Each idea is paired with the specific step that produces the effect, so you can go from the reference straight to paper.
What You Need Before You Start
- Masking fluid or a white gel pen, since almost every scene here needs a light source preserved
- A large flat wash brush for the misty backgrounds and a rigger for individual trunks and branches
- One warm and one cool of each primary, which lets you push light and shadow apart by temperature
- Toned gray, blue or black paper for the night pieces, which are far easier worked from dark to light
- A natural sponge for lifting mist out of a wet wash while it still has a sheen
1. Firefly Wood in Soft Watercolor
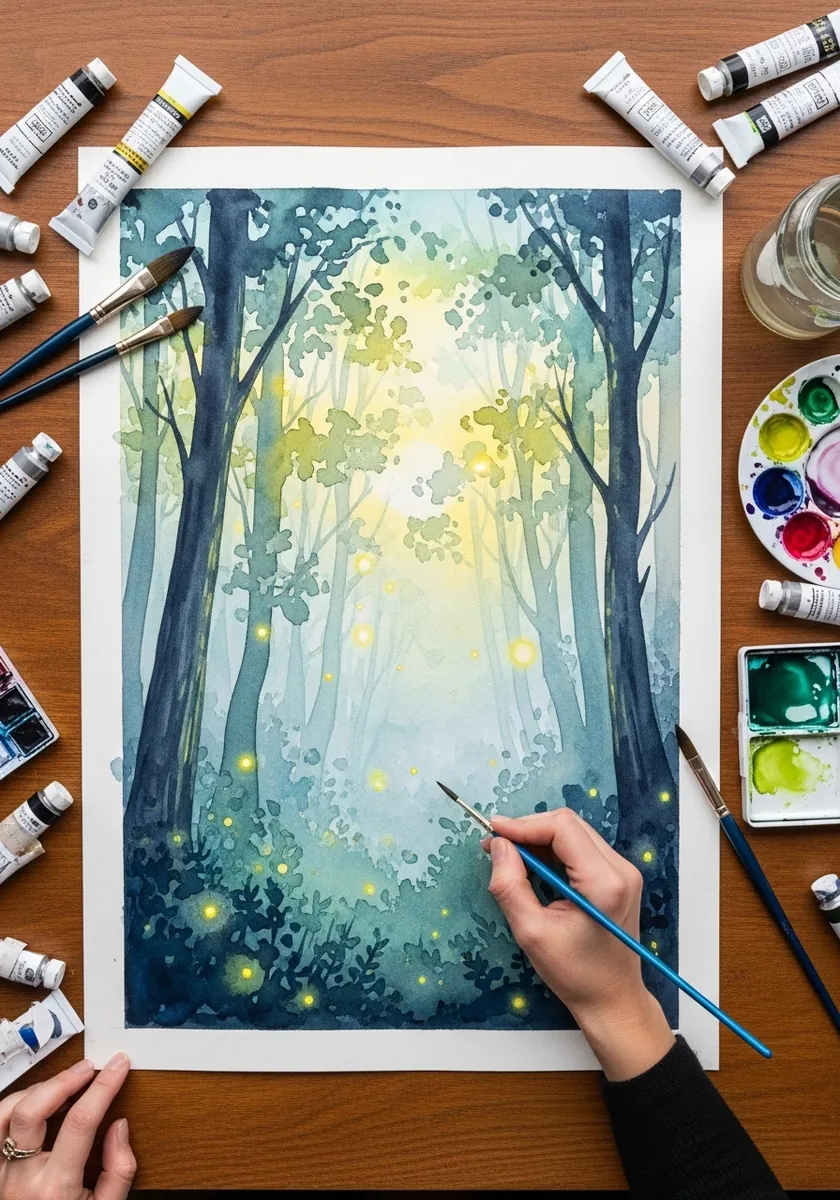
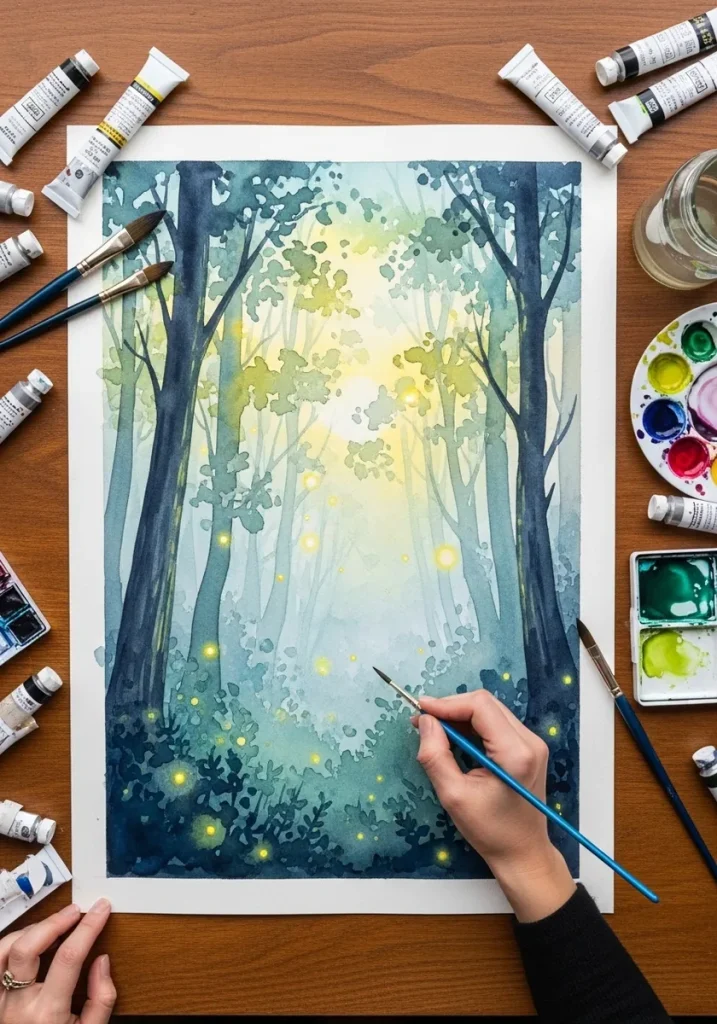
Start here because mist forgives everything. Wet the whole sky area and drop teal in, letting the far trunks blur completely, then add sharper trees in front once dry. Reserve the fireflies as tiny dots of untouched paper before any wash goes down, since you cannot recover them later.
2. Ink Moth Grove with Fine Detail
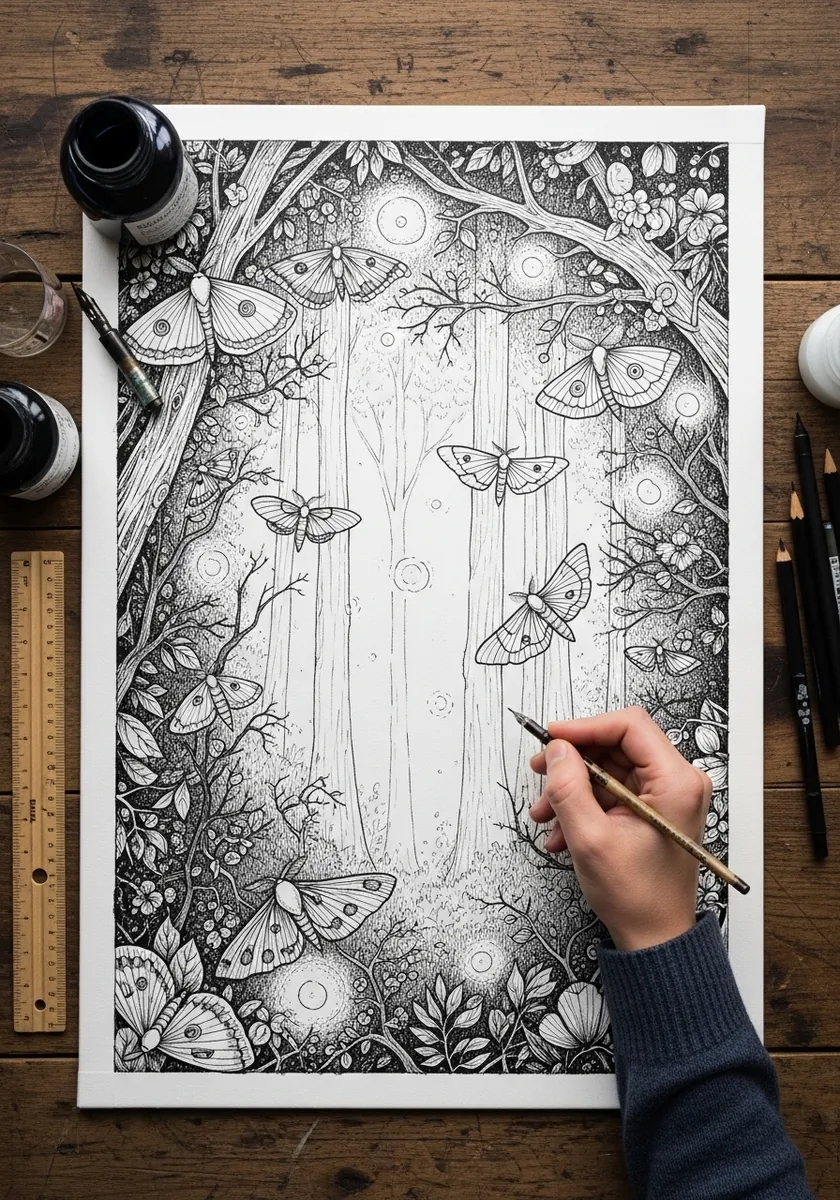
Density needs a still center. Fill the borders with intricate moths and foliage worked in fine line, then leave the middle of the page almost empty so the eye has somewhere to rest. Without that gap the whole page reads as texture rather than as a place.
3. Mushroom Ring Portal in Graphite
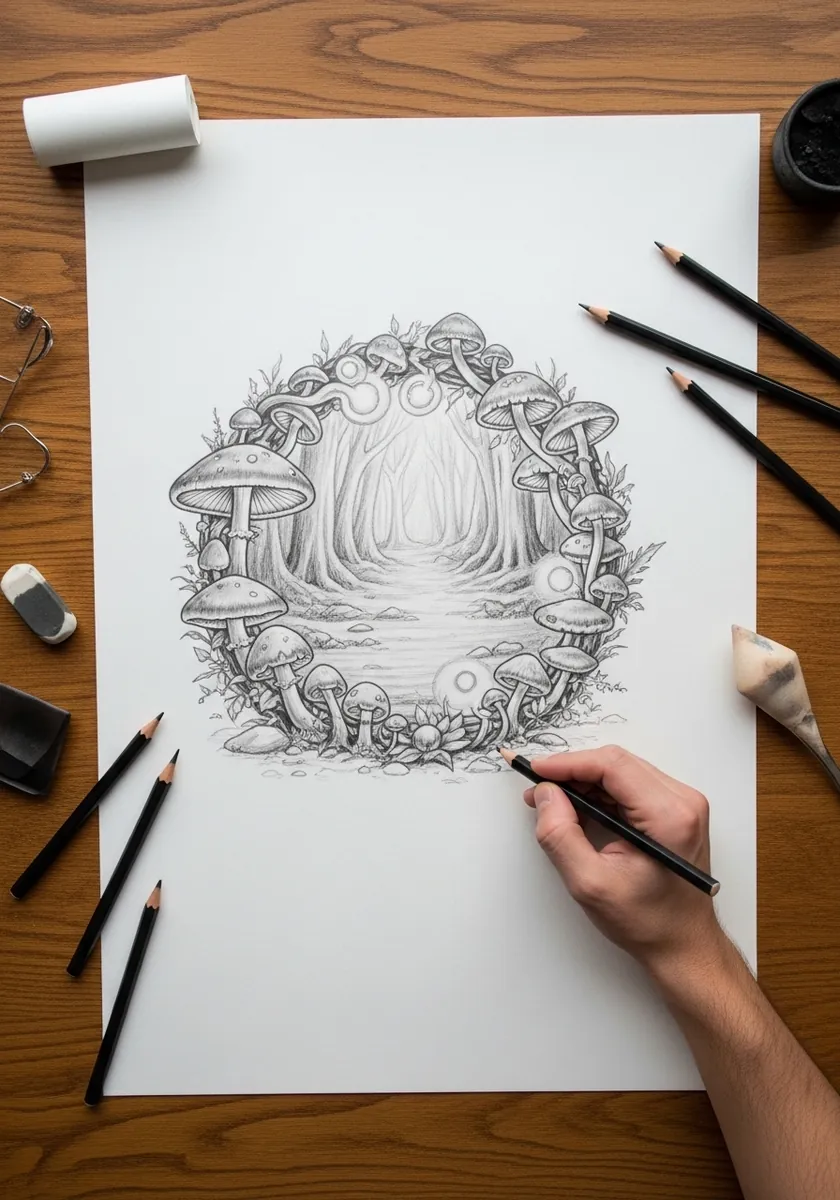
The ring of mushrooms is the frame, so rule a light circle first and build every cap around it. Keep the forest inside the circle much paler than the mushrooms themselves, which pushes the interior back and turns the ring into a genuine opening.
4. Lightning Storm Forest in Oils
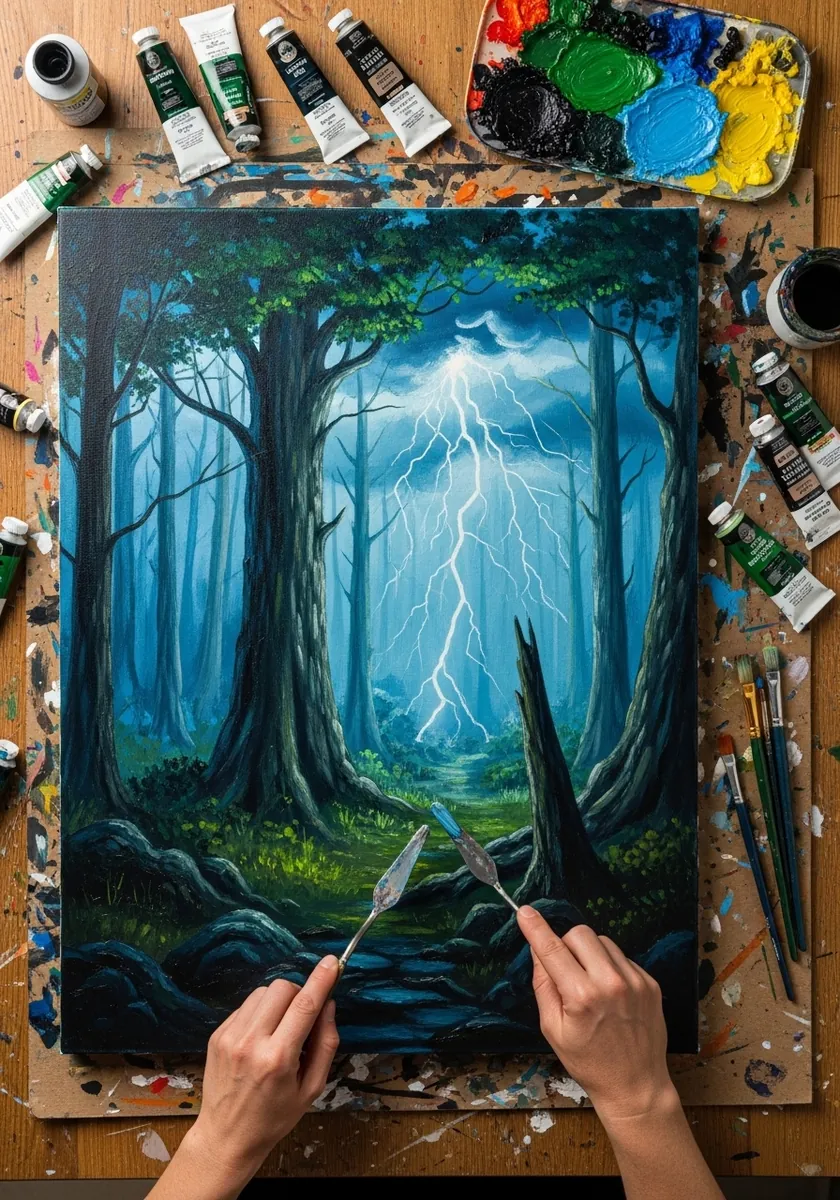
Lightning is the only light source, so everything else must respond to it. Paint the whole wood in deep blue-green first, then cut the bolt in with a knife edge and add pale rim light to the trunk edges nearest the strike.
5. Bioluminescent Forest in Bright Ink
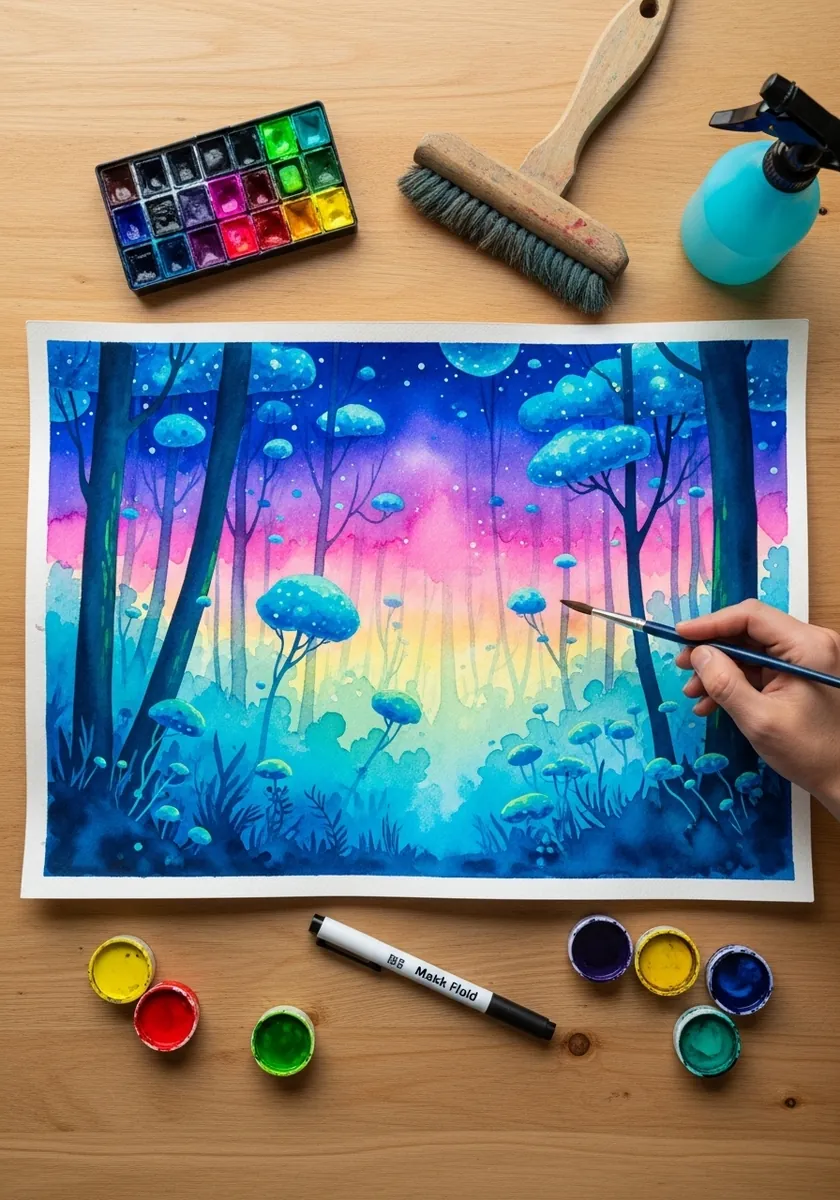
Saturated color still needs a value structure. Keep the darkest blues at the outer edges of the page and let the brightness build steadily toward the center, so the glow reads as light rather than as an evenly bright pattern.
6. Fox Spirit in Autumn Pastel
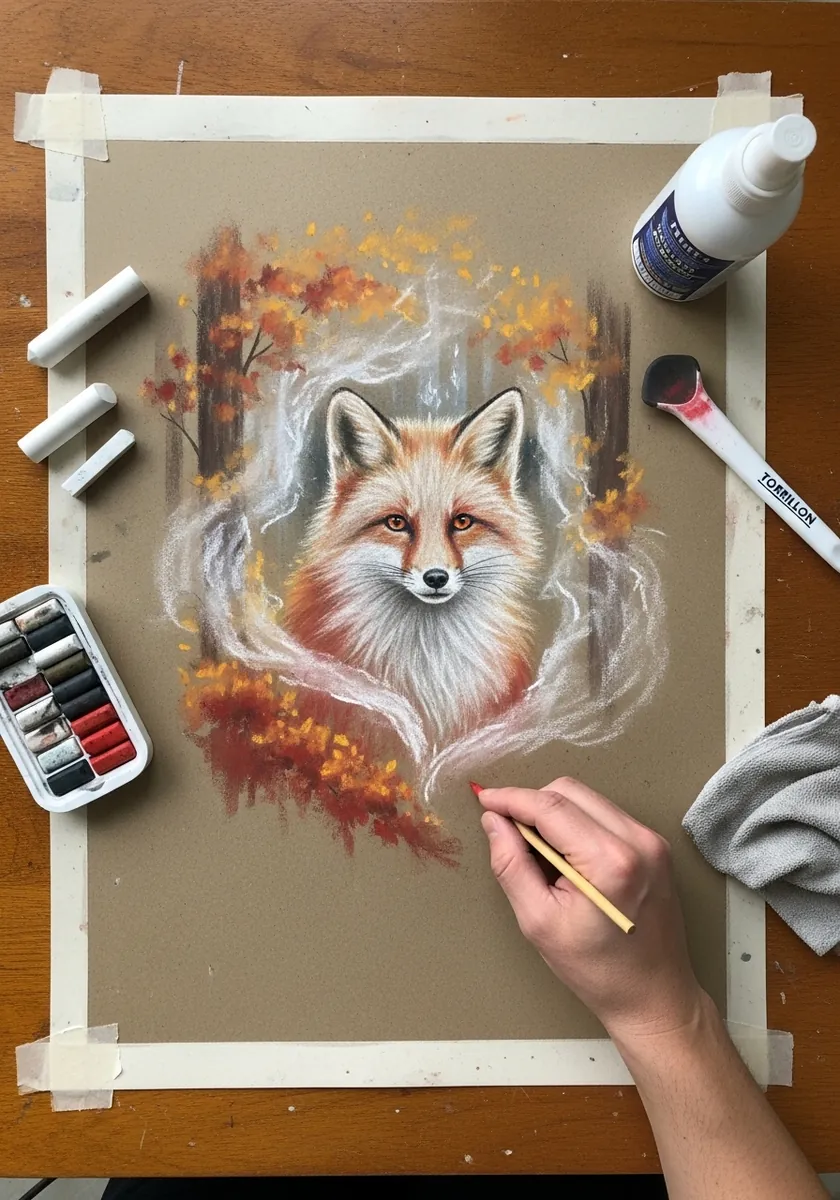
Smoke is the hardest element here. Blend it with a finger so it has no edge at all, then let it partly cover the fox’s body, because an animal half hidden by mist reads as far more mysterious than one drawn completely.
7. Cathedral of Trees in Watercolor
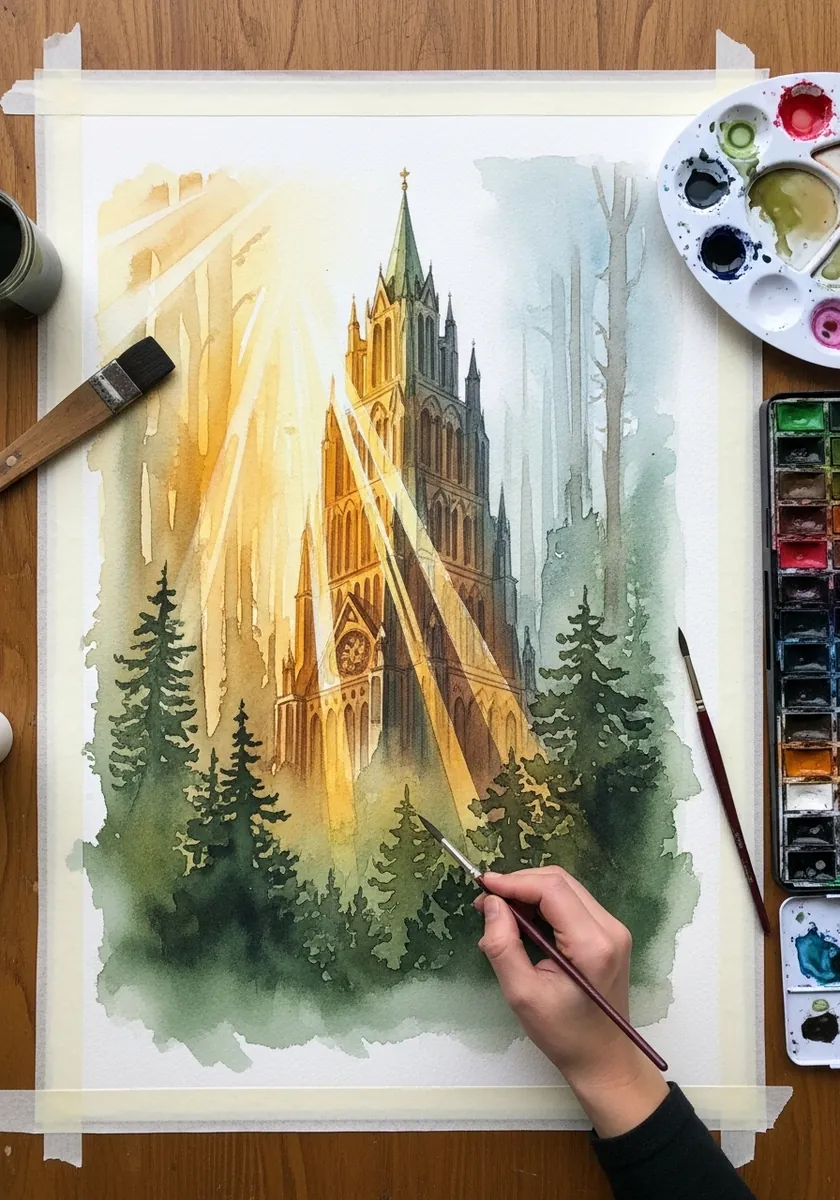
Light rays must converge on a single point. Rule them lightly to that point before painting, keep them as reserved paper rather than added yellow, and let them pass in front of the middle band of trees but behind the nearest ones.
8. Lantern Path in Charcoal
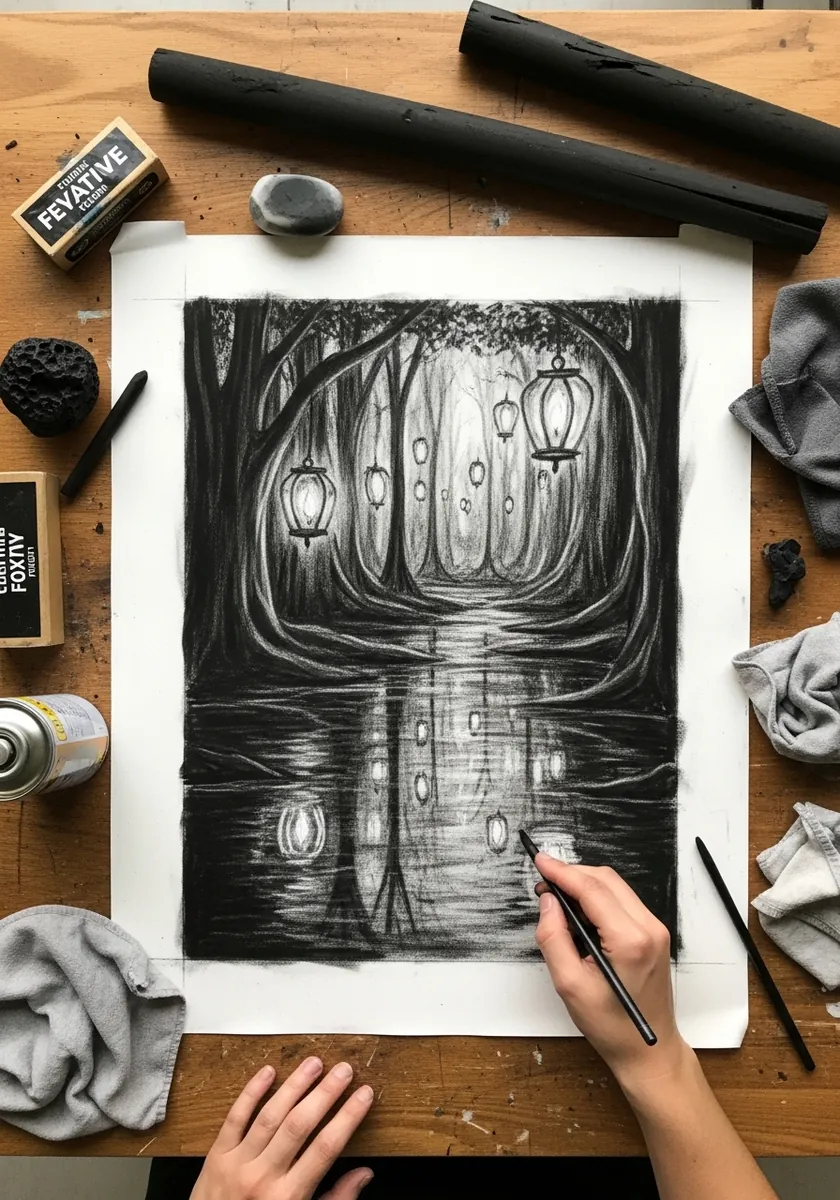
Reflections are the whole trick. Draw each lantern, then repeat it directly below in the water as a broken vertical column of short dashes rather than a solid shape, because still water still ripples enough to fragment light. Charcoal smudges easily, so work top to bottom and rest your hand on a spare sheet throughout.
9. Frozen White Forest in Gouache
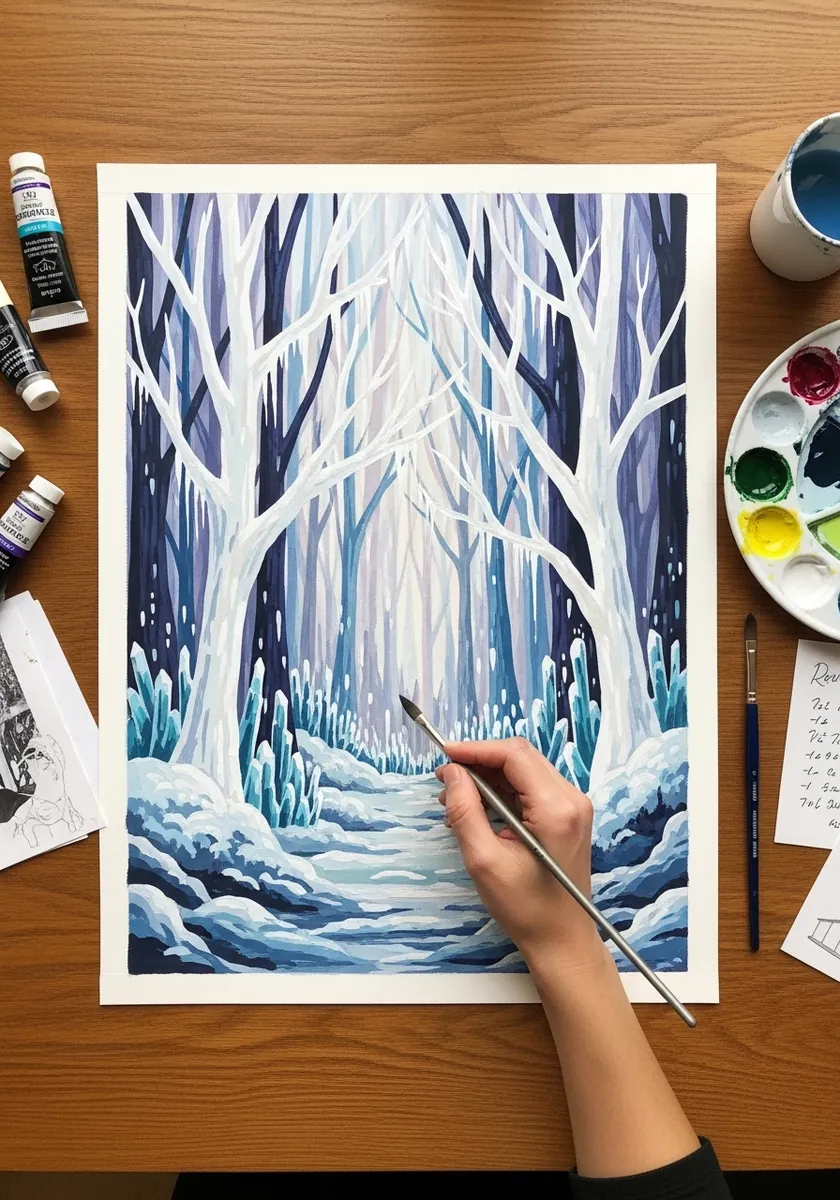
Working almost entirely in one hue is a real discipline. Separate the layers by value alone, from near black-blue at the front through mid blue to near white at the back, and add no other color anywhere on the page.
10. Blossom Deer in Brush and Ink
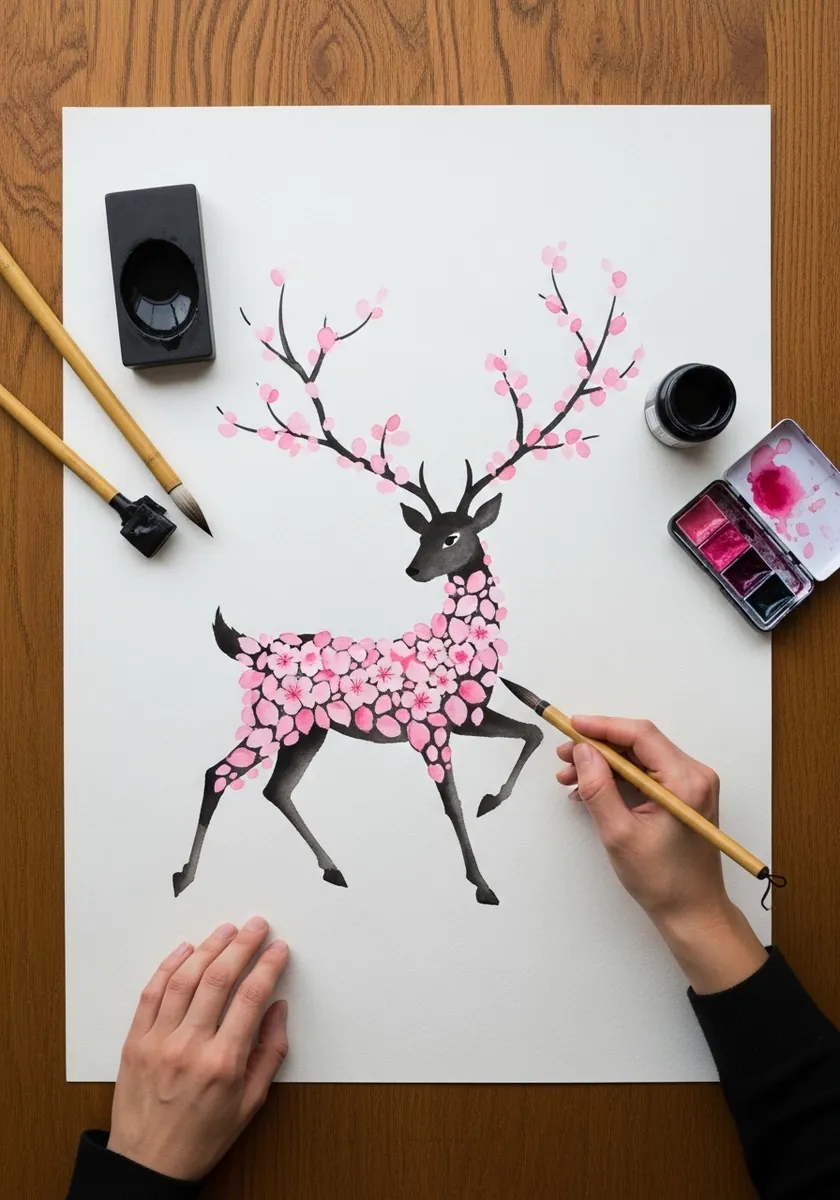
Two techniques in one image need clear separation. Paint the deer in confident black brush strokes, let it dry completely, then dab the blossoms on with a fine brush so the crisp petals sit clearly on top of the loose body.
11. Treehouse Village in Fine Line
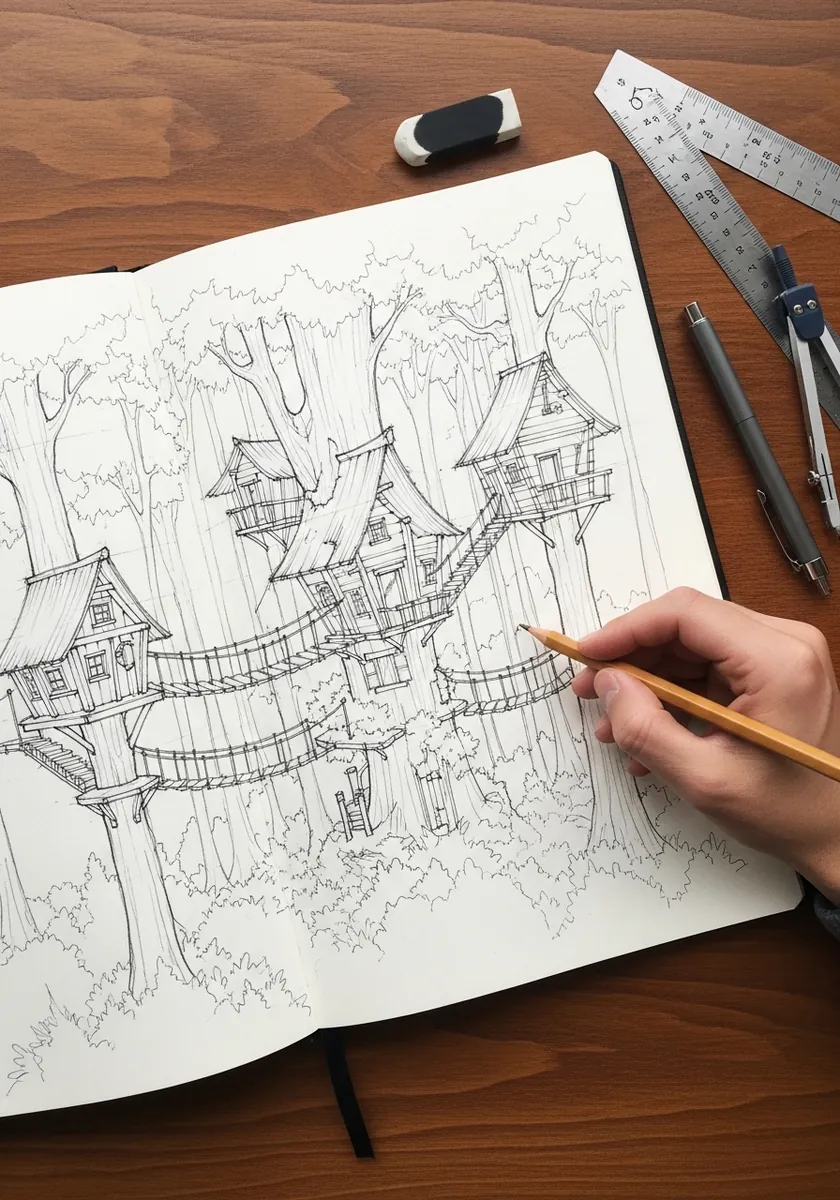
Architecture in trees needs believable support. Draw each platform resting on an actual branch fork rather than floating against the trunk, and let the rope bridges sag properly, since a straight rope reads as a rigid pole. Add one tiny figure on a walkway, which instantly tells the viewer how large the whole village is.
12. Underwater Forest with Coral
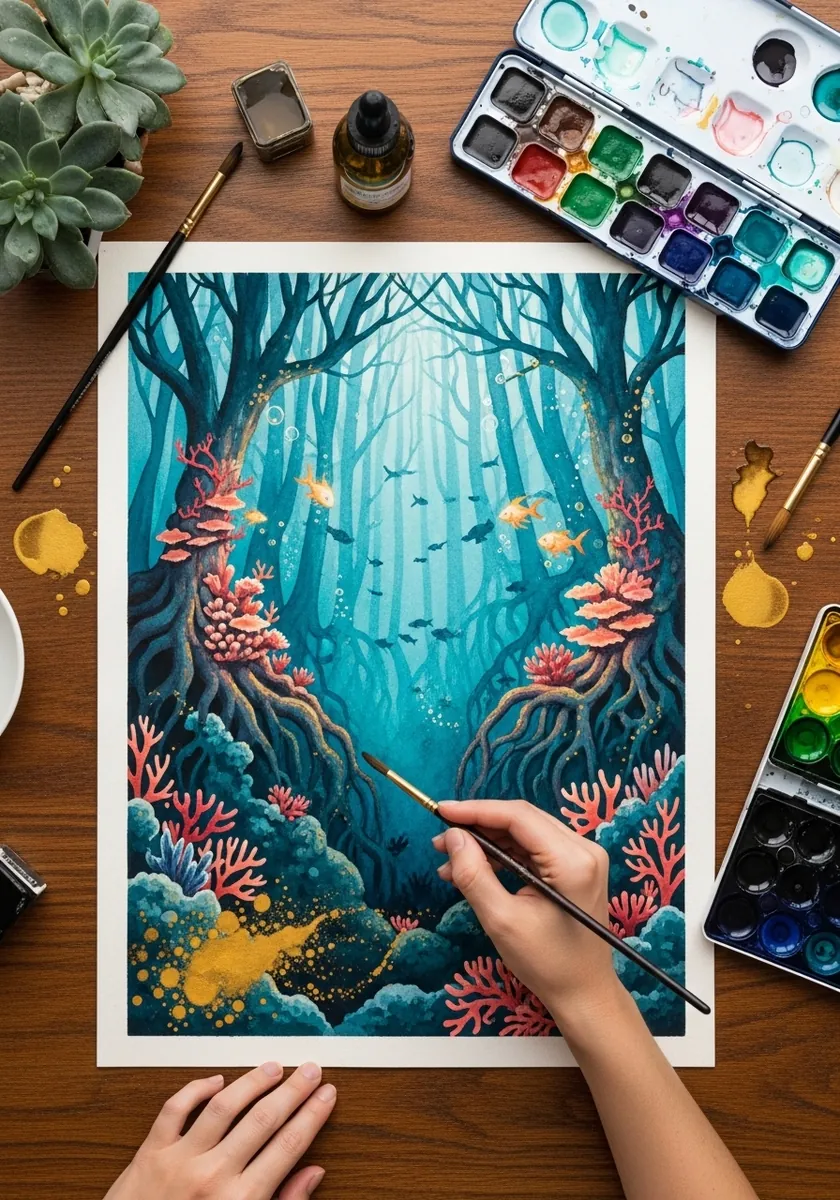
Water changes how light behaves. Everything grows bluer and lower in contrast with distance, far more aggressively than in air, so compress your value range toward the back and let only the nearest coral keep any warm color. Scatter a few rising bubbles at different sizes, since identical bubbles read as printed dots.
13. Tree Faces in Fine Ink
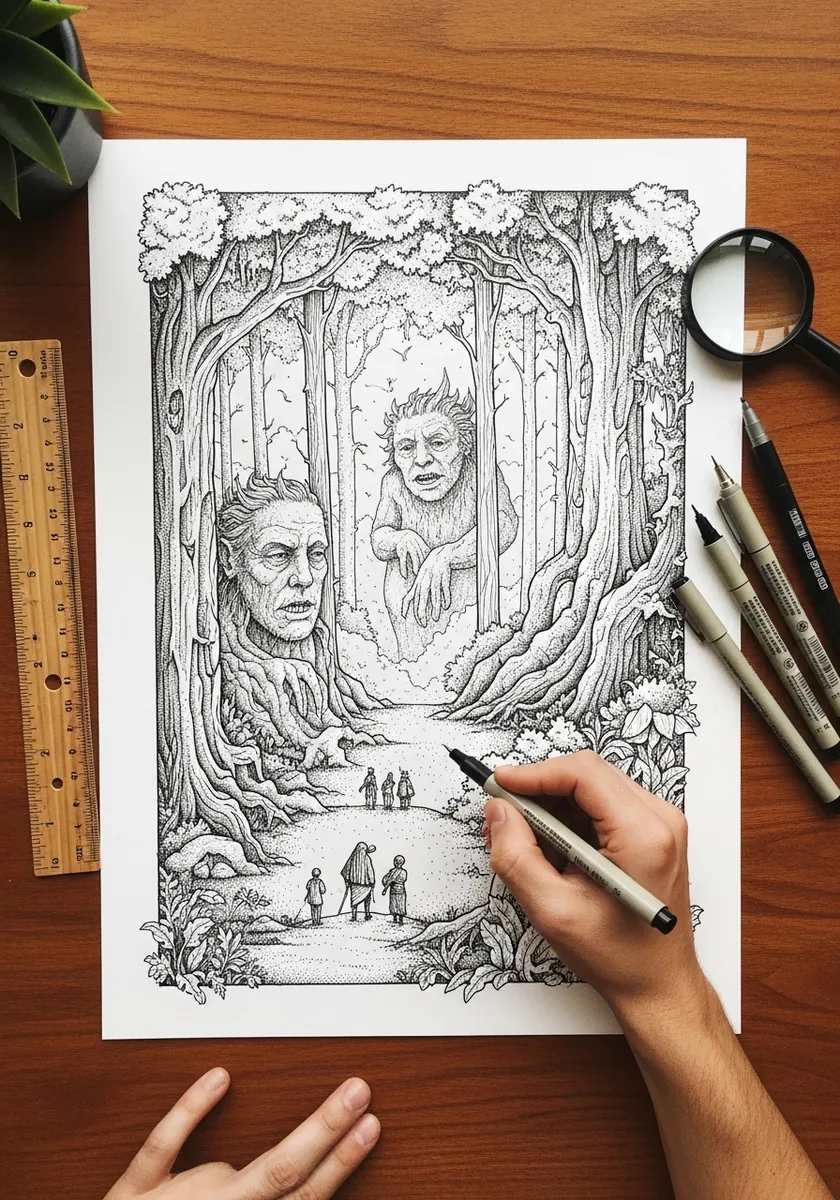
Faces in bark work when they are half hidden. Draw the trunk texture first with its natural vertical grooves, then let a brow and an eye emerge from that existing pattern rather than drawing a face and adding bark around it.
14. Sunset Forest in Bold Acrylic
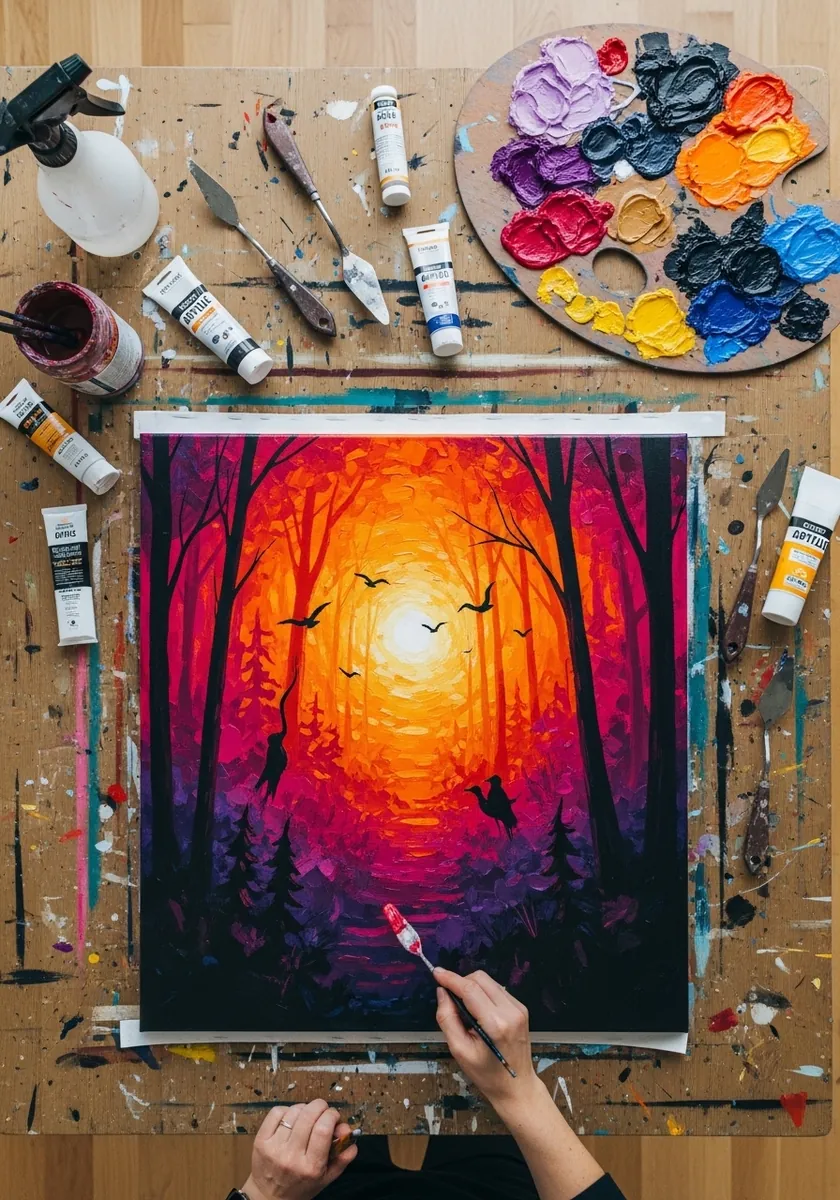
Silhouettes live on shape alone. Get the trunk spacing irregular and the canopy edges broken, then keep every tree pure flat black with no interior detail at all. Any shading inside would immediately weaken the contrast. Mix your black from ultramarine and burnt umber rather than using it straight from the tube.
15. Dandelion Meadow in Pale Wash
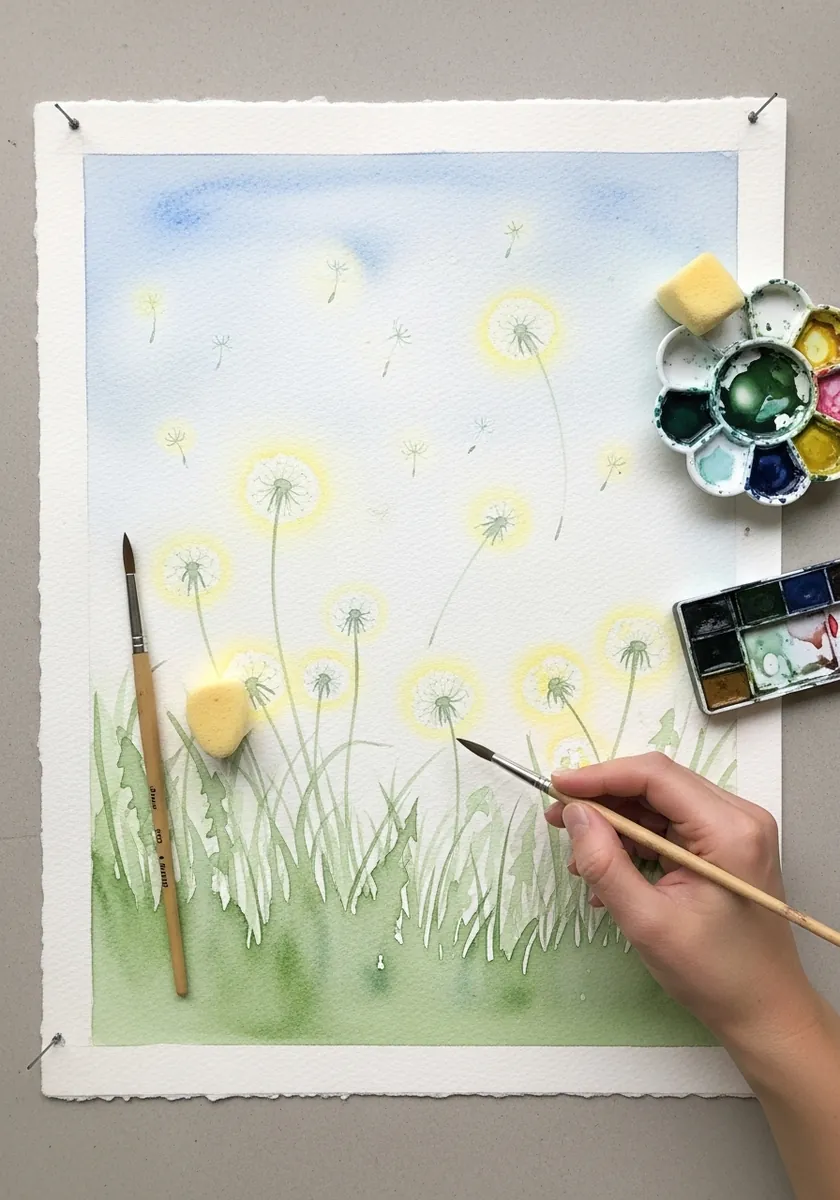
Restraint is the whole exercise. Keep the entire painting within three close values, let the seed heads stay as reserved paper with the faintest yellow halo, and resist adding any dark accent for contrast anywhere. Tilt the board slightly while the wash is wet, letting gravity soften the lower edge of the meadow.
16. Spirit Wolf on Gray Paper
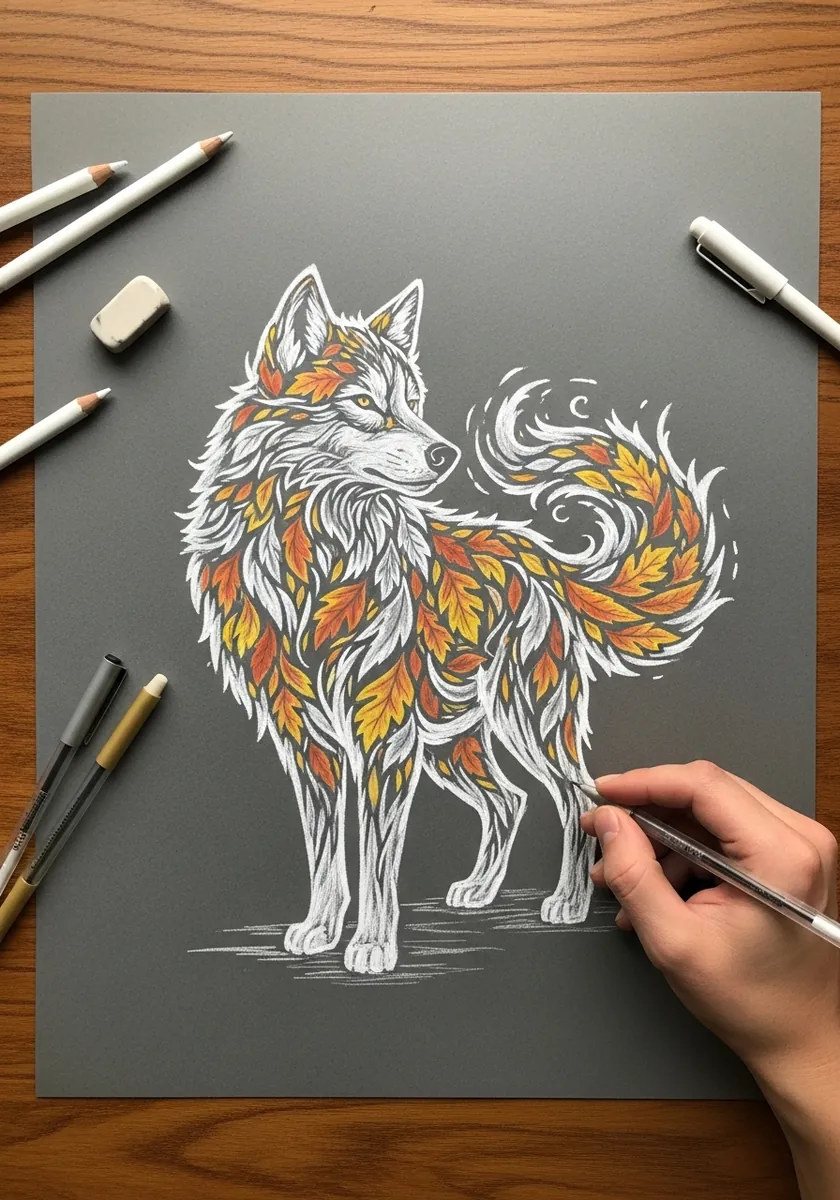
Toned paper lets you work in both directions at once. Add white for the lit fur and orange only where the flame element takes over, letting the gray paper itself remain as every mid tone across the animal’s body. Spray a light fixative between layers, or the earlier pastel will lift as you work over it.
17. Rain Storm Forest in Ink Wash
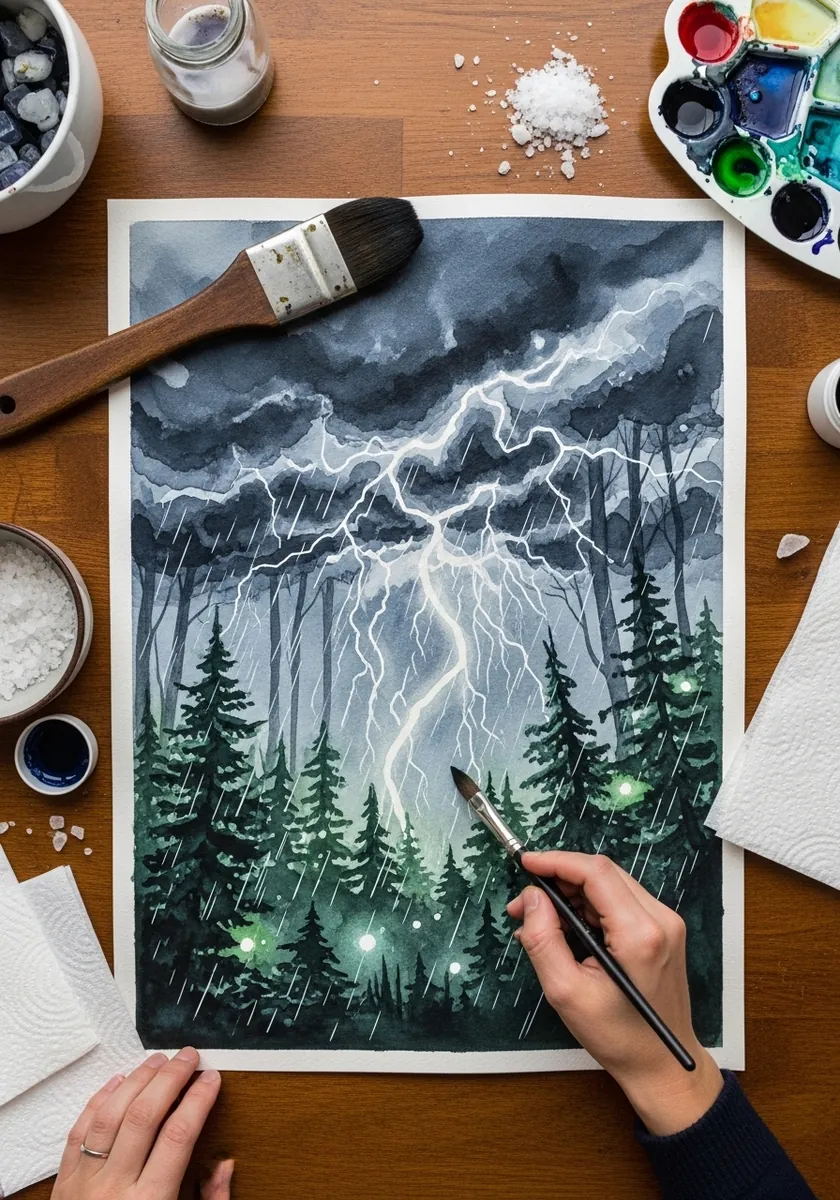
Rain reads as diagonal parallel lines, never vertical. Rule them all at the same angle across the entire page including the trees, and scratch a few back out with a blade so the brightest streaks catch the light. Keep the lightning bolt off center, because a strike down the middle splits the composition in half.
18. Fairy Glade in Light Sepia Line
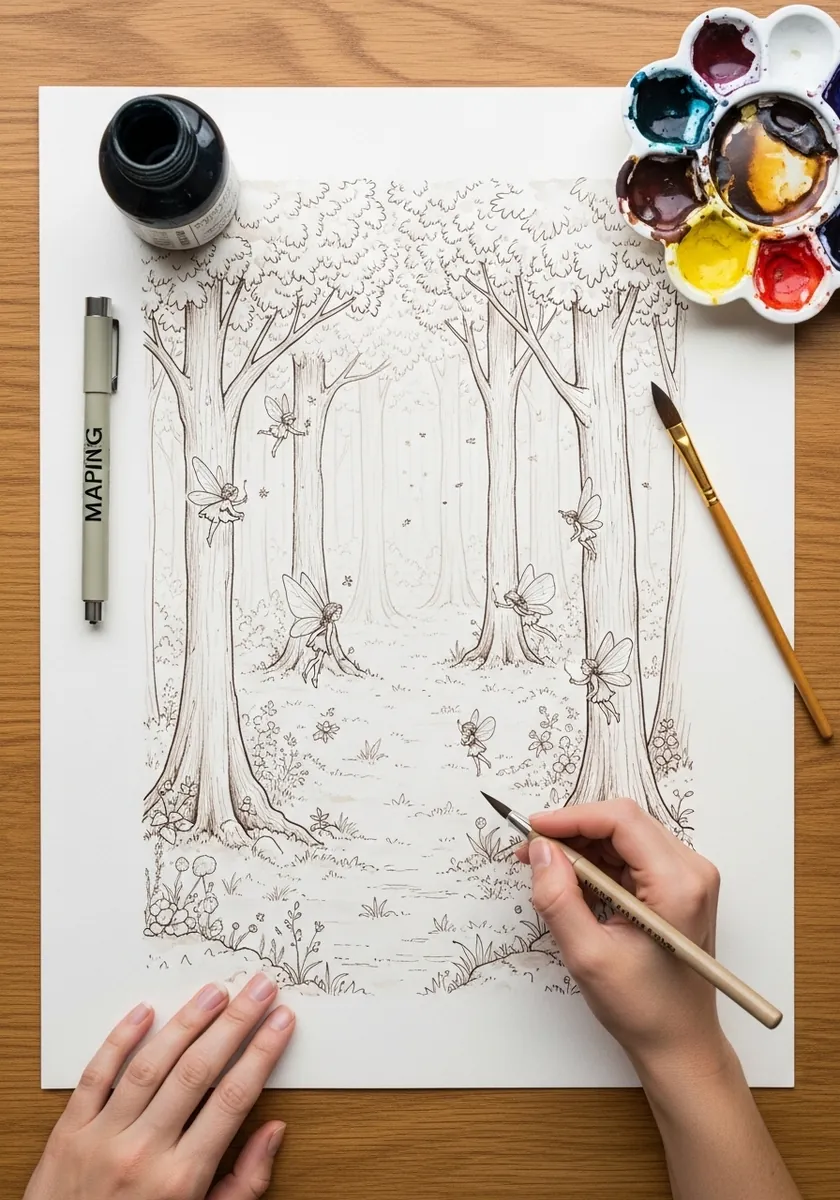
Keeping everything in light line is harder than it looks. With no tone, depth has to come from line density alone, so draw the far trees with fewer and finer strokes and let the nearest trunk carry twice the detail.
19. Blue Portal Between Two Trees
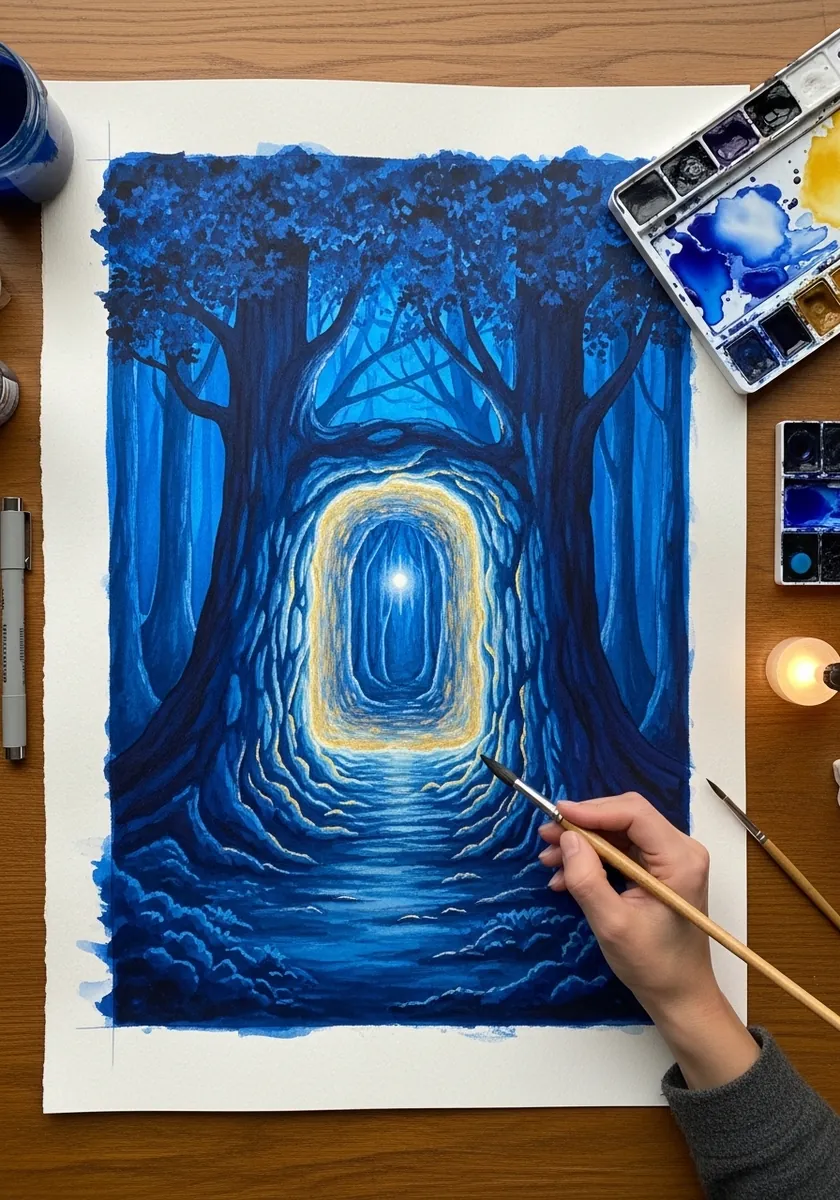
An archway between trunks is a strong composition. Let both trees lean slightly inward so they frame the opening, and build the glow in two passes with the sharpest edge in the entire picture right at the portal’s center. Paint the portal glow before the surrounding trees, as it is far easier to darken toward a light.
20. Autumn Lantern Grove in Oil Pastel
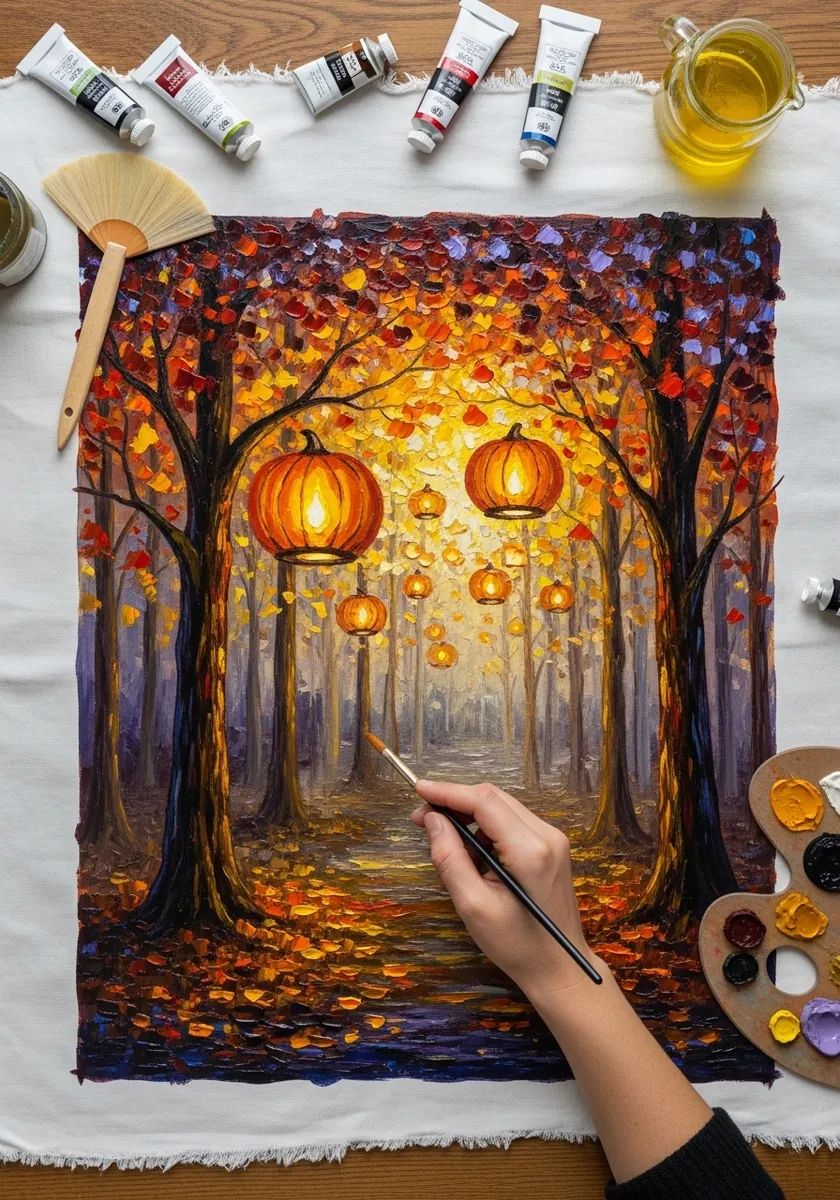
Oil pastel cannot make fine detail, which suits a scene this warm. Block the leaf canopy in short overlapping strokes of four related oranges, then press the lanterns in with heavier pressure so they sit physically above the surface. Work on a toned ground rather than white, which stops the oranges looking chalky against bare paper.
21. Bamboo Grove with Stone Lanterns
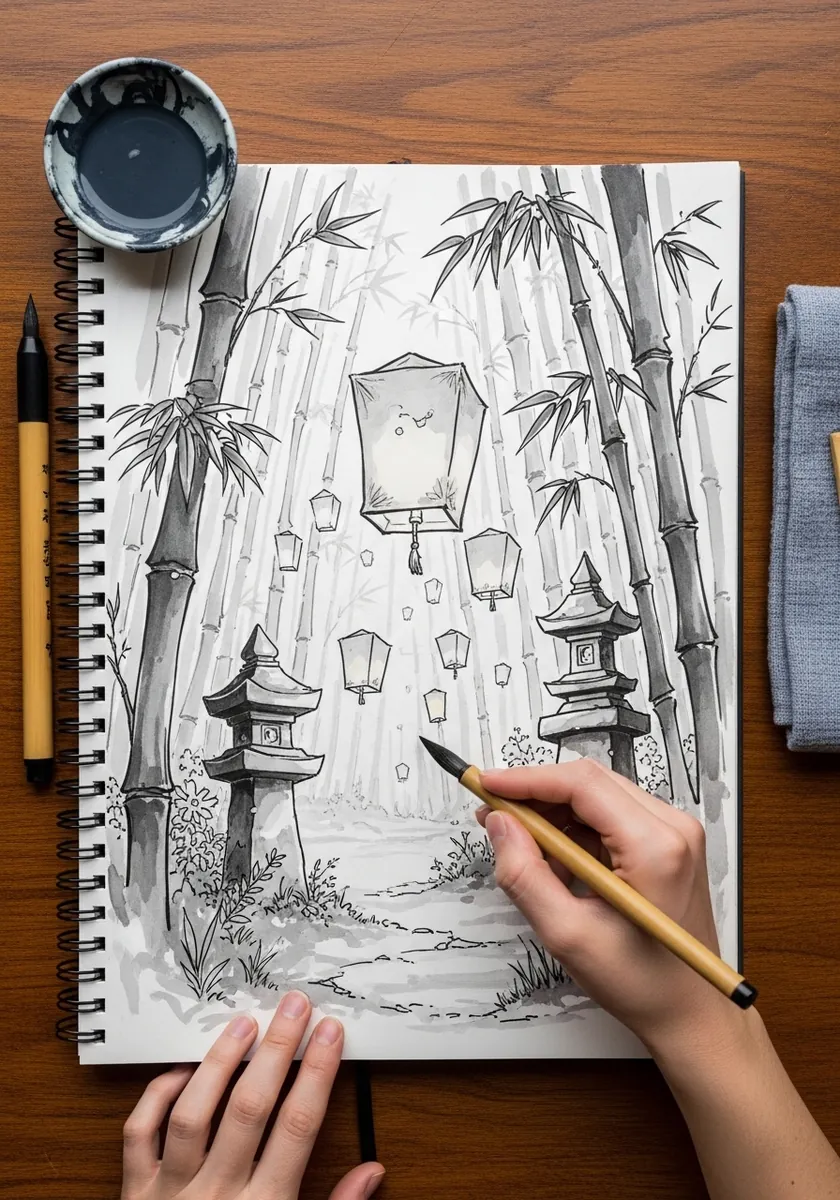
Bamboo grows in straight segmented poles, so draw each one as a series of short vertical strokes with a visible node between them. The leaves come last, in quick angled clusters that break the strict verticality. Leave the paper untouched between the poles, since bamboo groves are mostly light and air.
22. Crystal Cave Passage in Watercolor
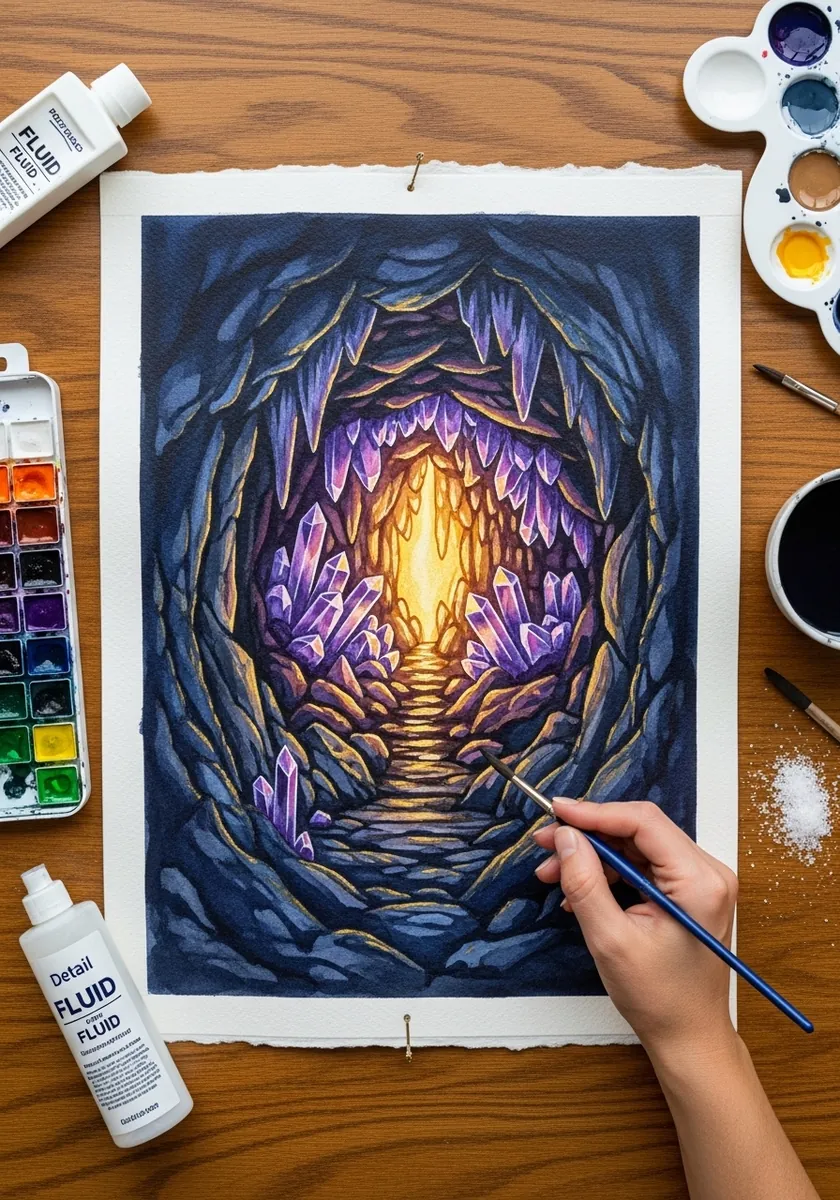
A tunnel is a series of receding frames. Draw four or five rock arches getting smaller toward the center, each one darker than the last, and place the light behind them all so it silhouettes every arch in turn. Add a few crystals breaking the arch outlines, which stops the tunnel feeling too neatly geometric.
23. Ancient Faces in Bold Ink Line
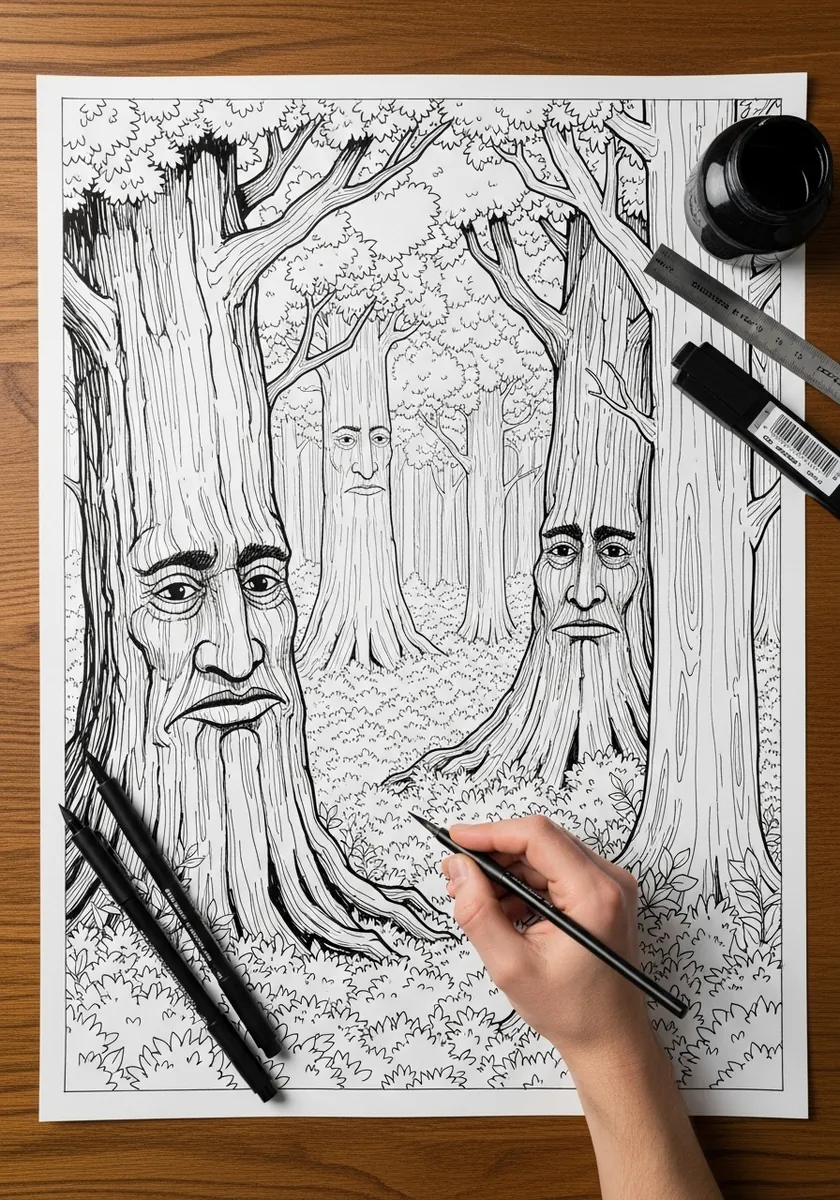
Line weight builds depth without any tone. Ink the nearest trunk in the heaviest line, step the middle trees down a weight, and draw the furthest in the finest nib you own. Three weights create three clear planes. Roots spreading outward at the base do more for a tree’s age than any amount of bark detail.
24. Moonlit Blossom Forest in Pink
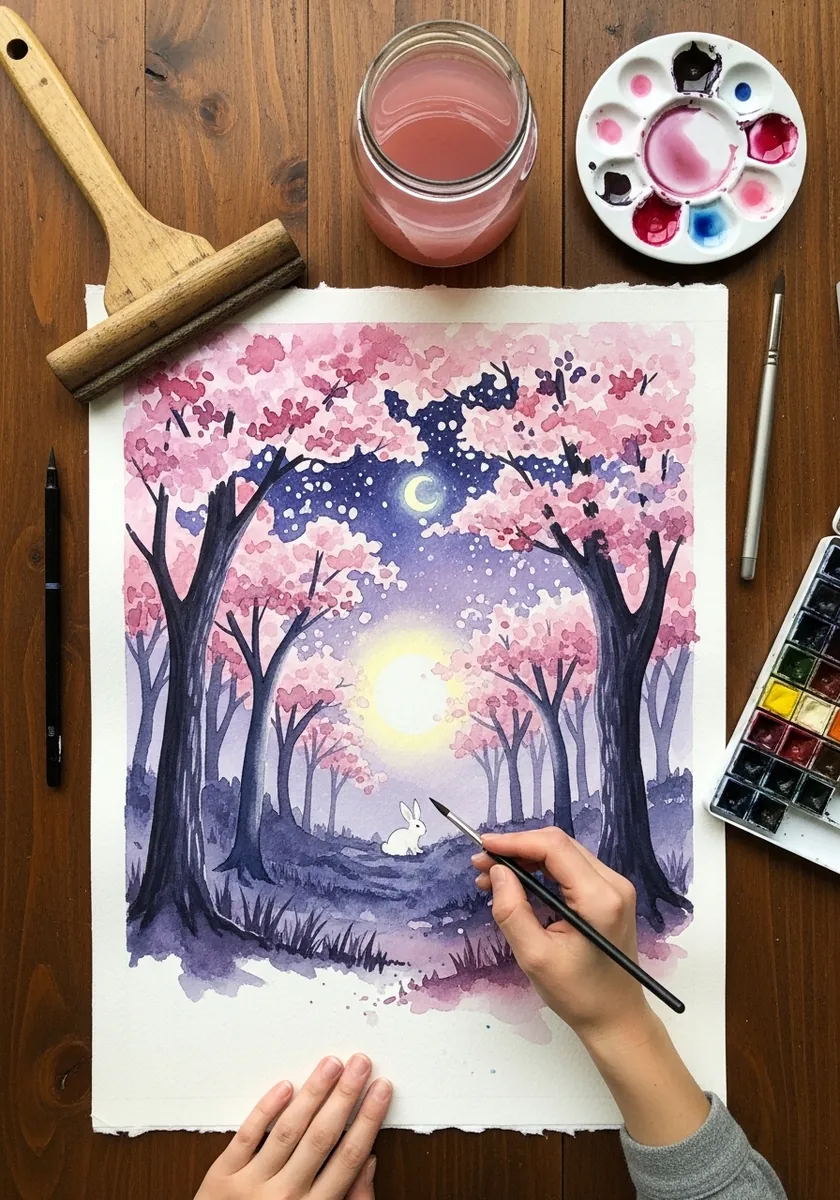
Night does not have to mean dark. Keep the value range light overall but shift everything cool, then let the moon and the rabbit be the only genuinely white things on the page so they read as lit. Paint the sky before the blossom, as pink over dry blue stays clean while the reverse goes muddy.
25. Mossy Temple Ruin in Green
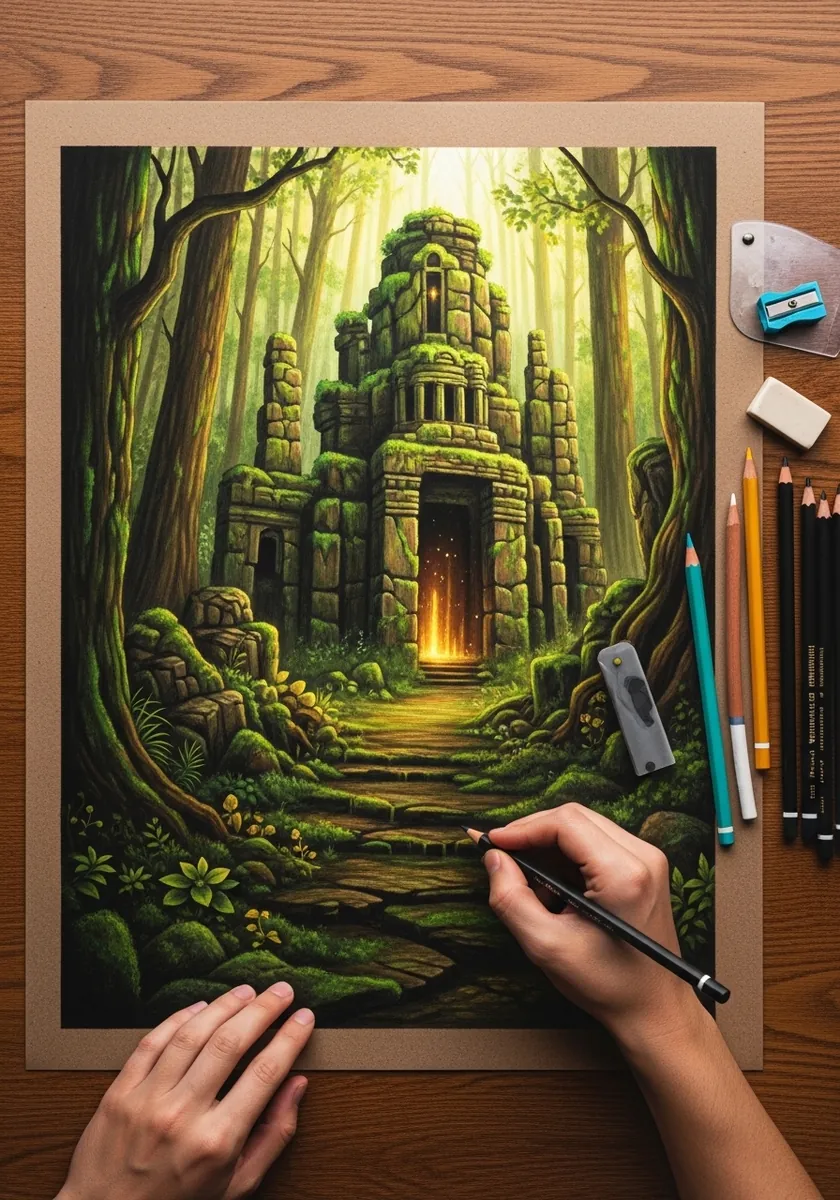
Overgrowth needs a logic. Moss grows heaviest where water collects, so weight it along the tops of horizontal stones and in every corner, leaving vertical faces comparatively clear. That pattern is what makes the ruin believable. Angle the stone courses slightly out of true, because perfectly level masonry never looks ancient.
26. Blue Pine Forest in Soft Pastel
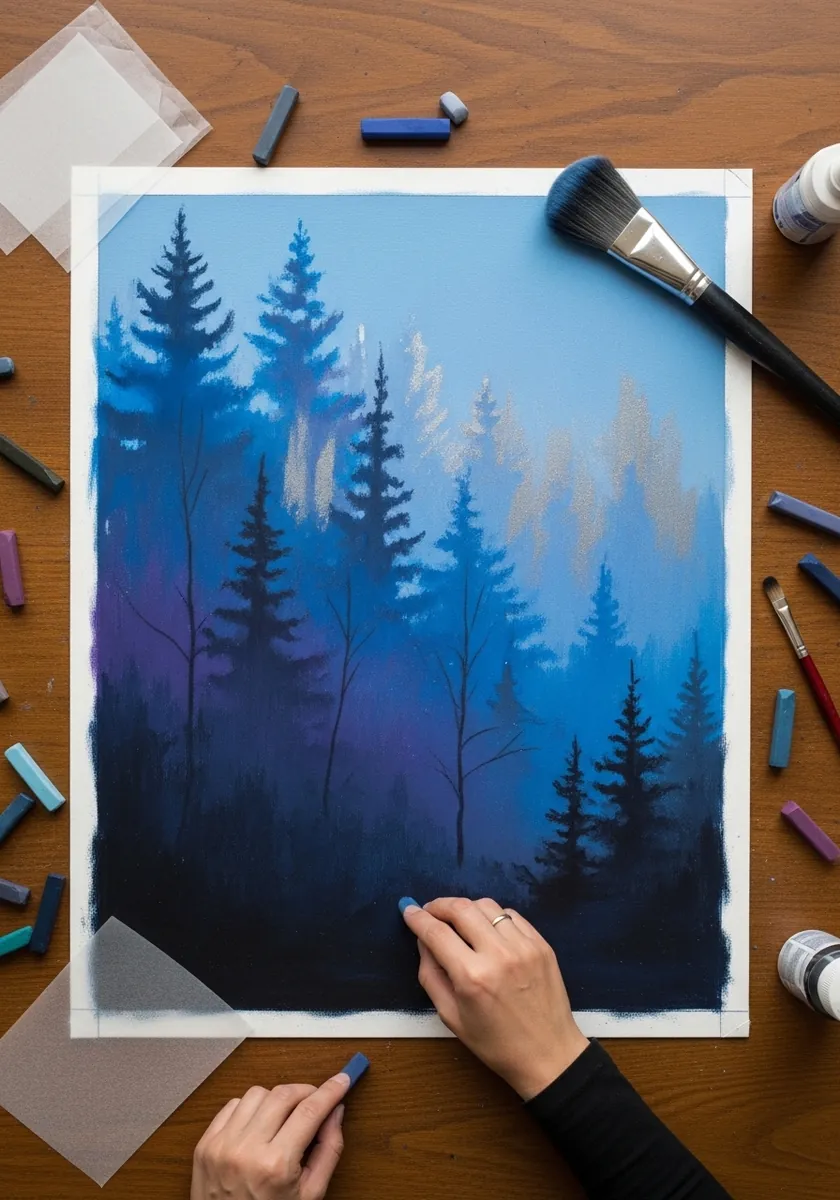
This is the three-layer rule at its purest. Three bands of pines, each lighter and lower in contrast than the one in front, with nothing else in the picture at all. If the depth reads here, it will read anywhere.
27. Canopy Looking Straight Up
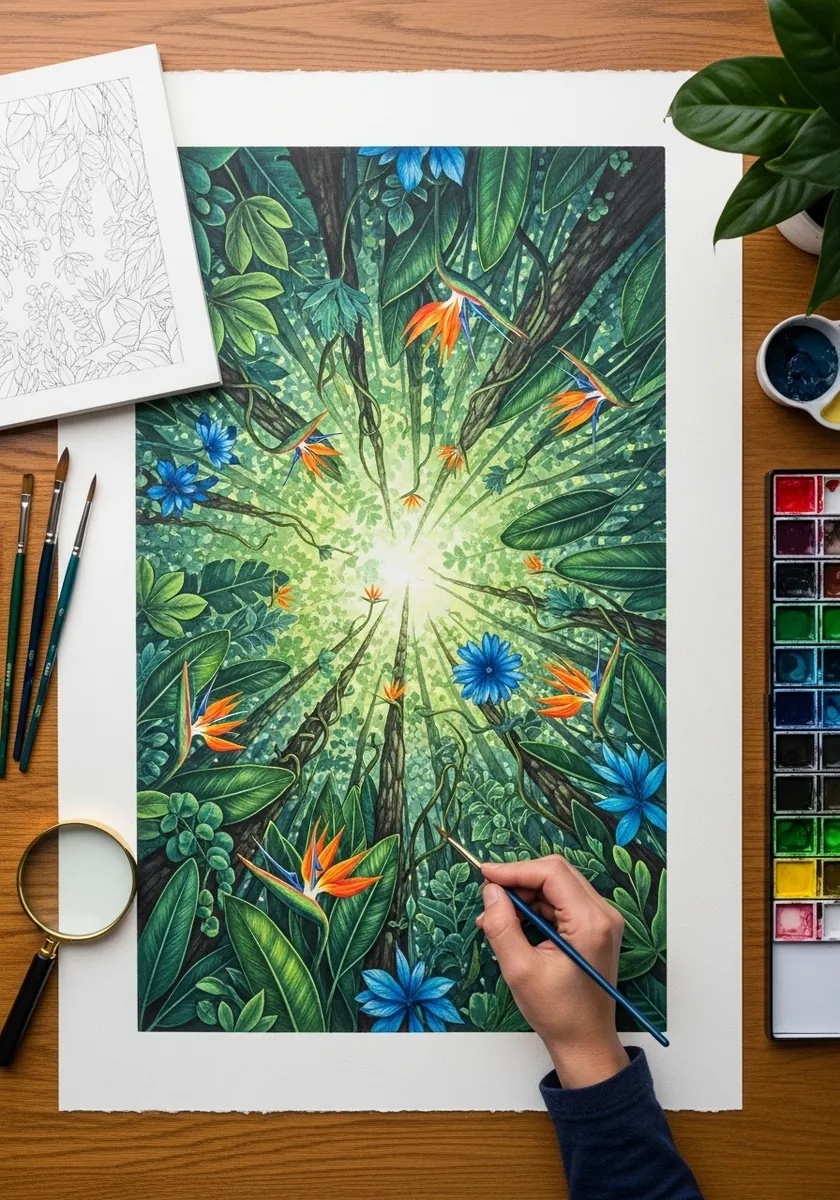
Looking up puts the vanishing point overhead. Every trunk and branch converges toward the bright center of the sky, so rule those lines before drawing a single leaf and keep the brightest point exactly at that convergence. Let a few leaves cross in front of the brightest area, which stops the center burning out flat.
28. Candy Carnival Forest in Bright Line
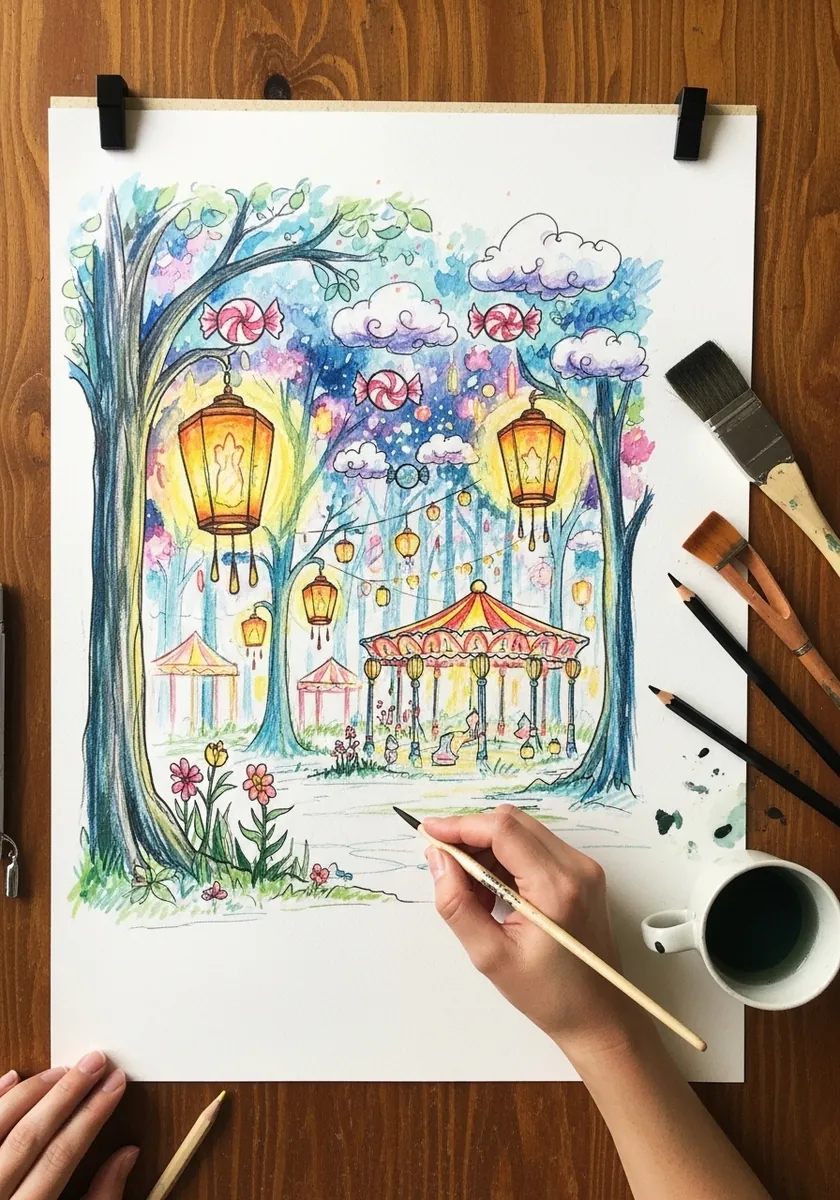
Whimsy still needs structure underneath. Keep the trees and carousel in correct perspective, then let the impossible elements float freely above them. Breaking every rule at once produces confusion rather than charm. Limit yourself to five colors even here, since unlimited color is what usually kills a whimsical scene. Restraint keeps it readable.
29. Snowy Owl Waterfall in Blue
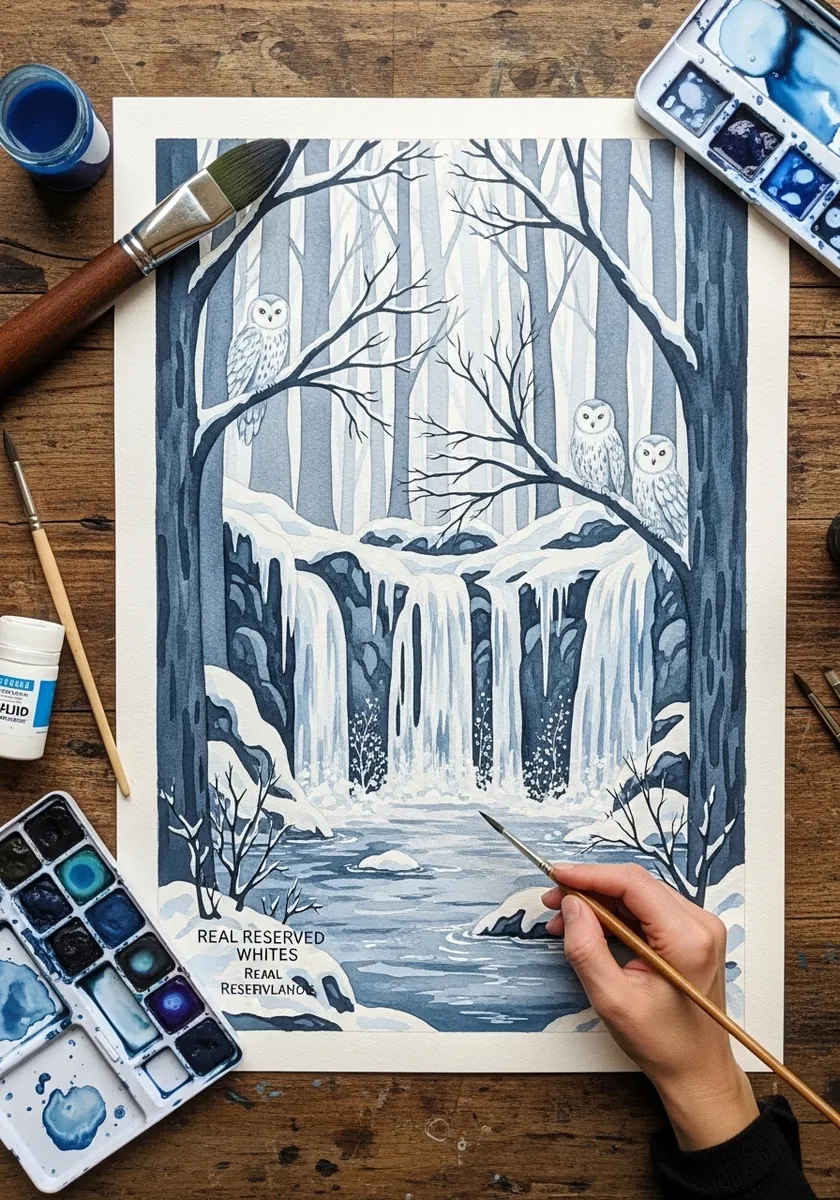
Reserved whites are doing everything here. Mask the waterfall and both owls before laying any wash, paint the whole scene around them, and only remove the masking at the very end so those areas stay pure paper. Rub the masking off with clean dry fingers only, as an eraser will tear damp watercolor paper.
30. Isometric Hedge Maze in Green
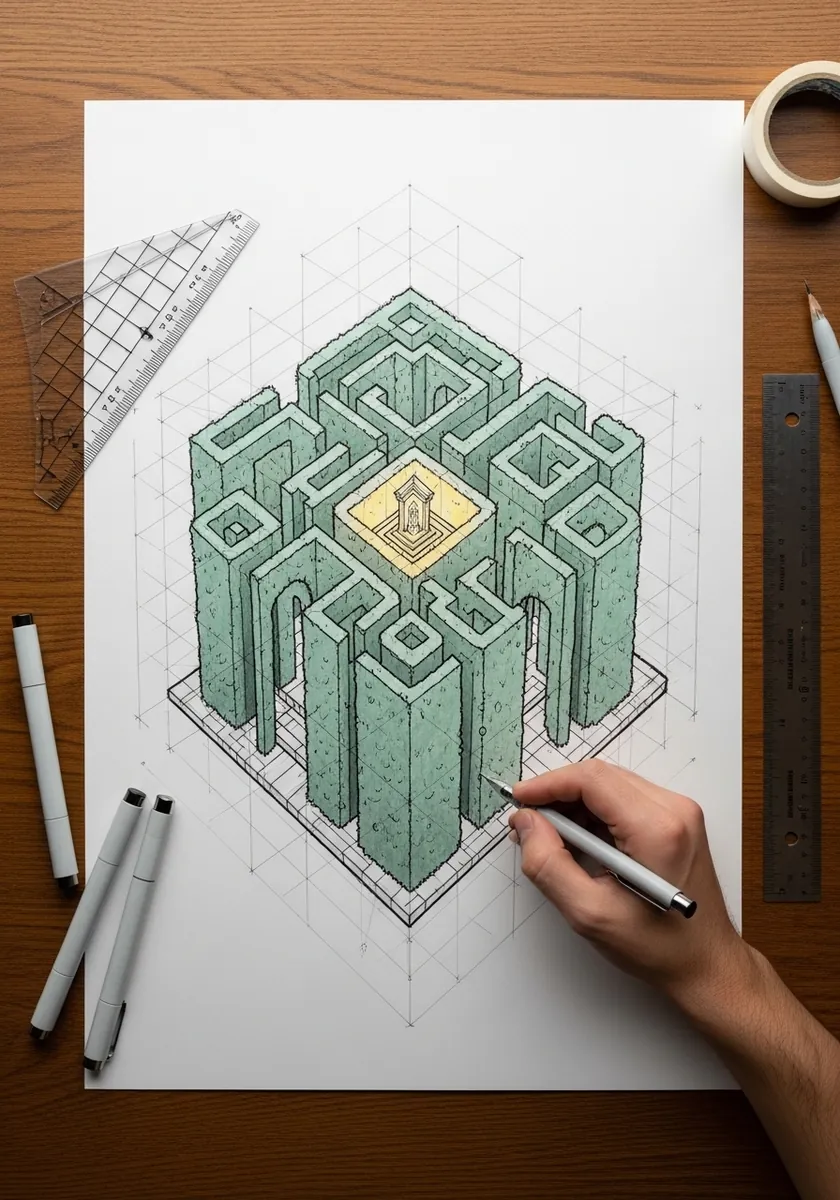
Isometric drawing is ruler work rather than freehand. Rule the grid first, extrude every hedge wall by exactly the same height, and shade one side of each wall consistently so the whole maze shares a single light direction. Draw the glowing center last, once every wall is placed, so its light falls on finished geometry.
Frequently Asked Questions
How do you make a forest look magical in a drawing?
Add one impossible light source and build proper depth behind it. Three value layers of trees, palest at the back and darkest at the front, plus a single glow the viewer travels toward. The realism of the depth is what makes the impossible light convincing.
How do you create depth in a forest scene?
Layer the trees in three distinct value bands and never let two bands share a tone. Make the trunks smaller and closer together as they recede, drop the contrast toward the back, and let a soft mist wash separate each layer from the next.
How do you paint a glow effect?
Two passes. Lay a wide, very soft halo of pale warm color first and let it fade outward into the surrounding dark. Then add a small intense core inside it, with the sharpest edge in the whole picture right at the center.
What colors work best for an enchanted forest?
Pick a dominant cool, usually blue-green or violet, and reserve warm yellows and oranges exclusively for the light source. That single restriction does more for atmosphere than any amount of detail, because the eye reads the warm note as magic.
What is the easiest magical forest scene for a beginner?
A misty wood with fireflies. The mist hides any weak drawing, the trees are simple vertical shapes, and the fireflies are small dots of reserved white. It teaches layering and glow without demanding accurate perspective.
References and Further Reading