Acrylic dries darker than it looks wet, because the binder is milky when wet and clear when dry. Mix every color slightly lighter than you want and test a swatch on scrap before committing it to the canvas.
Key takeaways
- ["Acrylic dries noticeably darker, so mix lighter and dry-test a swatch first", "Paint the background first and the flowers over it, since acrylic is fully opaque", "Work dark to light and save every highlight for the very last pass", "Make each petal one loaded stroke, pressed at the base and lifted at the tip", "Use a stay-wet palette or retarder, because acrylic skins over within minutes"]
One property of acrylic catches almost everybody, and it has nothing to do with brushwork. Acrylic dries darker than it looks wet. The binder is a milky white emulsion while wet and dries completely clear, so every color loses that lightening effect as the water leaves it.
The practical fix is a habit rather than a technique. Mix slightly lighter than you want, put a swatch on scrap paper and dry it with a hairdryer before committing anything to the canvas. Matching a color wet and finding it a value darker an hour later is the single most common acrylic frustration.
The second rule reverses everything watercolor taught you. Acrylic is opaque, so you never reserve white and never cut around petals. Paint the background first, let it dry hard, then lay the flowers straight over it. Working the other way leaves a ragged halo around every bloom.
The forty ideas below cover impasto, flat graphic, dark moody florals, botanical studies and full garden scenes. For the same subjects in transparent media, see watercolor flower art ideas, and for one bloom in depth, watercolor sunflower ideas.
Compiled by the GS Art Zone editorial team. Last updated August 2026. Each idea is paired with the specific step that produces the effect, so you can go from the reference straight to paper.
What You Need Before You Start
- A stay-wet palette or a retarder medium, since acrylic skins over faster than you think
- Two whites, a titanium for opacity and a zinc for glazing, because they behave differently
- A palette knife, which does more for petal texture than any brush
- Synthetic brushes rather than natural hair, as acrylic ruins sable very quickly
- A spray bottle to keep the palette workable through a long session
1. Sunflower Bouquet on Canvas
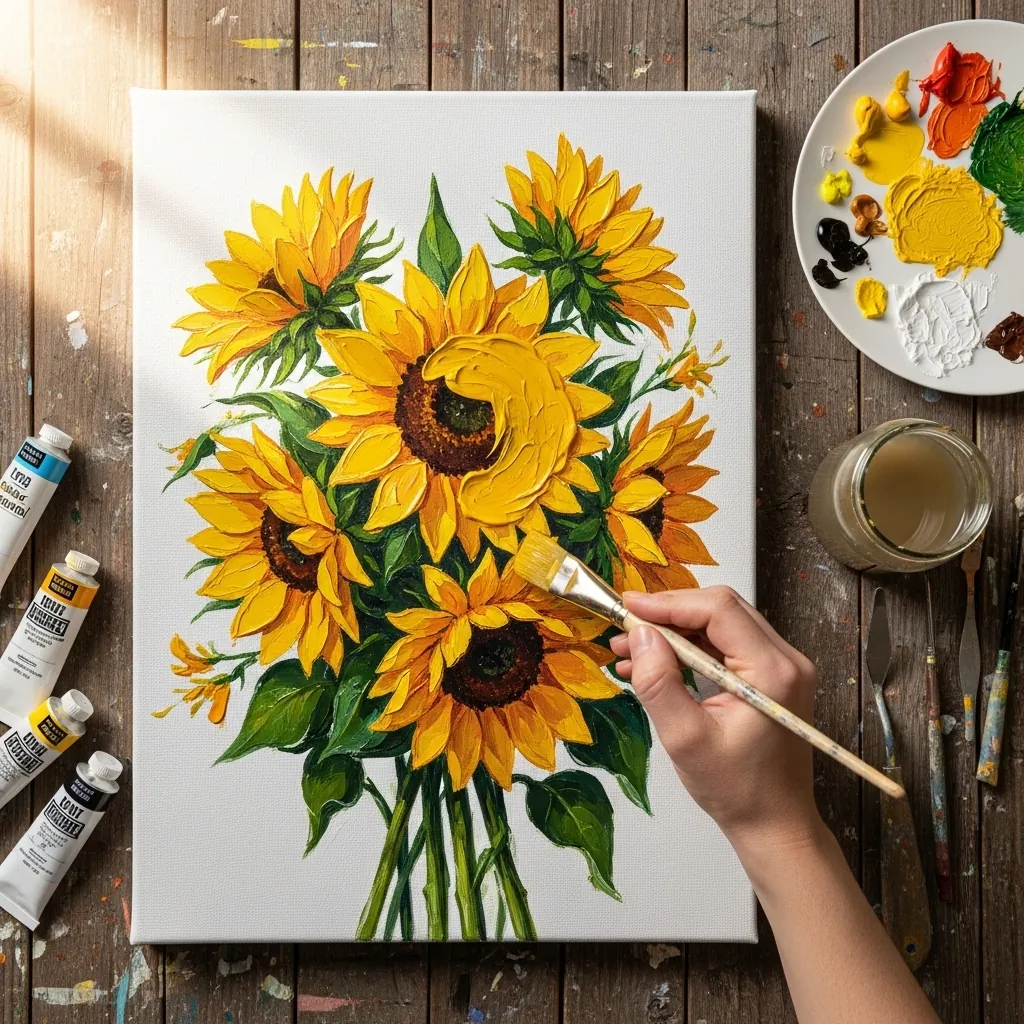
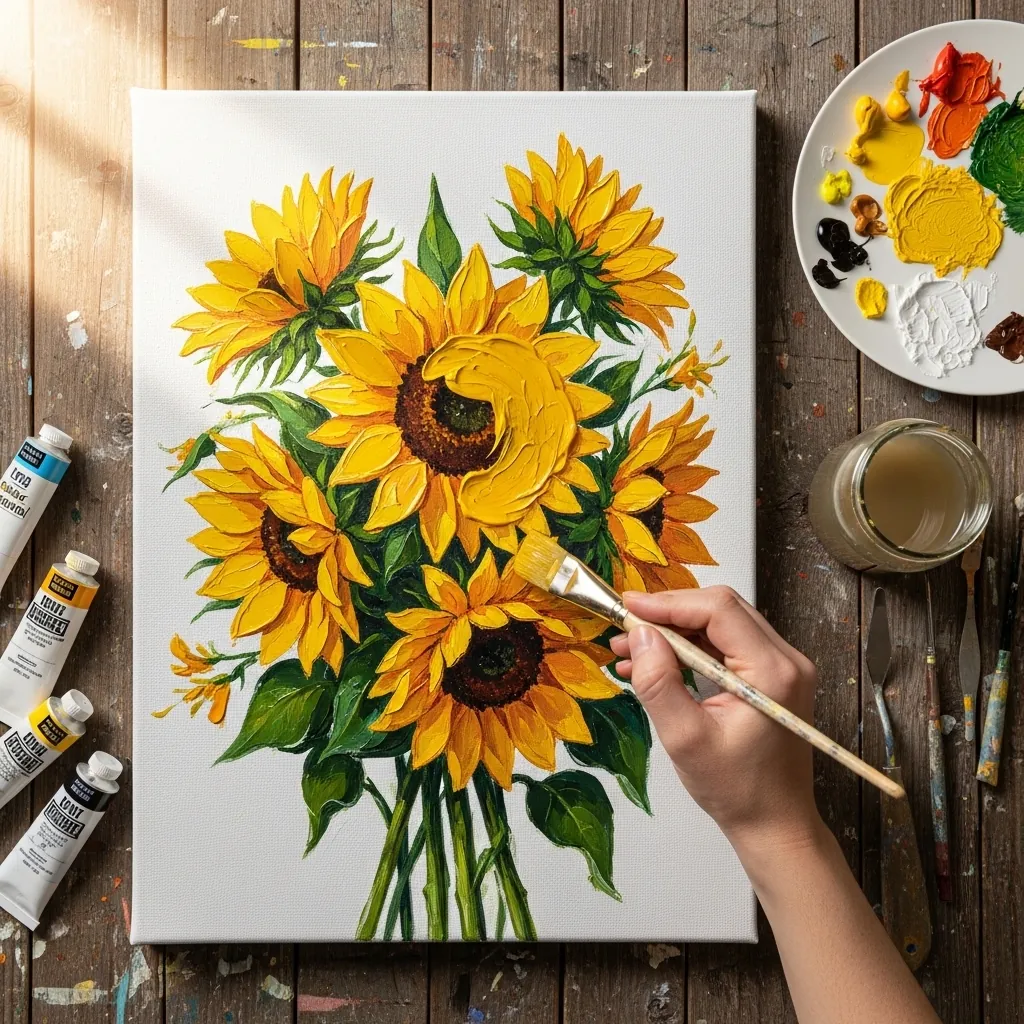
Sunflowers are the ideal first acrylic flower because the petals are simple and the center is complex. Paint the background first, block every petal as one loaded stroke, then build the seed head last with short stabbing marks in three different browns.
2. Deep Burgundy Peonies
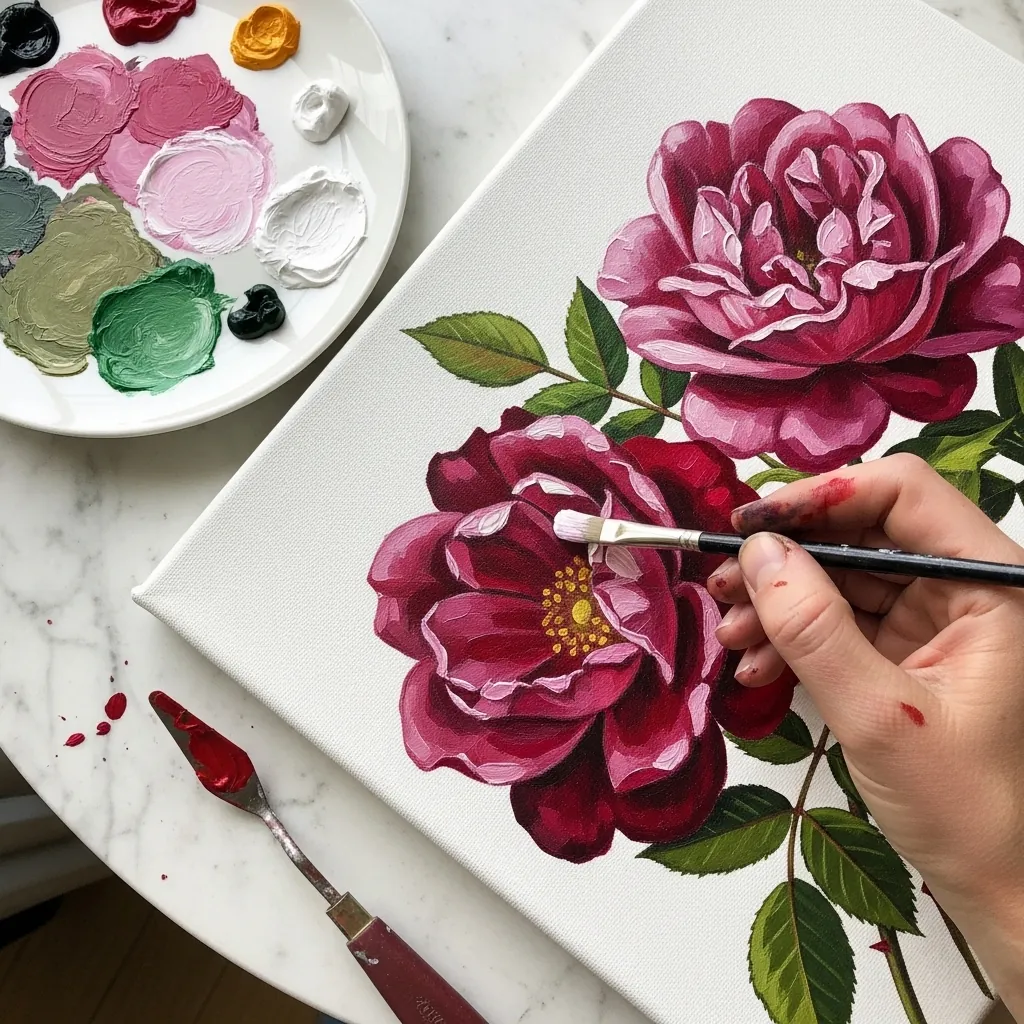
Peonies are made of many small overlapping petals, so build them in layers. Block the whole flower as one mid-value mass first, then cut the individual petals in with a lighter tone, working outward from the center. Keep the outermost petals slightly cooler so the warm center comes forward.
3. Lavender Field Landscape
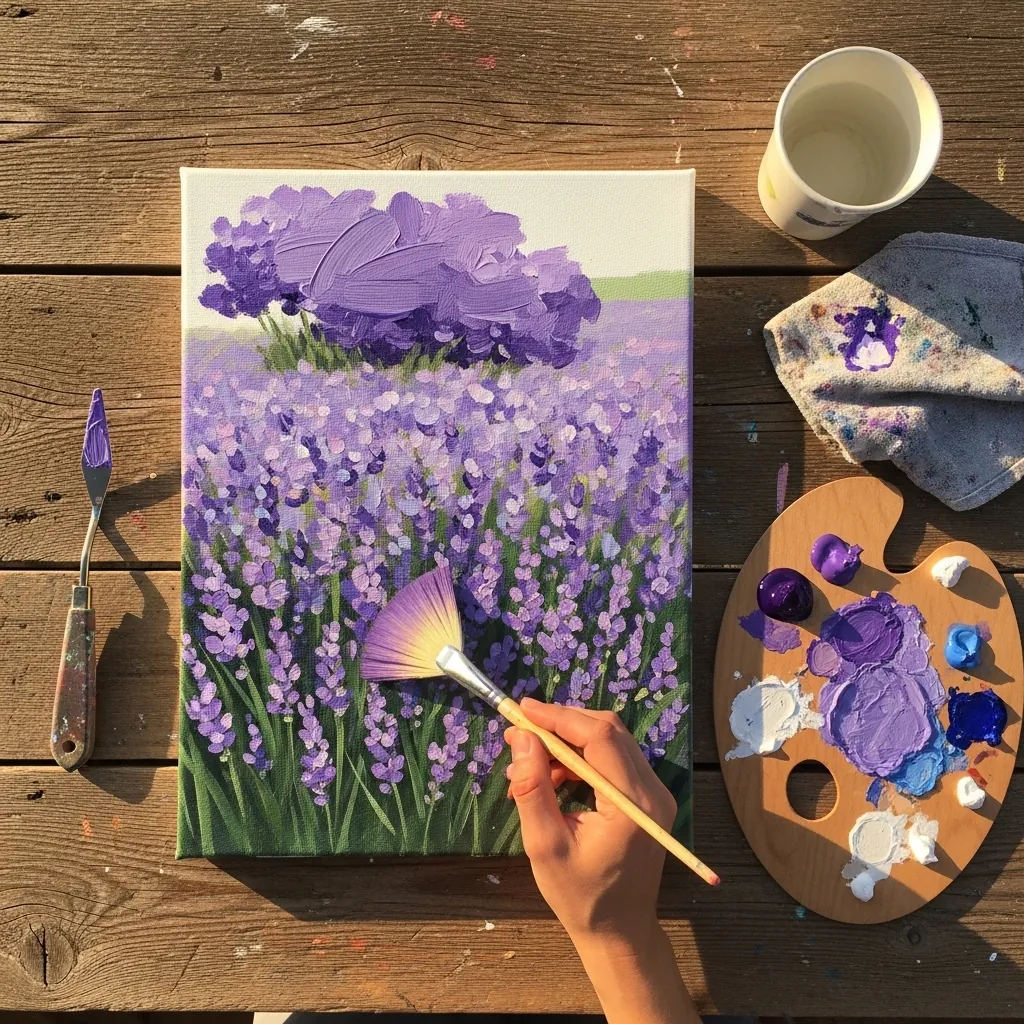
Rows of flowers need the perspective to do the work. Make the lavender rows converge toward a point behind the treeline, shrink the individual plants as they recede, and keep the far rows as one unbroken purple mass with no detail at all.
4. Pink and White Peony Close-Up
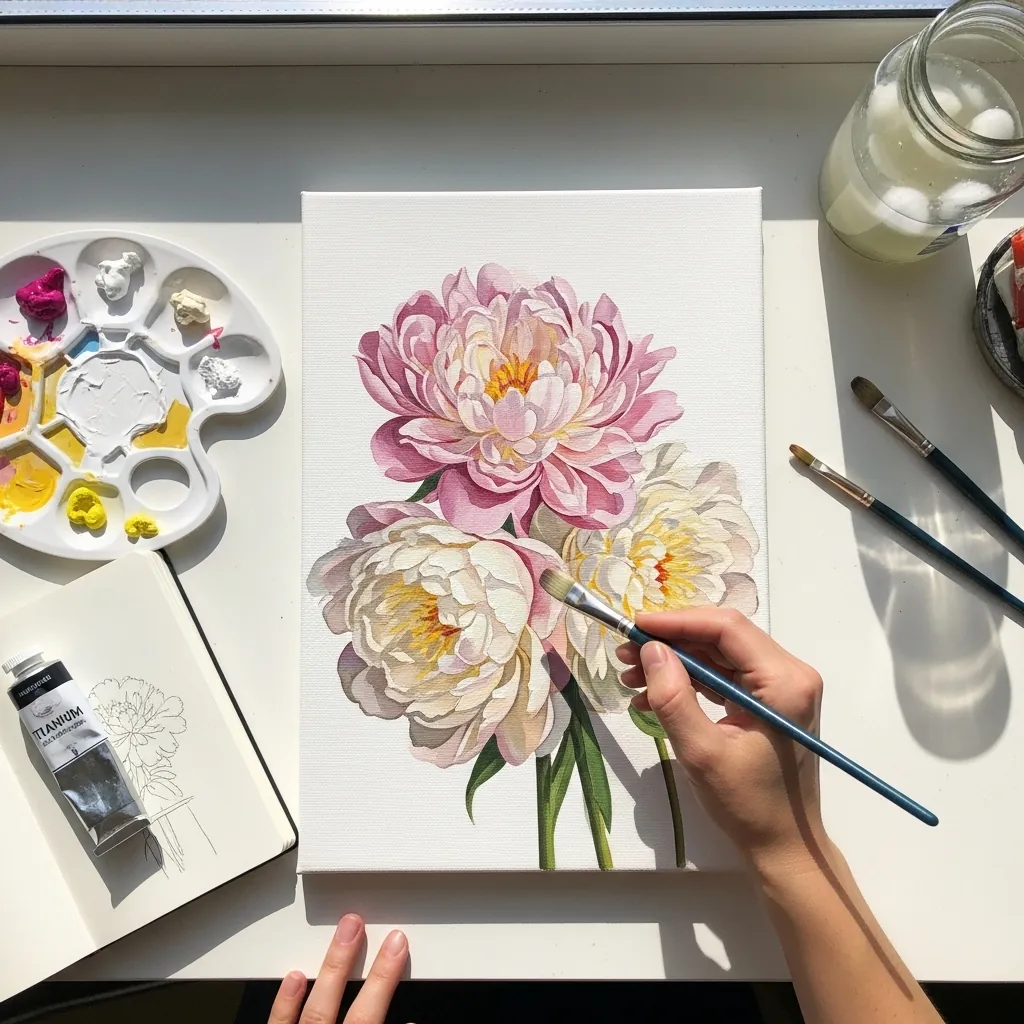
A single flower filling the canvas is a value exercise. Push the shadow between the innermost petals much darker than feels comfortable, keep the outer petal edges lightest, and let that range carry the whole picture. Turn the canvas as you work so every petal edge is drawn toward you.
5. Single Red Tulip
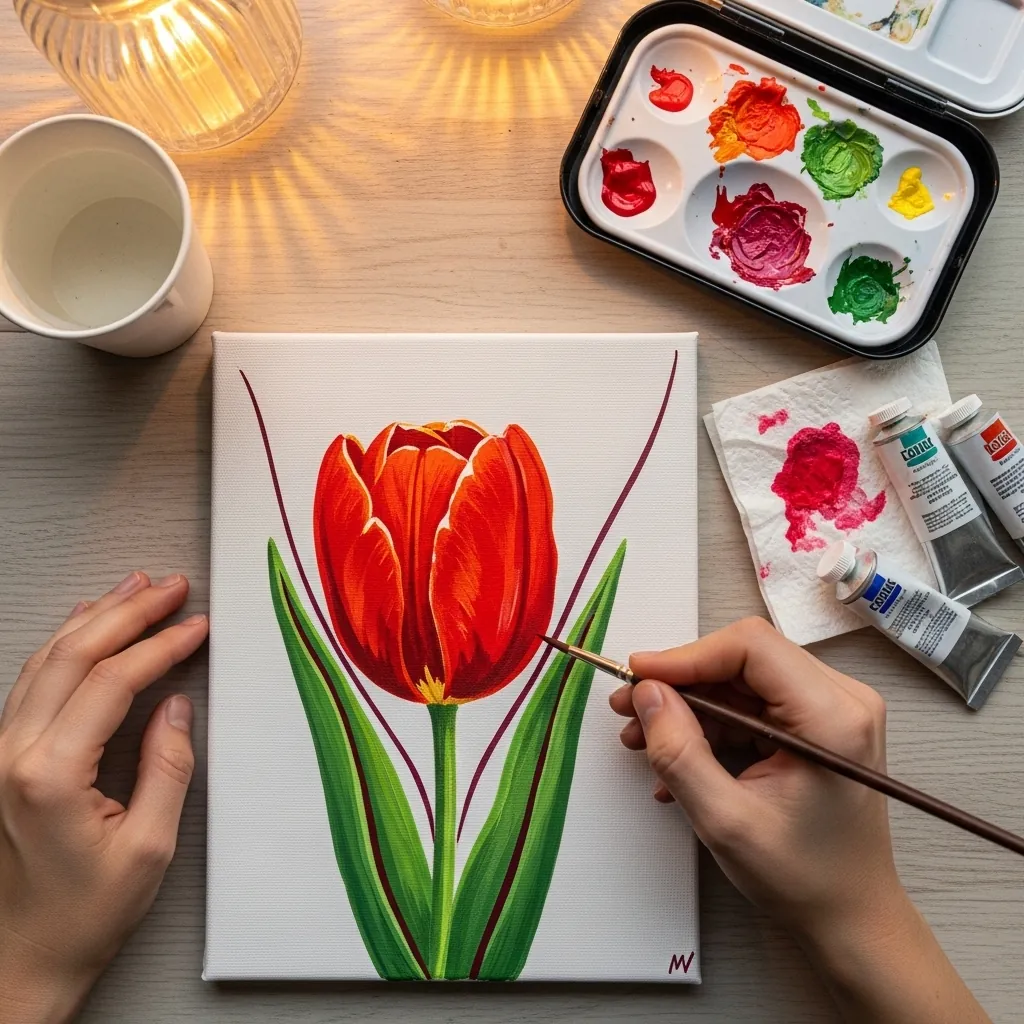
A tulip is three visible petals plus two behind, which is why it reads so cleanly. Keep the cup shape closed at the base and slightly open at the top, and let the leaf curve away from the stem in one long sweep.
6. White Daisies on Blue
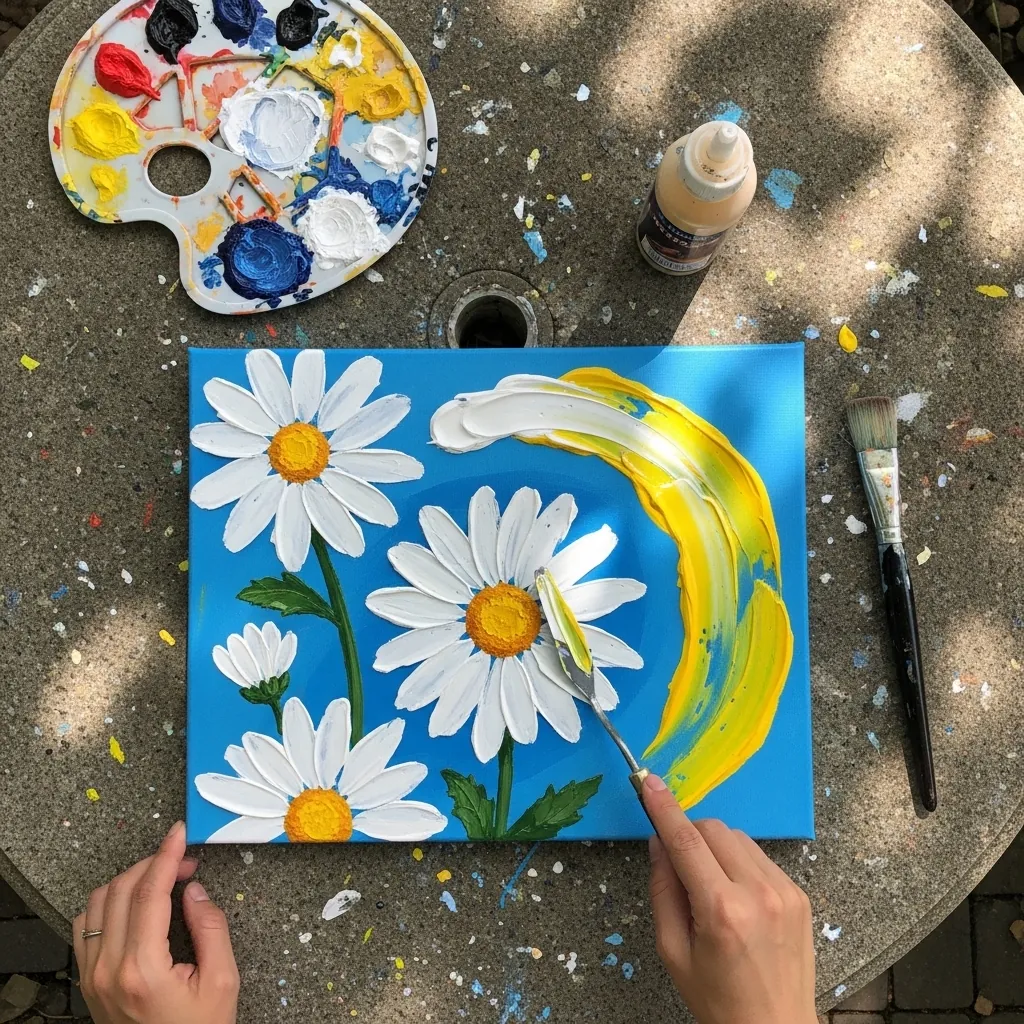
Painting white over a saturated blue is exactly what acrylic is for. Let the blue dry completely hard, then lay each petal in a single opaque stroke of titanium white, and add no shading at all so they stay graphic.
7. Hibiscus With Knife Stripe
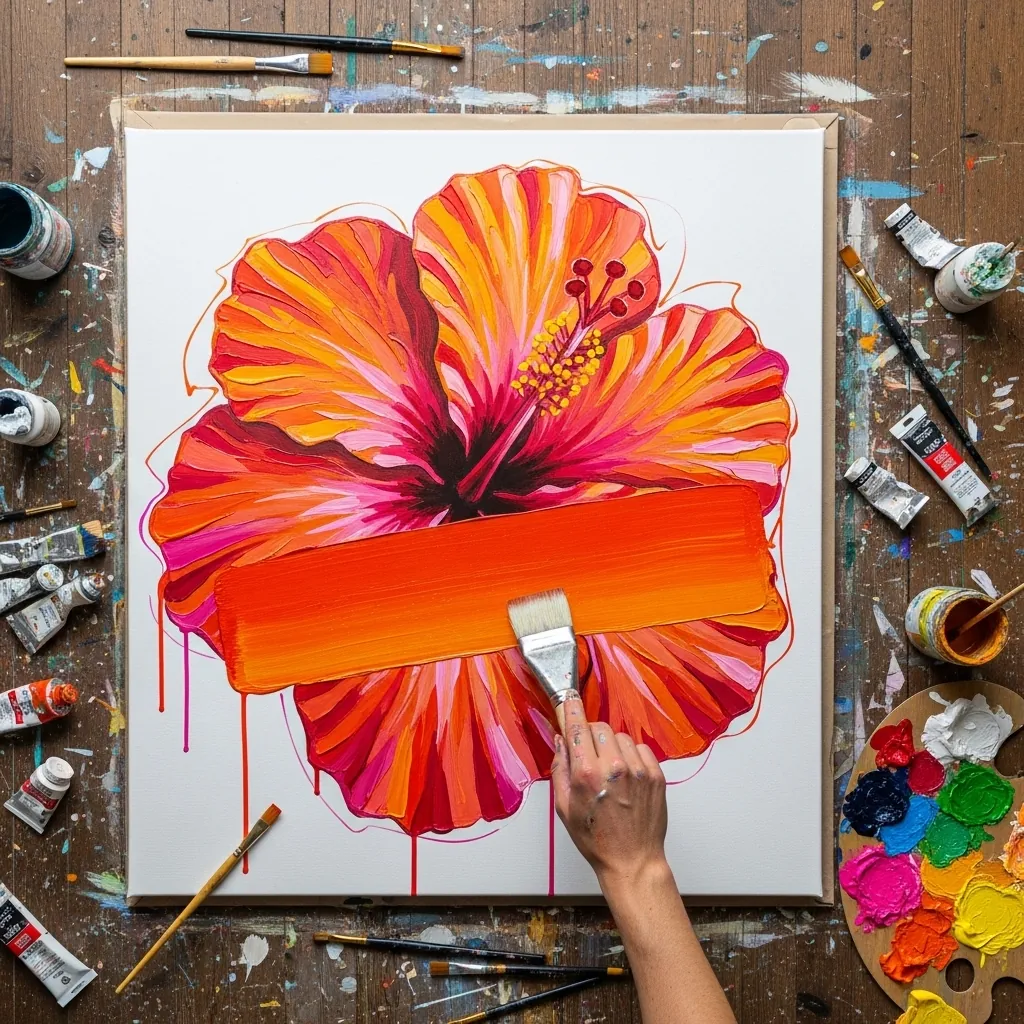
Dragging a knife of paint across a finished flower is a bold move that either works or ruins it. Let the flower dry fully, load the blade evenly, and pull once in a single unbroken movement without pressing hard enough to lift what is underneath.
8. White Hydrangea on Black
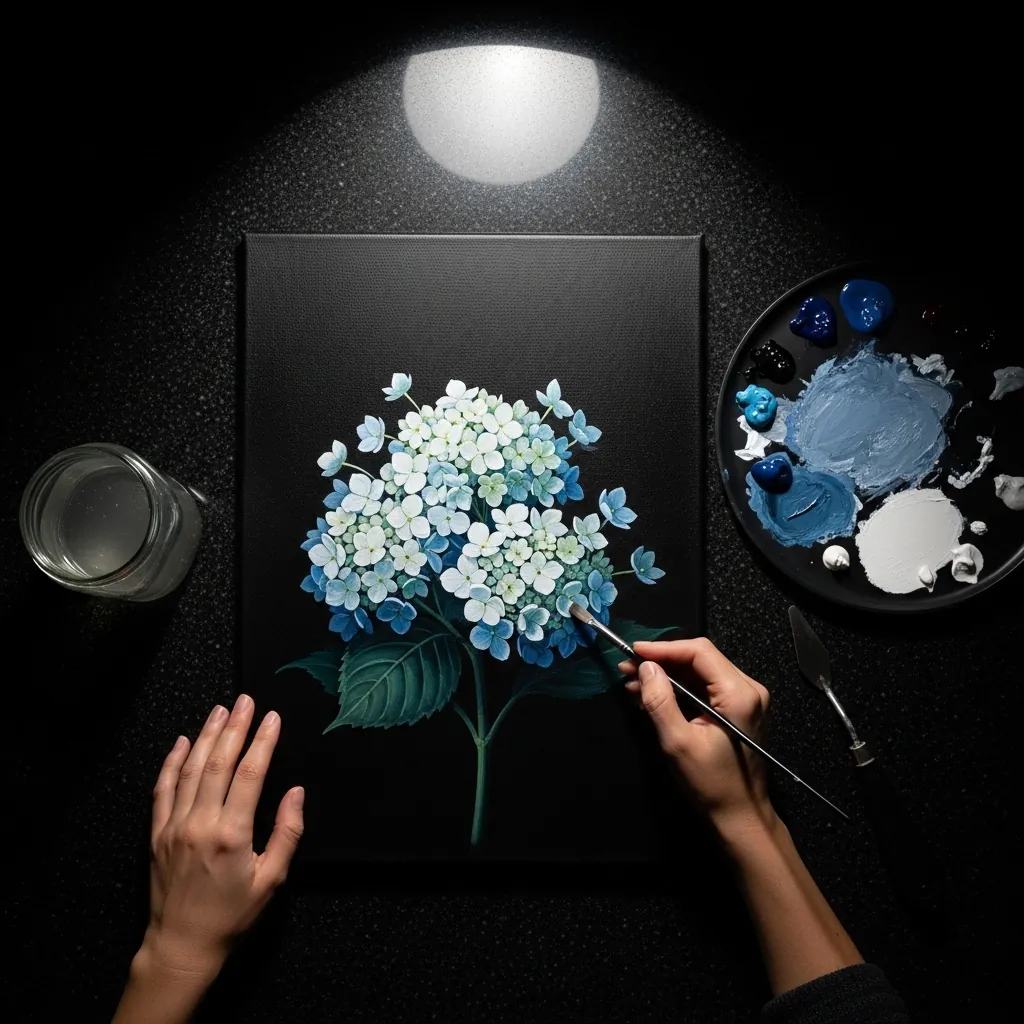
A black ground makes pale flowers glow. Paint the black first and let it cure, then build the hydrangea from many small four-petal florets, keeping the ones at the edge darker so the head stays domed rather than flat. Add three or four florets falling loose below the head to break the dome.
9. Mixed Cosmos Bouquet
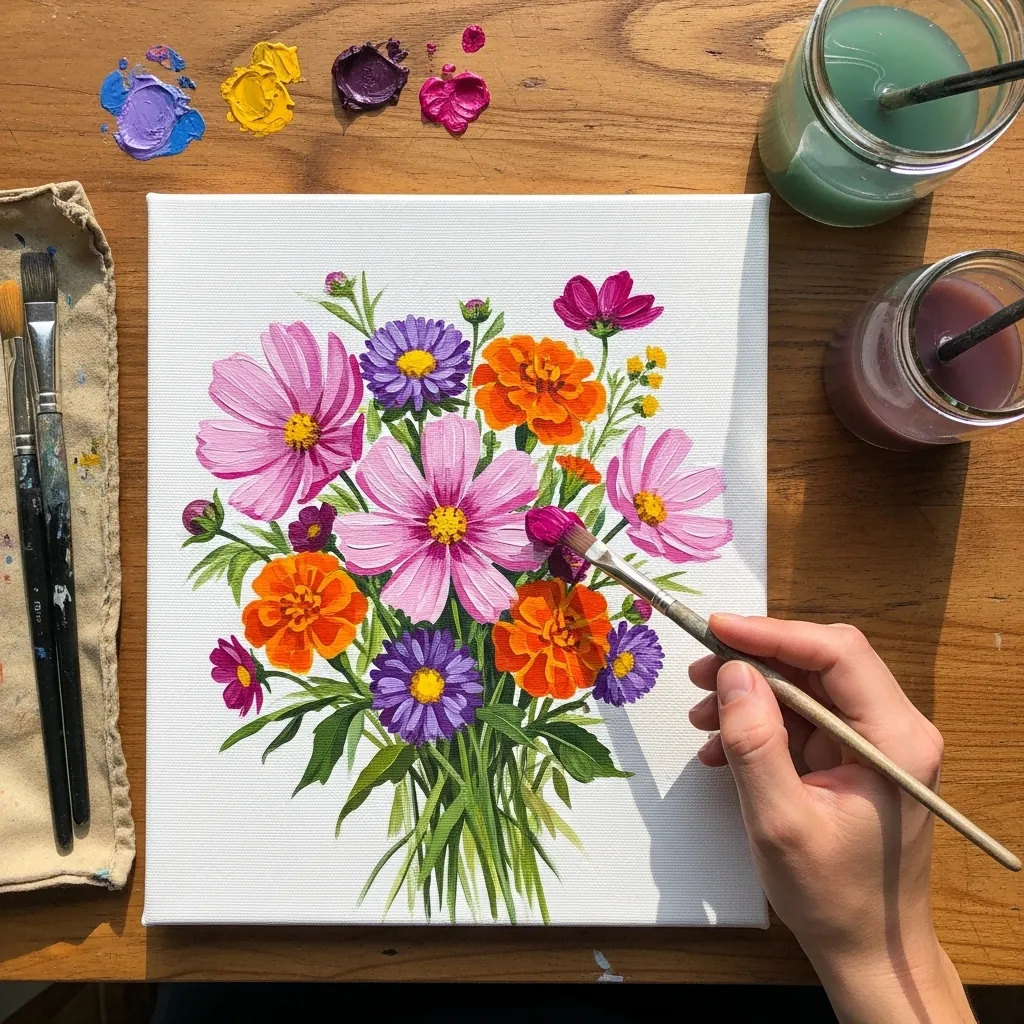
Cosmos have very fine feathery leaves, which is the whole character of the plant. Paint the flowers first as solid shapes, then add the foliage as thin flicked strokes with a rigger brush, letting them cross in front of some blooms.
10. Magnolia on a Round Canvas
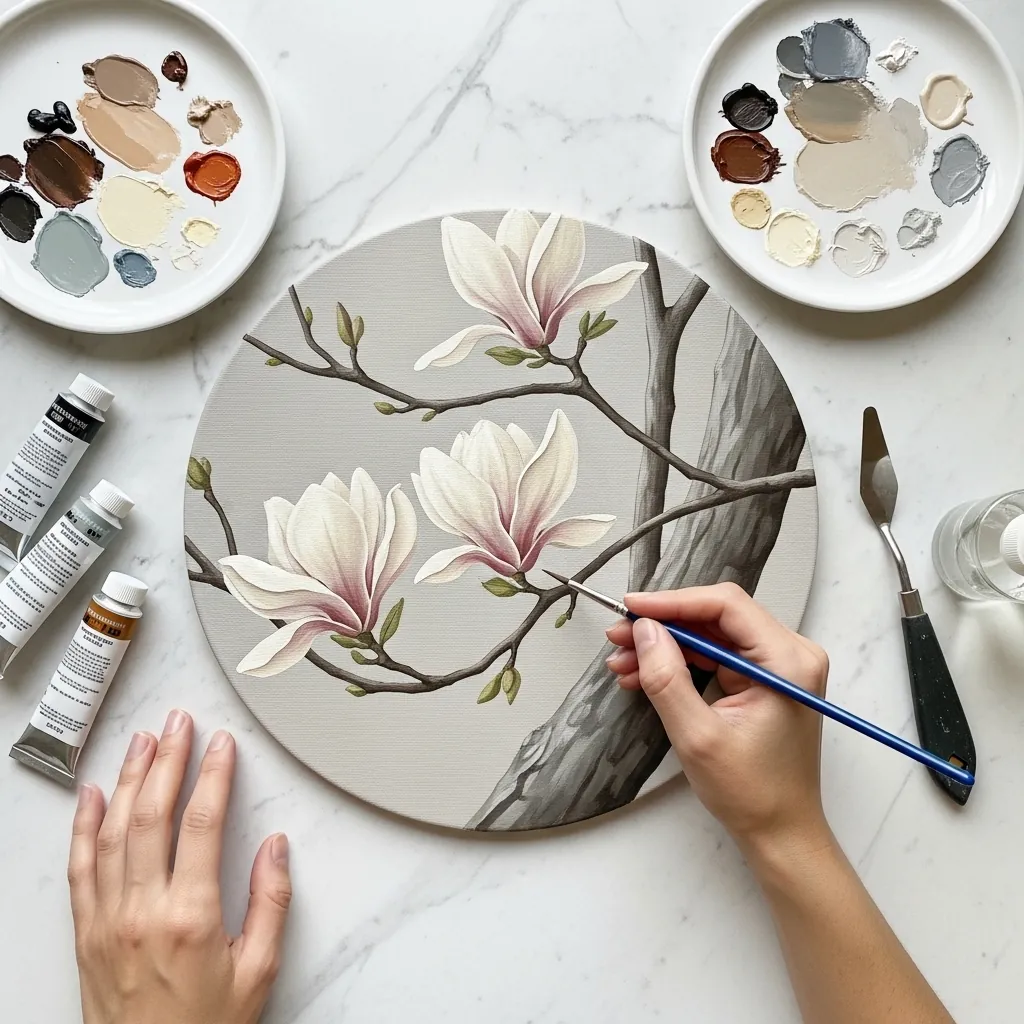
A circular format changes the composition entirely. Run the branch diagonally across the circle rather than horizontally, let it exit the edge at two points, and leave the largest empty area opposite the heaviest cluster of blooms. Paint the branch a full value darker than the blooms so it reads as structure.
11. Cherry Blossom on Gray
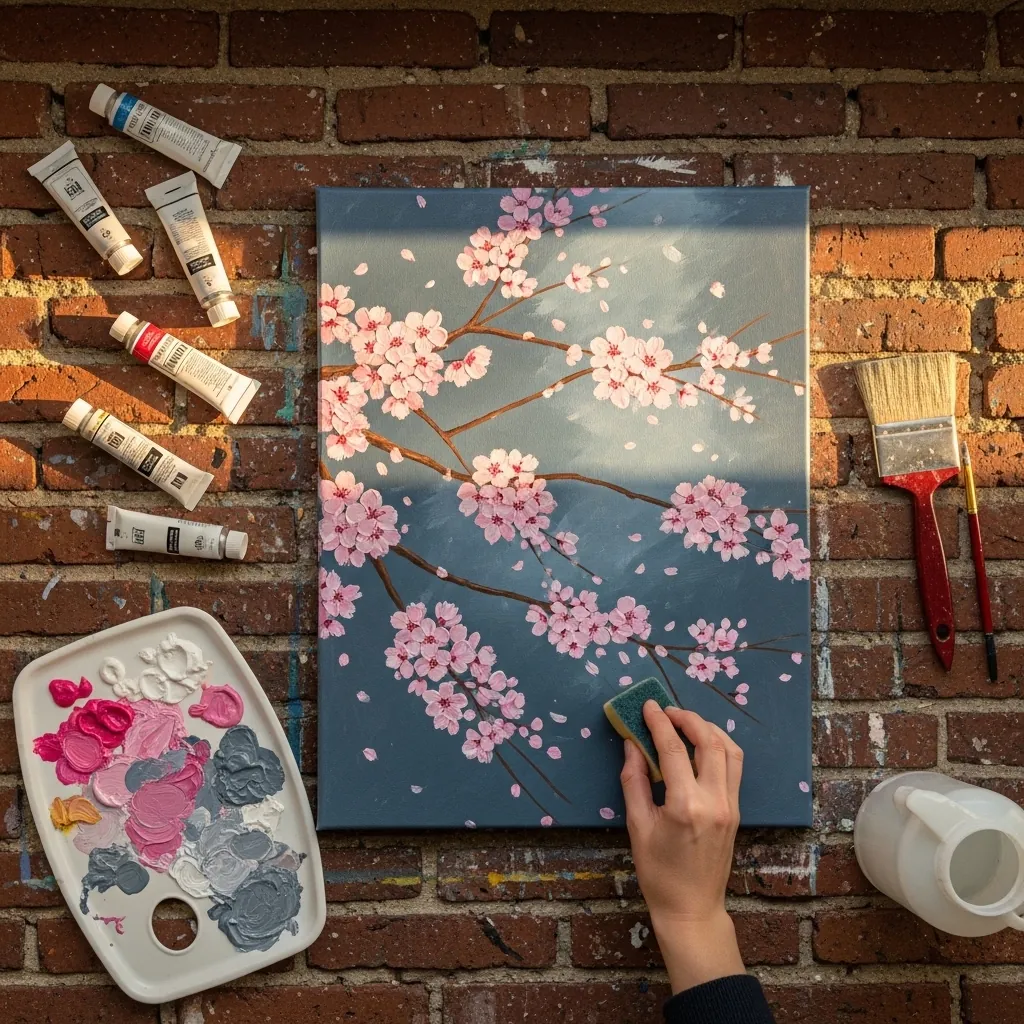
Blossom is dozens of tiny marks, so keep them varied. Vary the size and angle of each flower, cluster them tightly near the branch joints and thin them toward the tips, and let a few fall loose in the space below.
12. Bird of Paradise on Blue
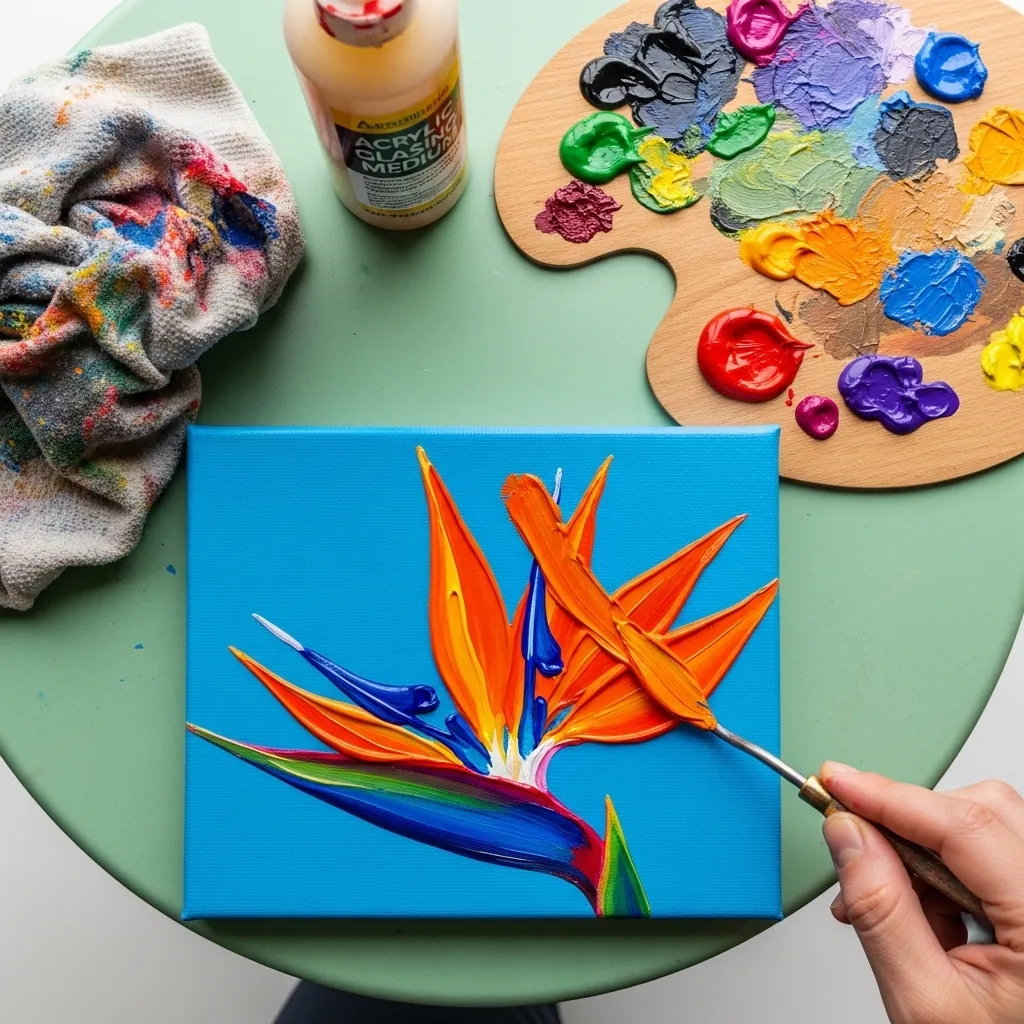
This flower is architectural rather than soft, so treat it that way. Keep every edge hard and every plane flat, let the orange sepals fan out at clearly different angles, and use no blending anywhere on the canvas. Rule the sepal edges with a straightedge if freehand keeps softening them.
13. Red Poppy With Drips
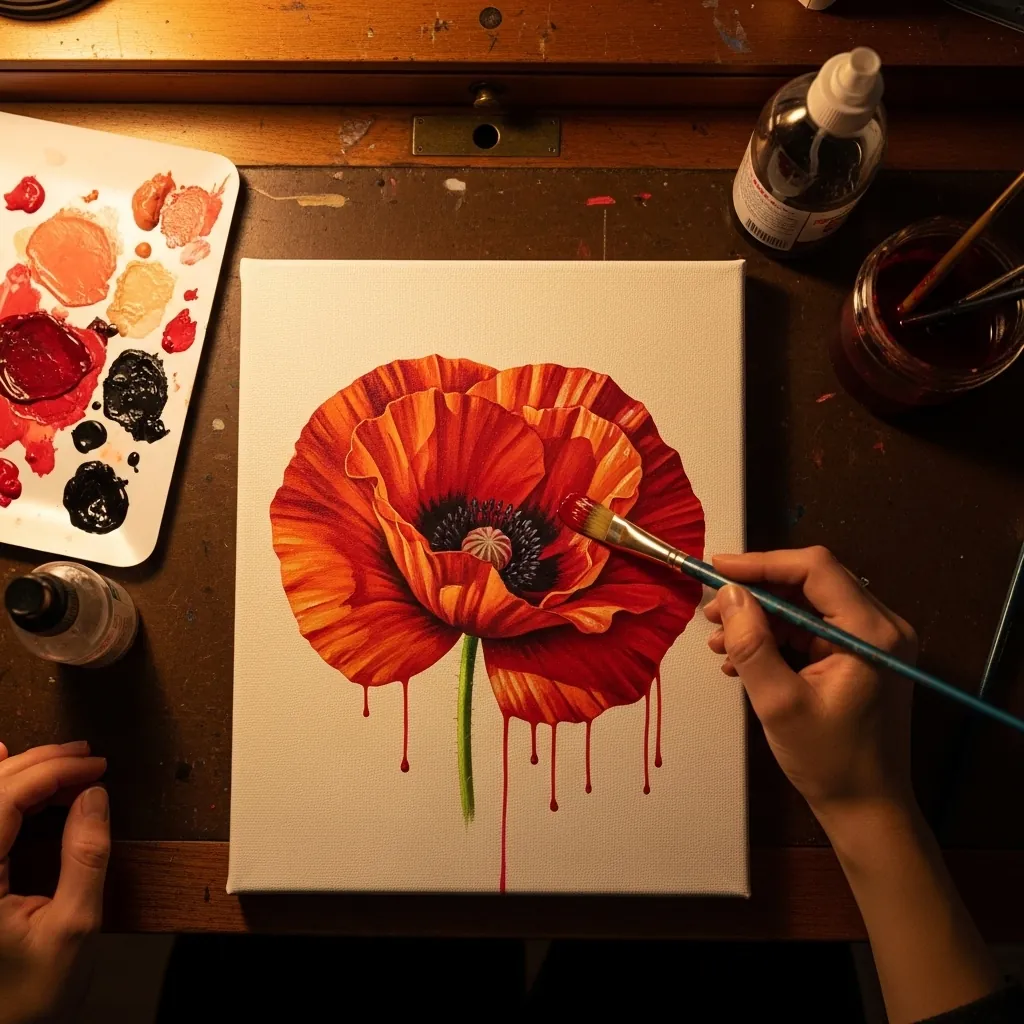
Acrylic drips need thinner paint than you would normally use. Dilute the red with medium rather than water so the film stays strong, apply it at the base of the flower, and stand the canvas upright for only as long as you want the runs to travel.
14. Sunflowers Filling the Canvas
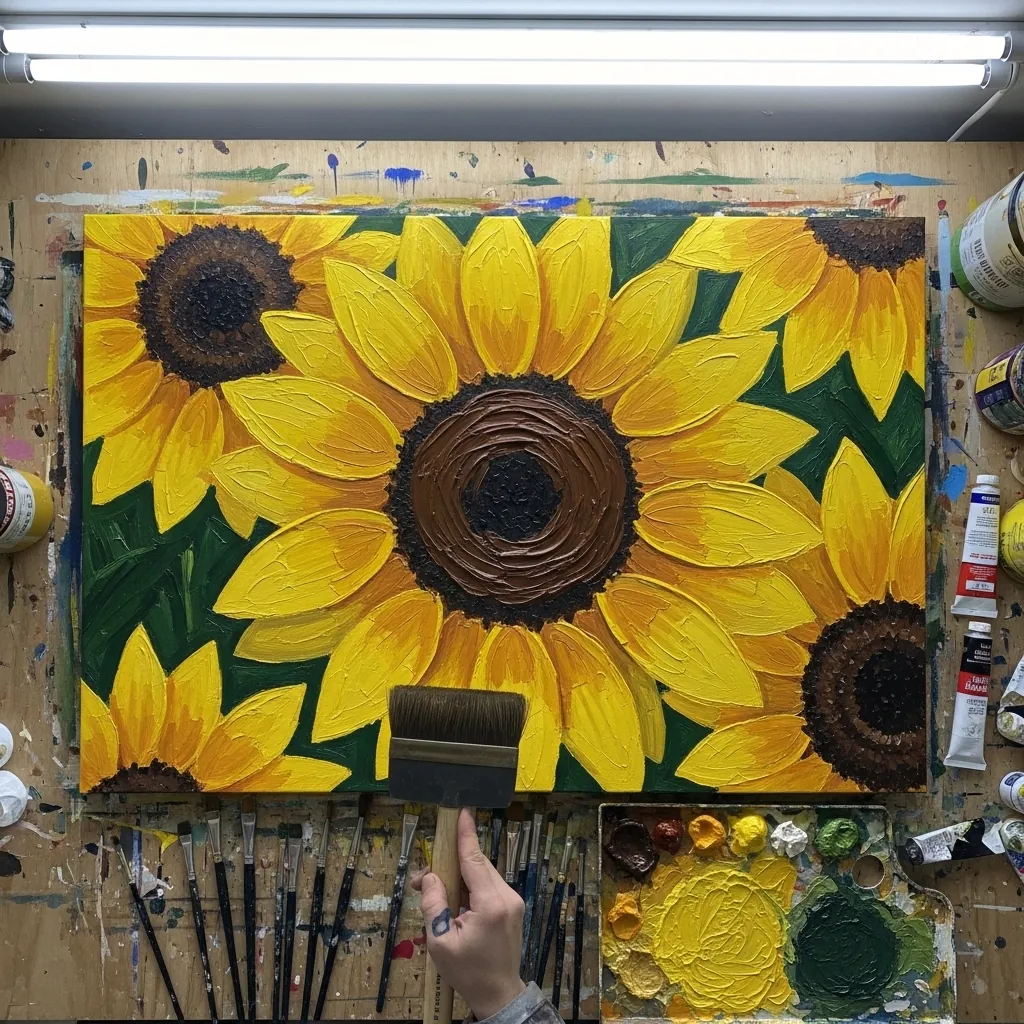
Cropping tightly removes the need for a background entirely. Let petals run off all four edges, keep at least one flower center near a third rather than the middle, and let the leaves fill every remaining gap. Vary the flower sizes so the composition does not become a repeating grid.
15. Hanging Wisteria
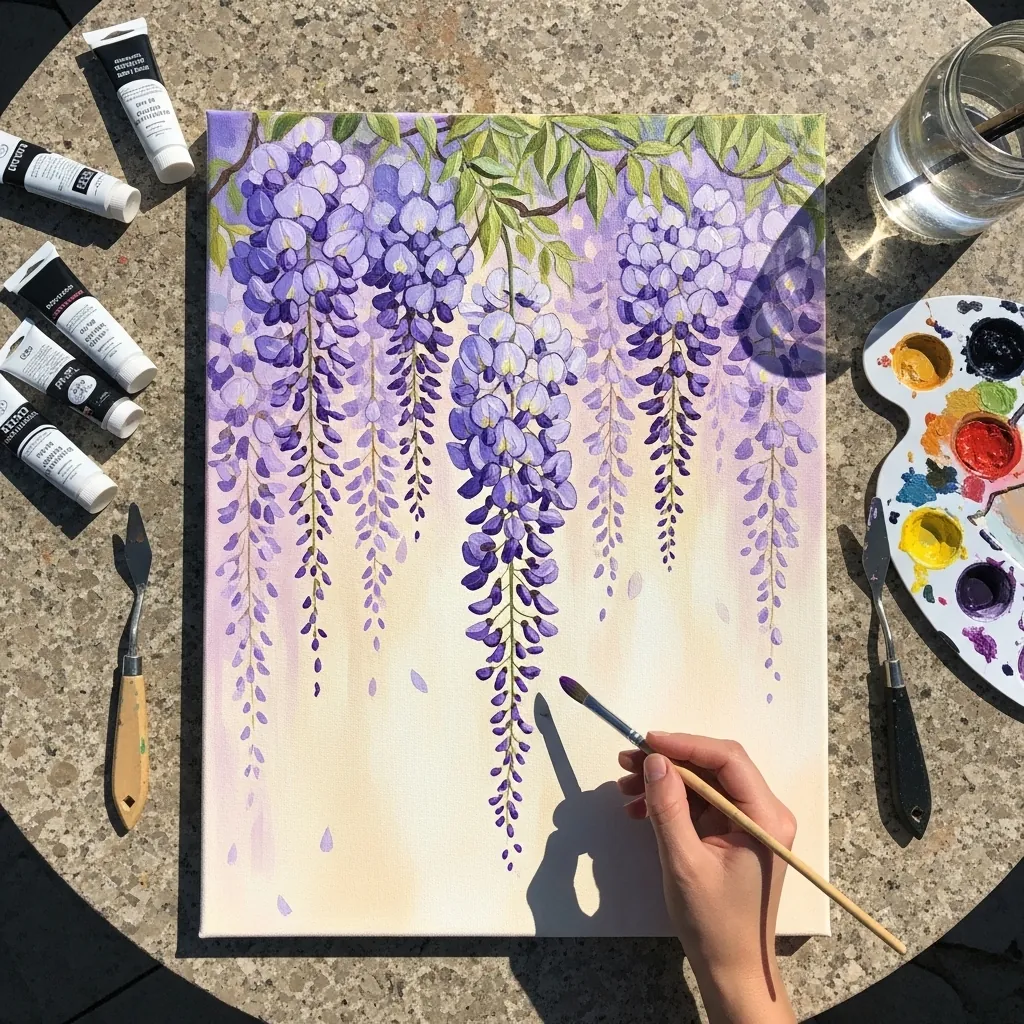
Wisteria hangs, so gravity is the whole subject. Draw each raceme as a slightly curved vertical, widest at the top and tapering to a point, and vary the lengths considerably so the row never looks like a fringe. Paint the individual florets smaller toward the tip of each raceme.
16. Pink Cactus Flower
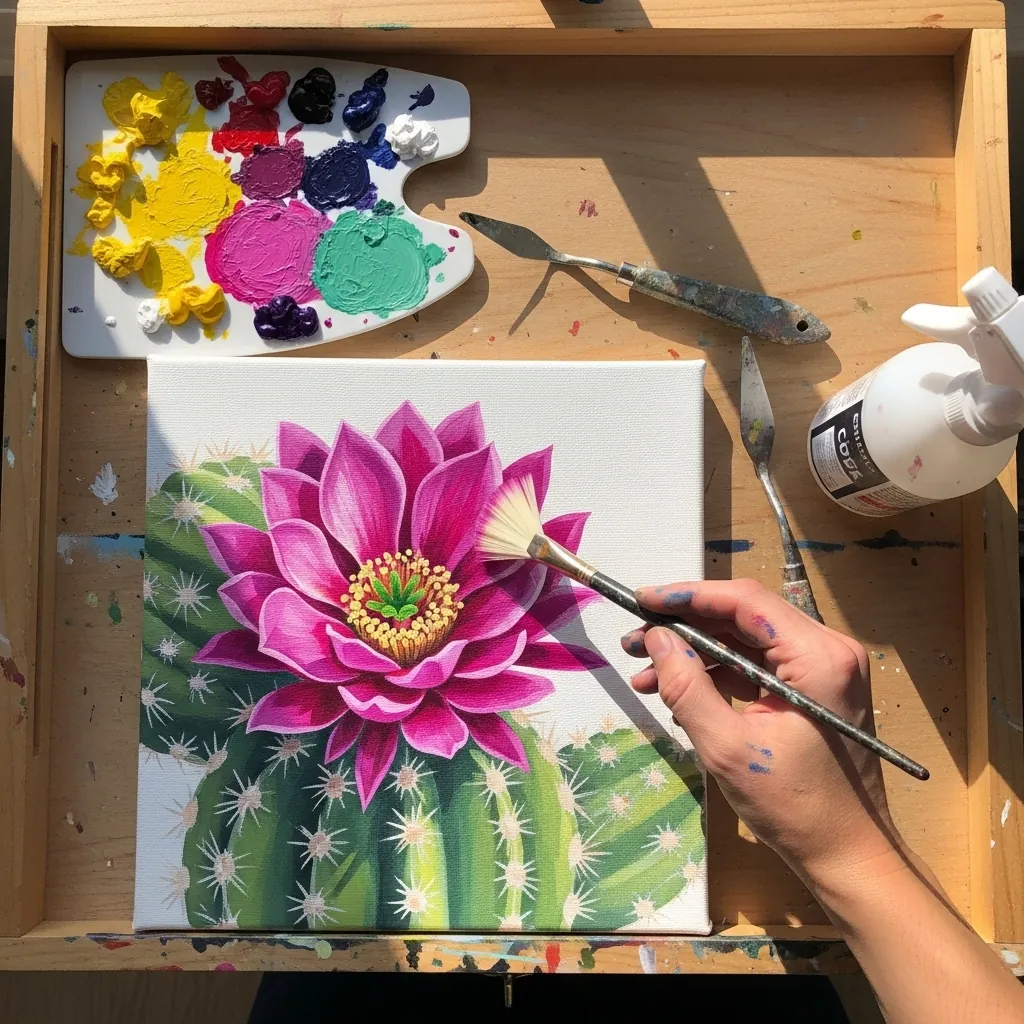
A soft flower on a spiky plant is a contrast worth exaggerating. Keep the petals blended and smooth, then add the spines as sharp single flicks of a rigger brush, and let a few catch the light as white rather than dark.
17. Tiny Flowers on a Small Canvas
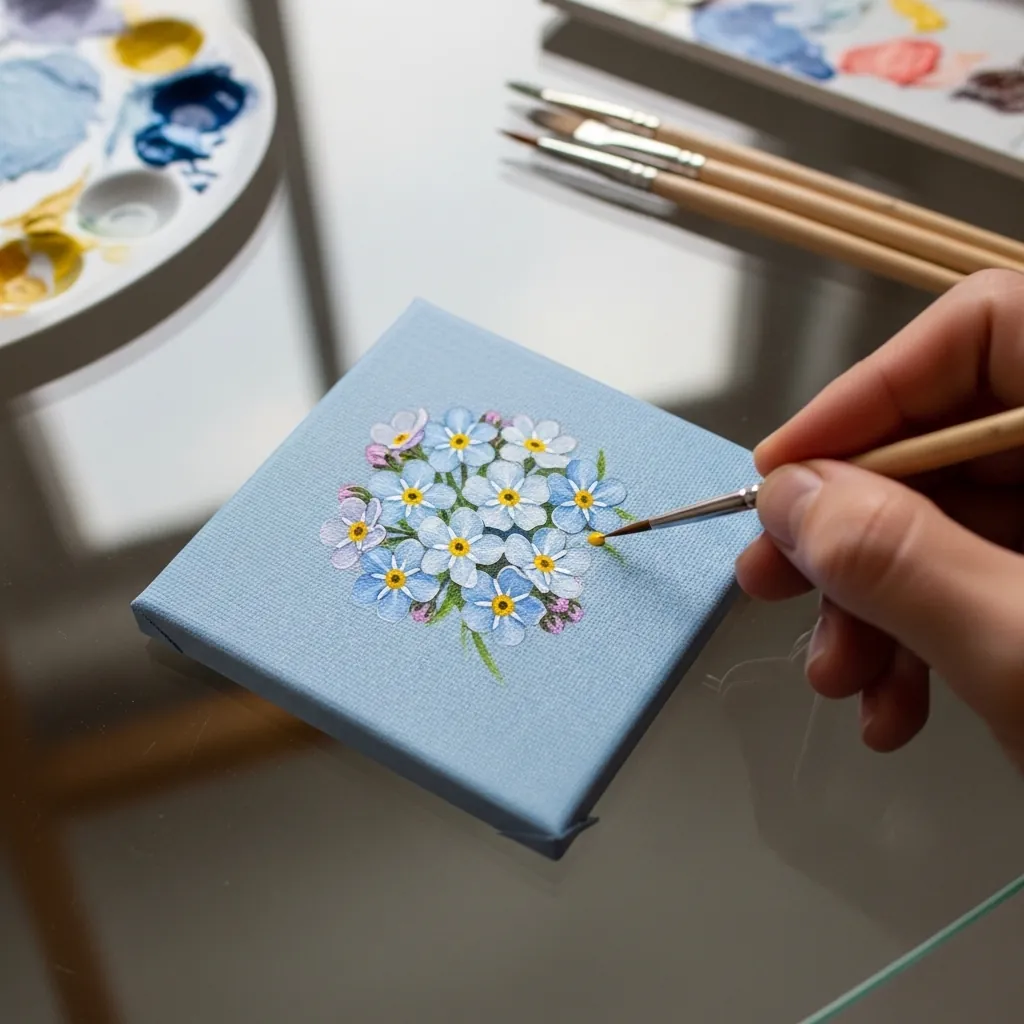
Working small means fewer flowers, not smaller brushwork. Choose seven or nine blooms, give each one enough space to be read individually, and resist filling the canvas because empty ground is what makes a small piece feel considered. Use a smaller brush than feels necessary, since the marks read enormous at this scale.
18. Impasto Rose in Palette Knife
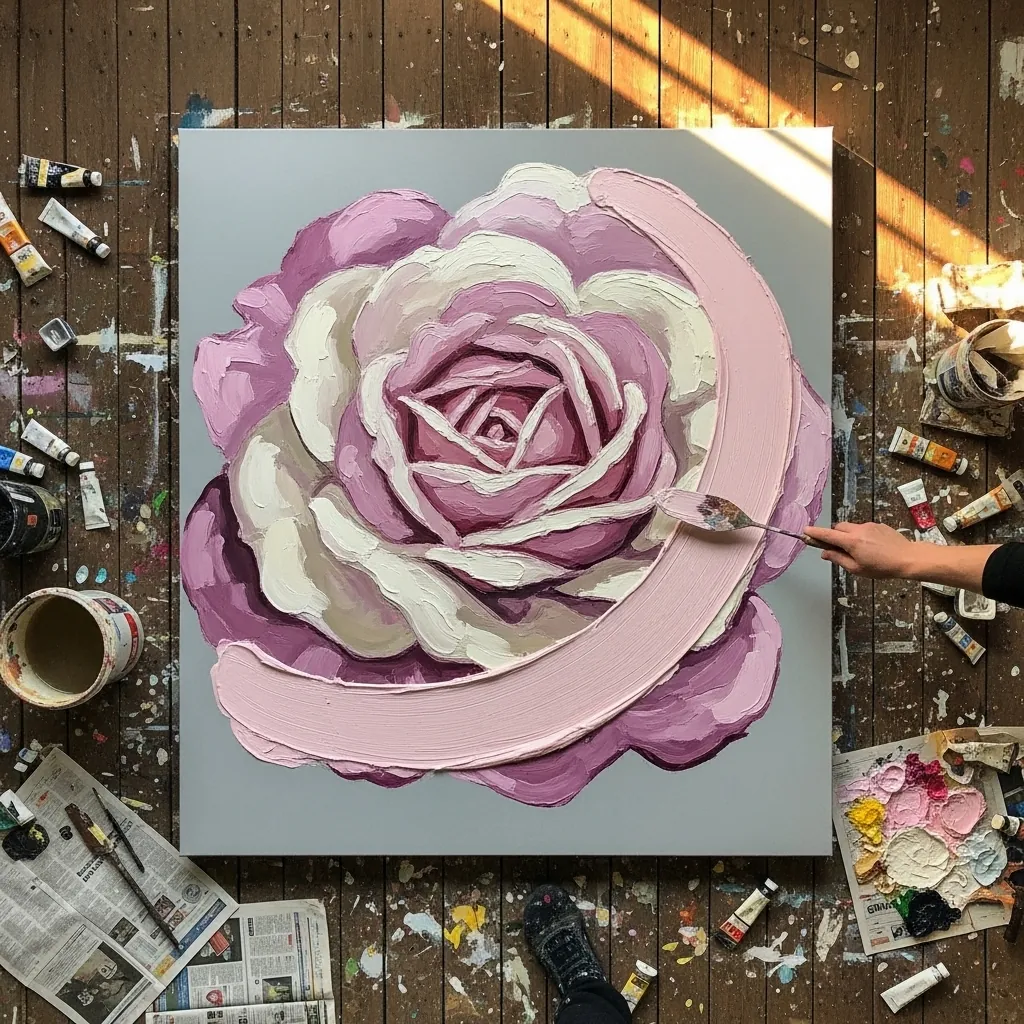
Knife-painted roses are built from the outside inward. Lay the outer petals first as broad flat blades of paint, then work toward the center with progressively smaller and more curved strokes, and never go back into a stroke once it is placed.
19. Orange Gerbera Daisies
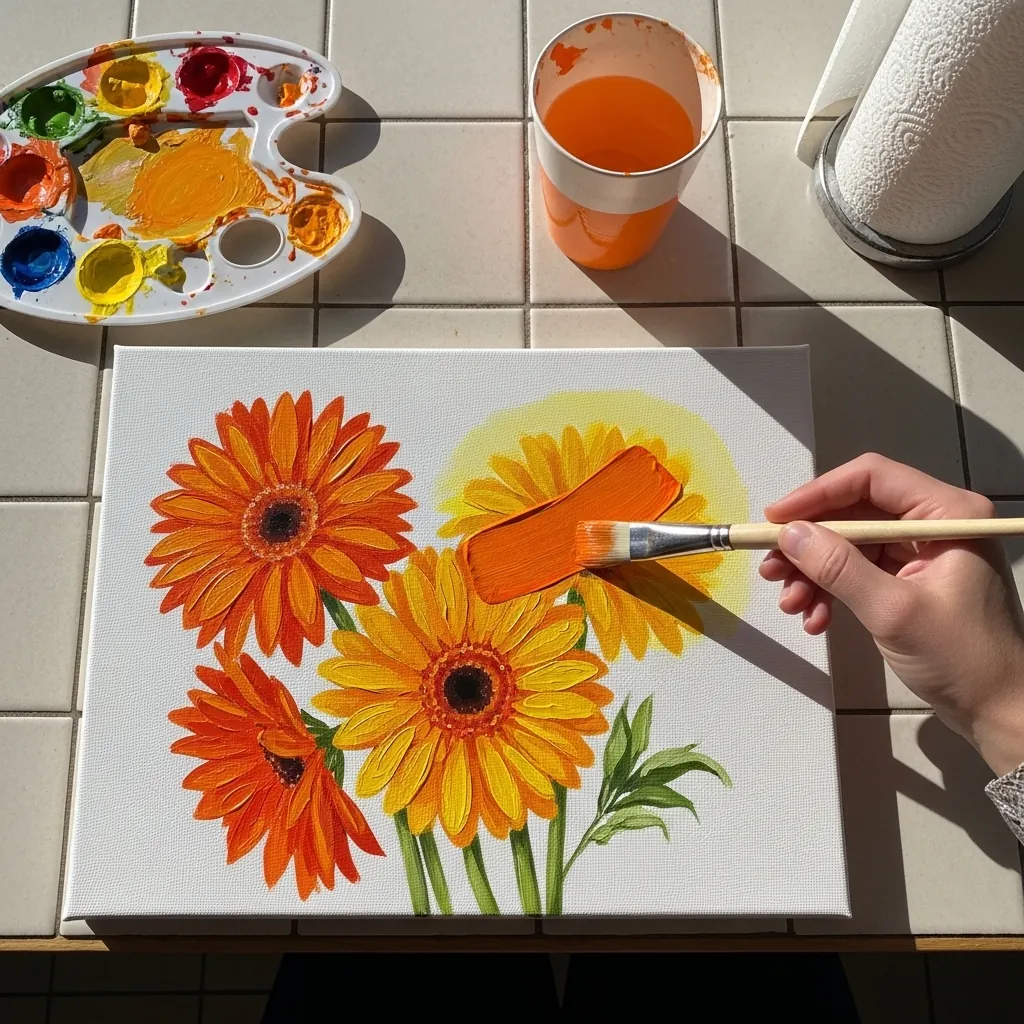
Gerbera petals radiate from a dense center in two overlapping rings. Paint the outer ring first, then the shorter inner ring offset so it sits between the outer petals, and finish the center with a dark ring and a lighter dome.
20. Pale Flowers on Navy
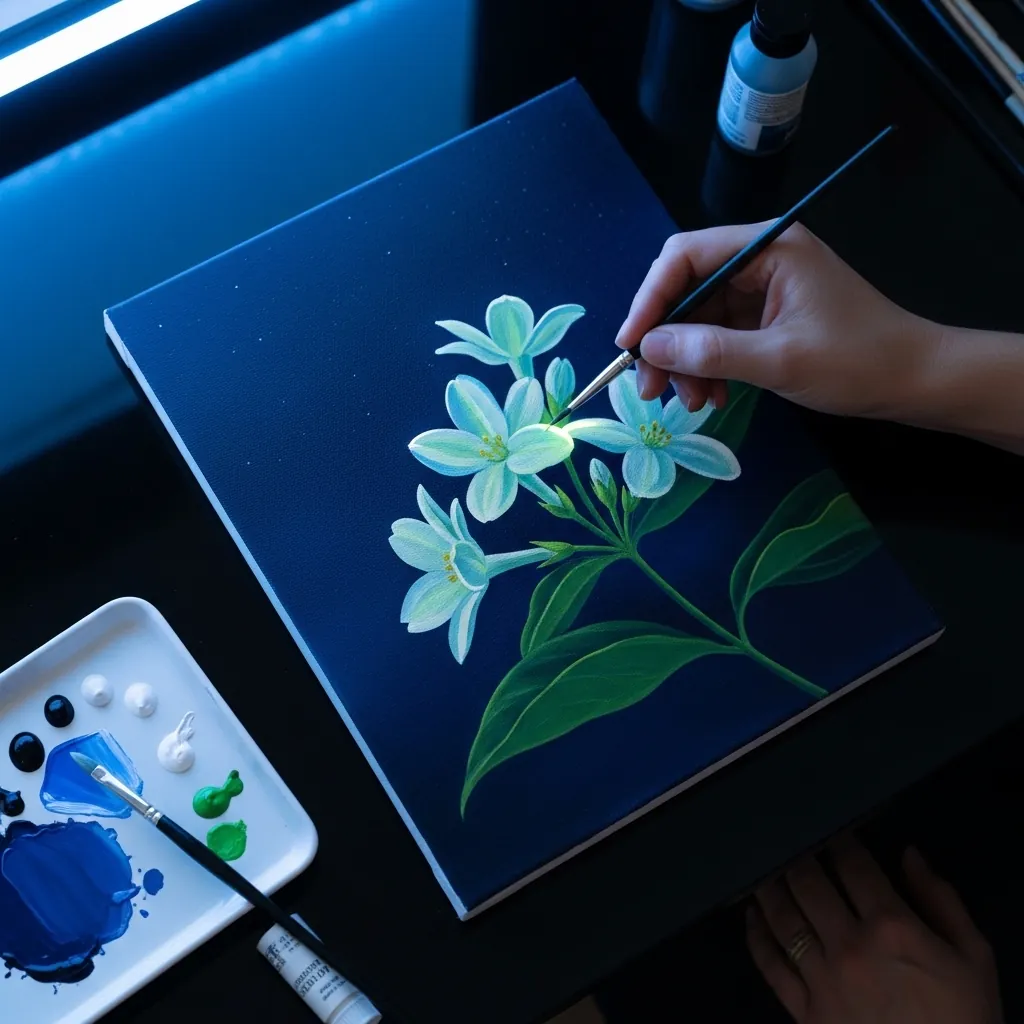
Pale on dark is the easiest way to make acrylic look luminous. Keep the flowers thin and slightly translucent at the edges so the navy shows through, and reserve fully opaque white for the two or three brightest points only.
21. Magenta Bougainvillea
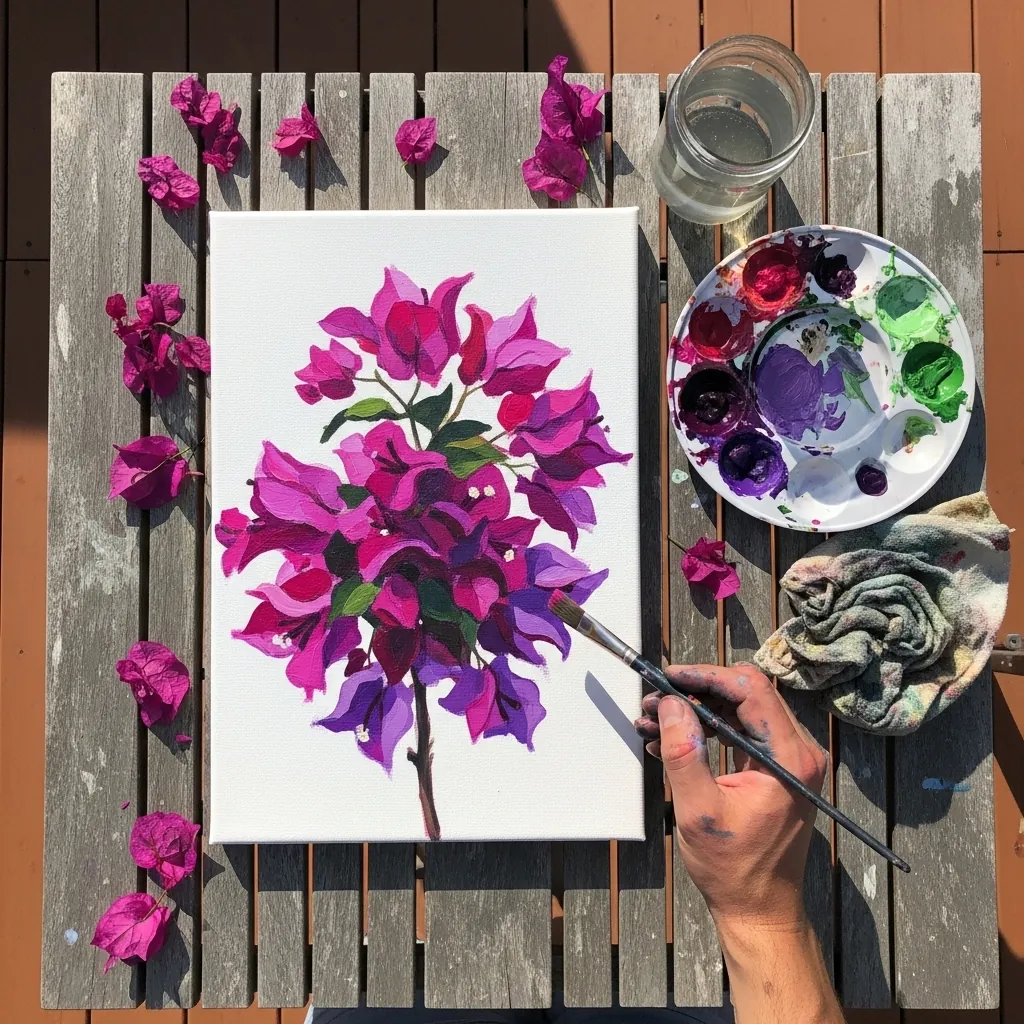
The colored parts of bougainvillea are bracts rather than petals, which is why they look like paper. Keep them flat and slightly angular with visible veining, and put the tiny actual white flowers at the center of each cluster of three.
22. Purple Orchid on Cream
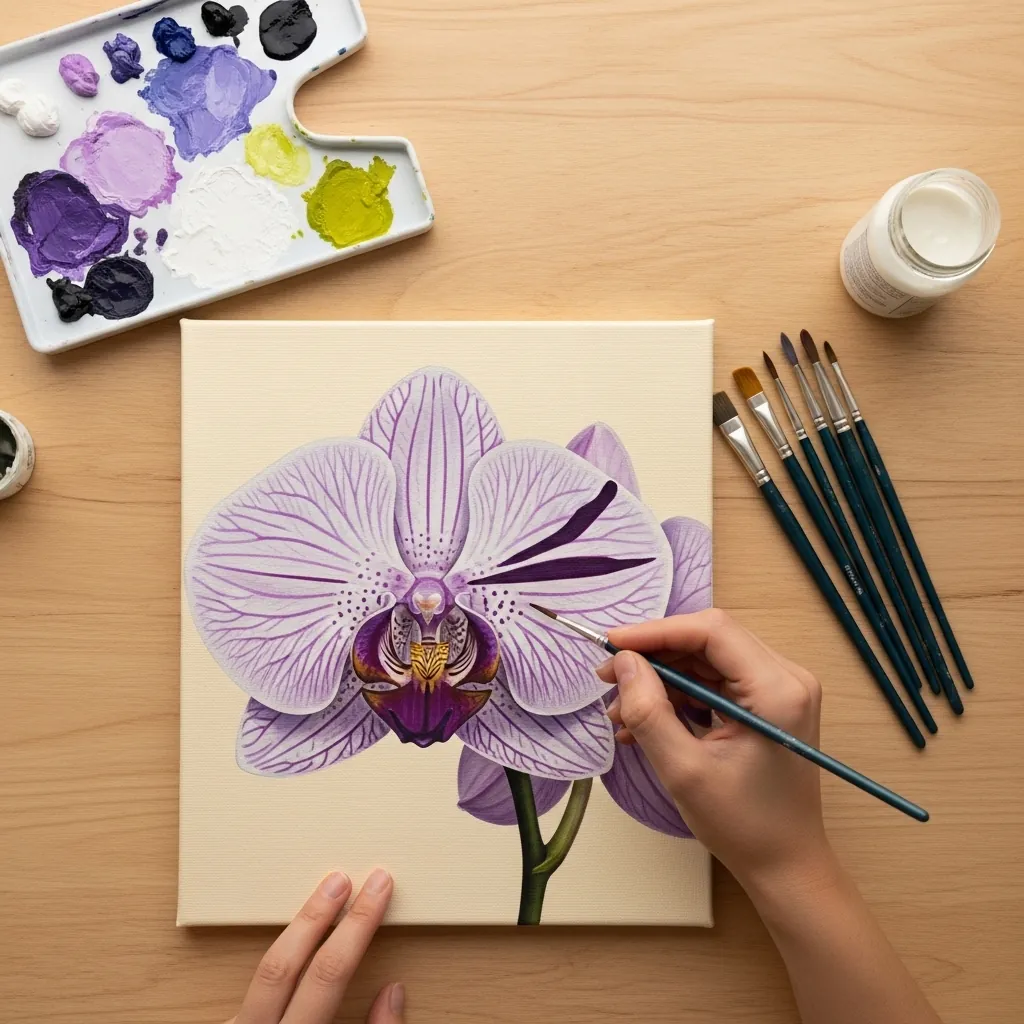
Orchids are bilaterally symmetrical rather than radial, so the drawing matters more than usual. Establish the central lip petal first, build the two side petals as a matching pair, and set the whole flower at a slight angle rather than face on.
23. Wildflower Meadow Panel
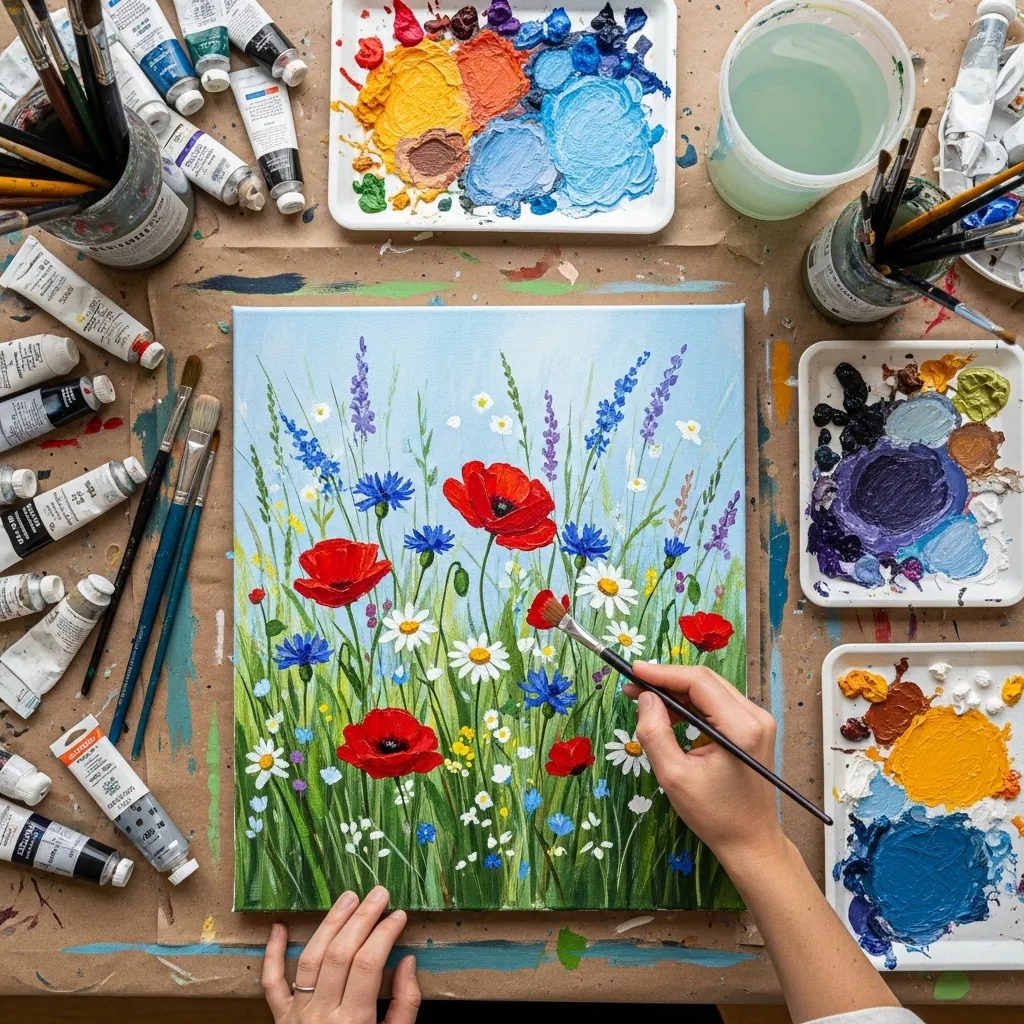
A meadow needs three depths to feel real. Block a soft green mass at the back, add mid-ground flowers as simple dabs, and paint only the front row with any real detail, because everything sharp reads as close. Scatter a few tall grass stems across the front row to knit the layers together.
24. Dark Dahlia on Deep Green
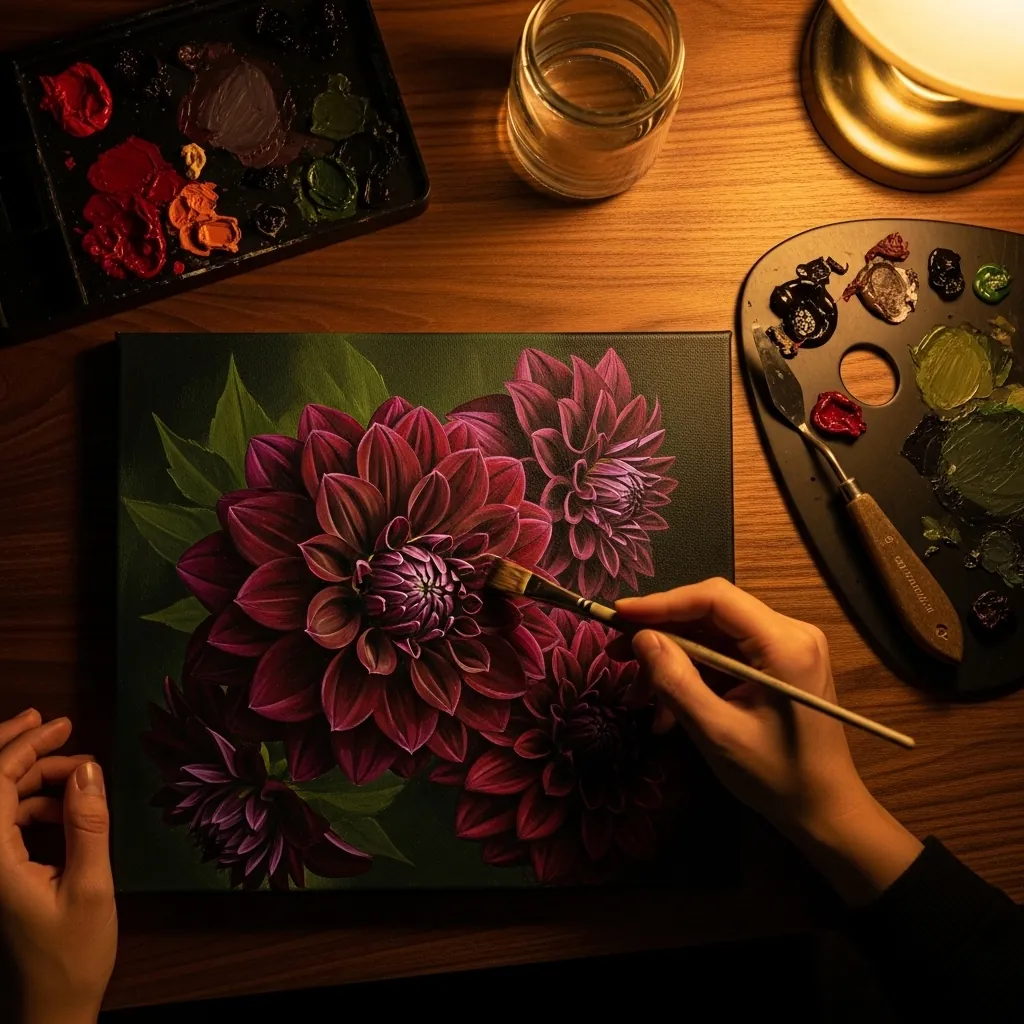
A dahlia is a spiral of pointed petals, and the spiral is the drawing. Start at the tight center and work outward, rotating each ring of petals slightly so they interlock, and darken the gaps between them almost to black.
25. Pop Art Flower Panel
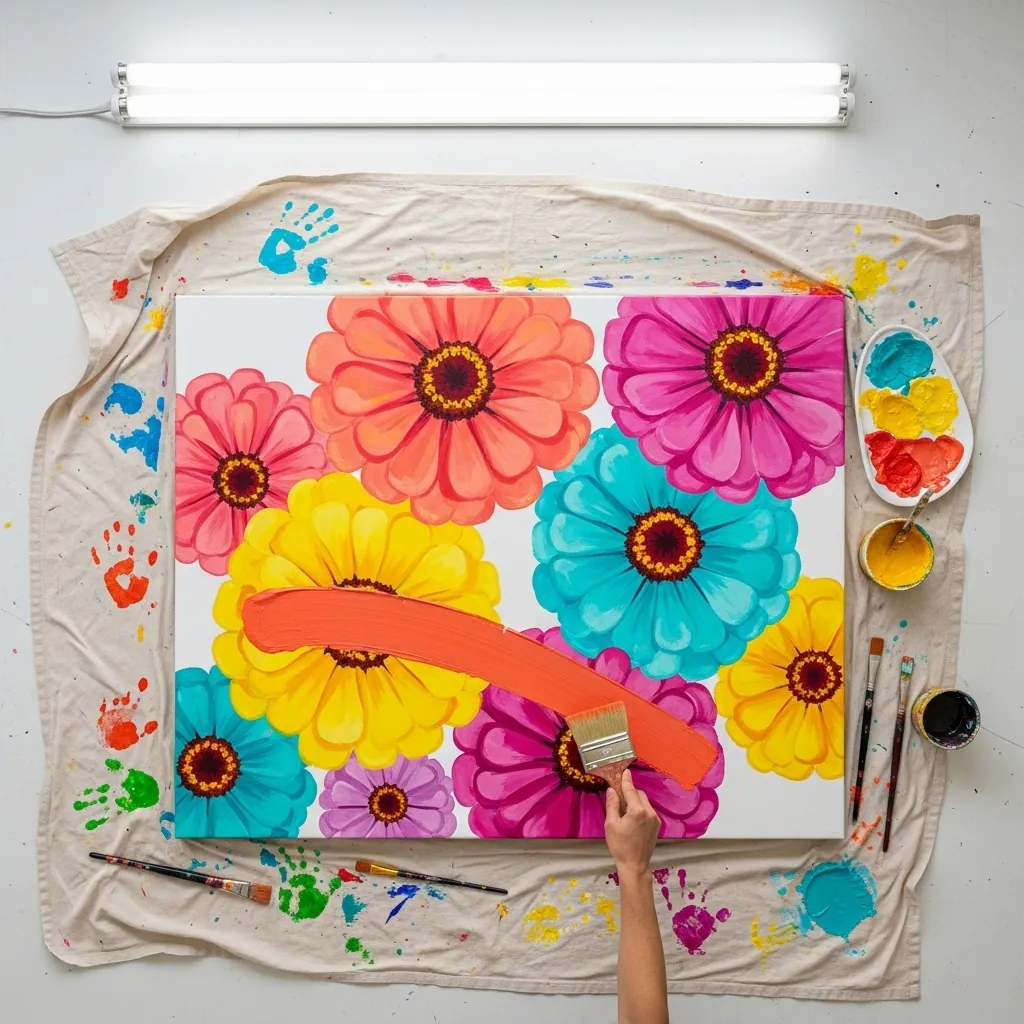
Flat saturated color needs even application. Mix enough paint for the whole shape before you start, lay it in one direction only, and add a second coat once the first is bone dry to eliminate every streak. Sand lightly between coats if you want a genuinely flawless flat surface.
26. White Lotus on Teal
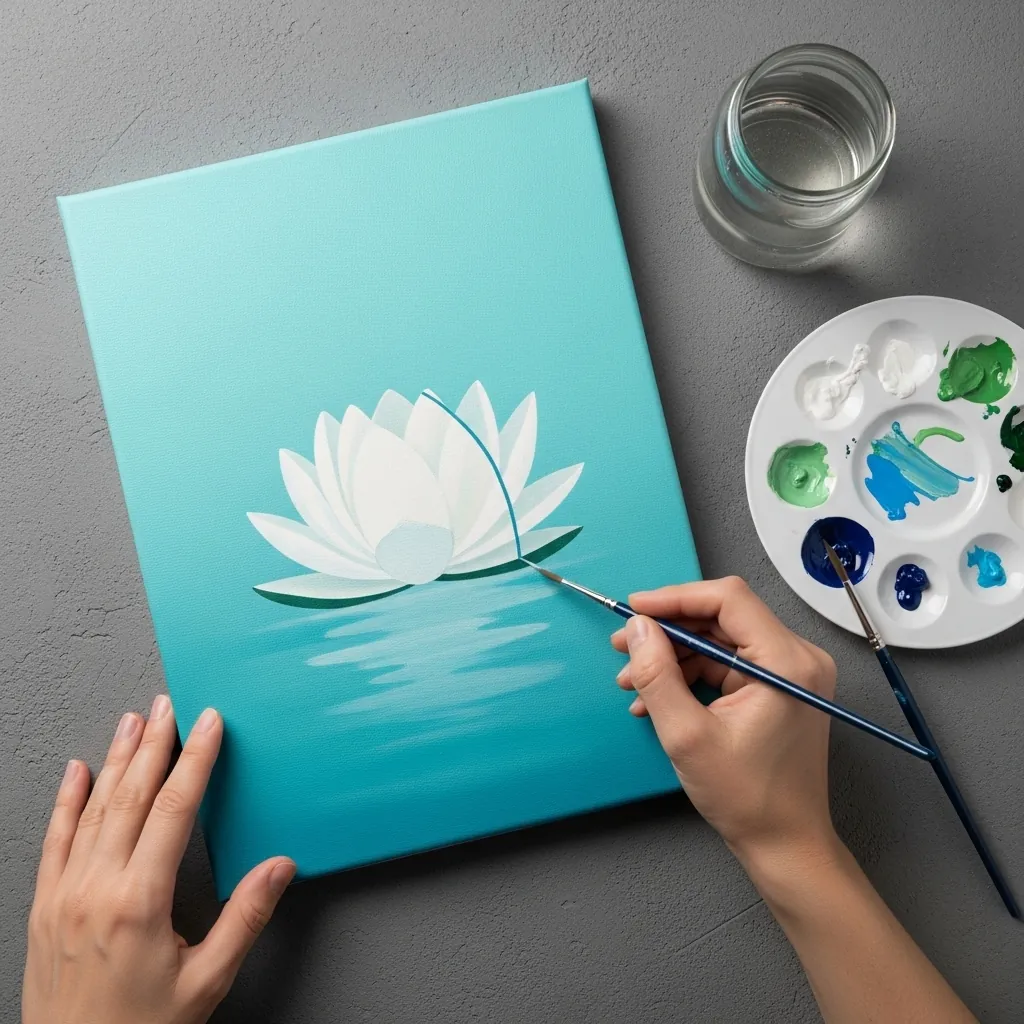
Minimal work exposes edge quality. Keep the teal background perfectly even with no visible brush marks, make the lotus edges clean and deliberate, and add only one soft shadow beneath it where it meets the water. Roll the background on with a foam roller rather than brushing it.
27. Hollyhock Garden Path
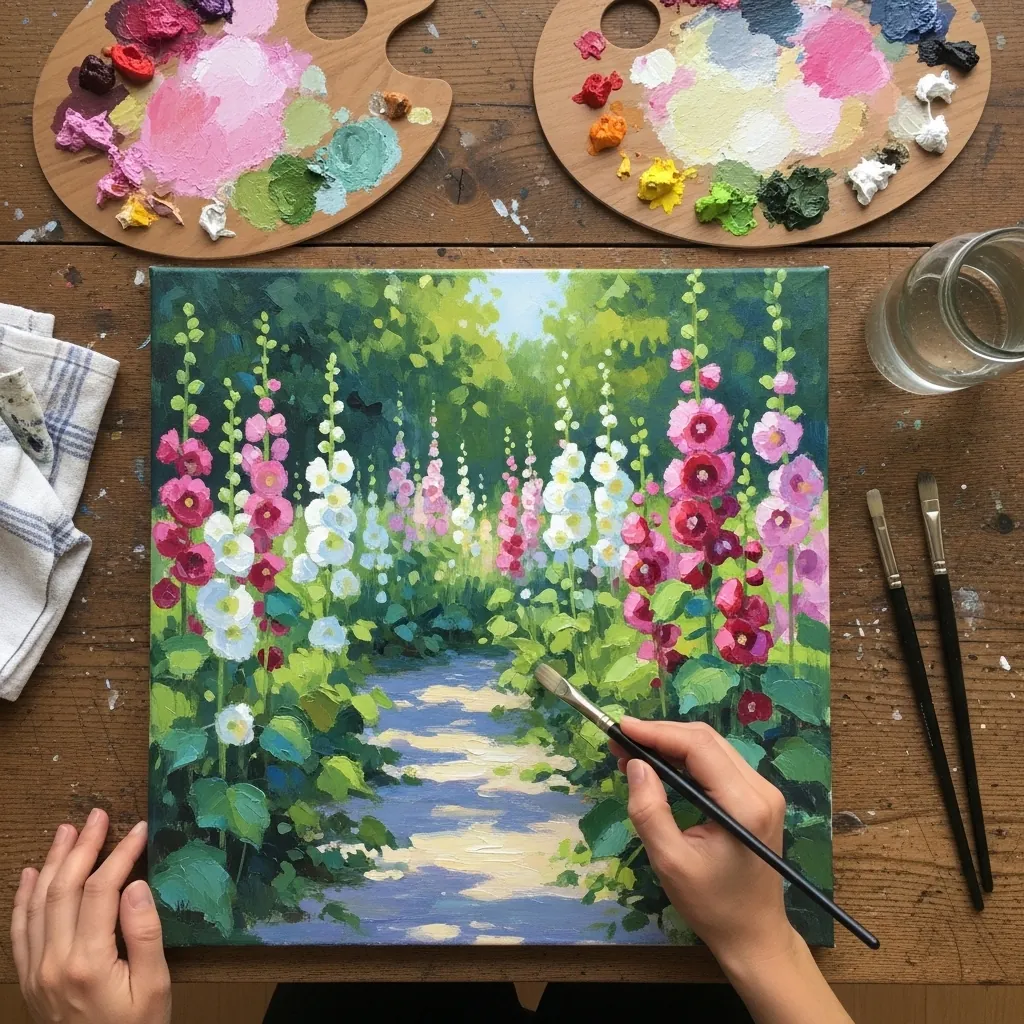
A path leads the eye, so make it narrow as it recedes. Keep the hollyhocks tallest in the foreground and progressively shorter along the path, and let the brightest light fall in the middle distance rather than at the front.
28. Red Anthurium Study
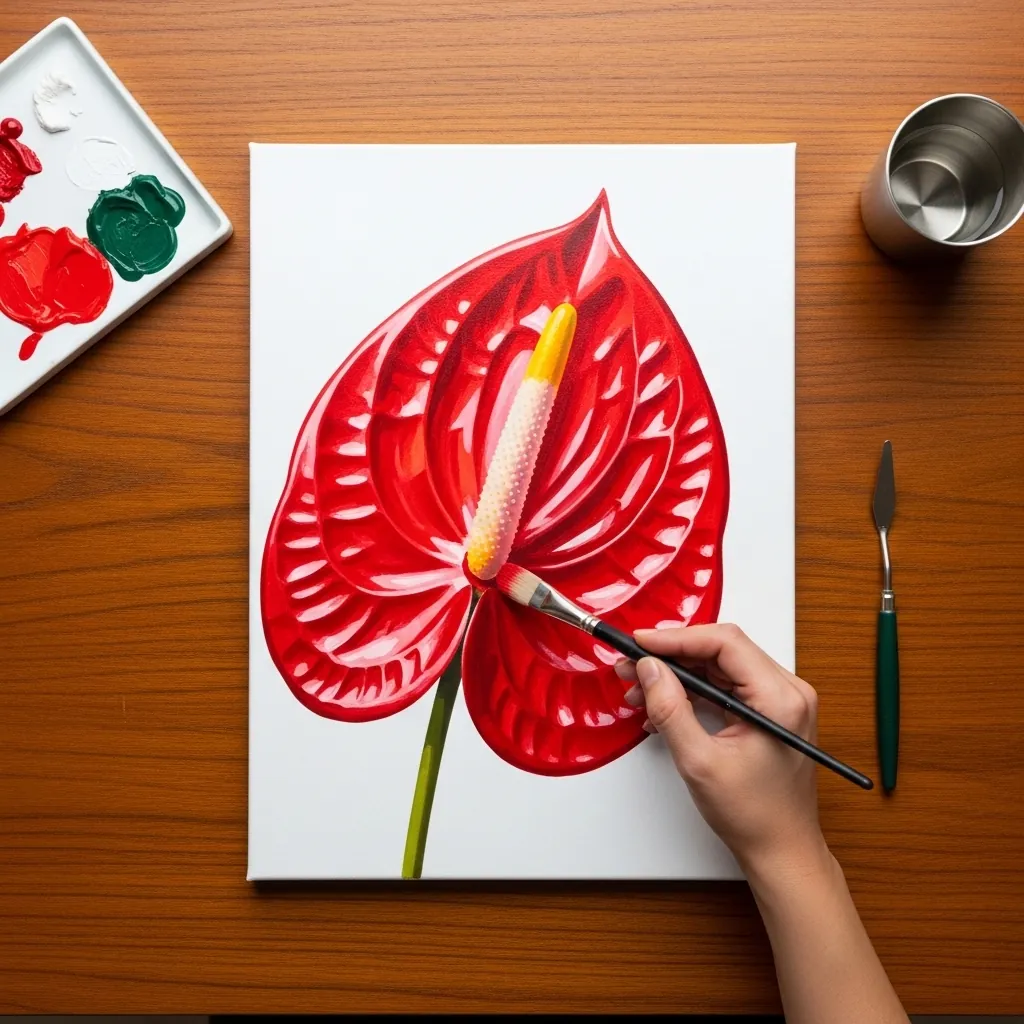
Anthurium is one glossy heart-shaped bract and one upright spike. Keep the surface shiny with a hard highlight running down one side of the bract, make the veins slightly raised, and angle the spadix rather than drawing it vertical. Keep the leaf behind it a duller green so the bract stays the brightest thing.
29. Rose Bouquet With Eucalyptus
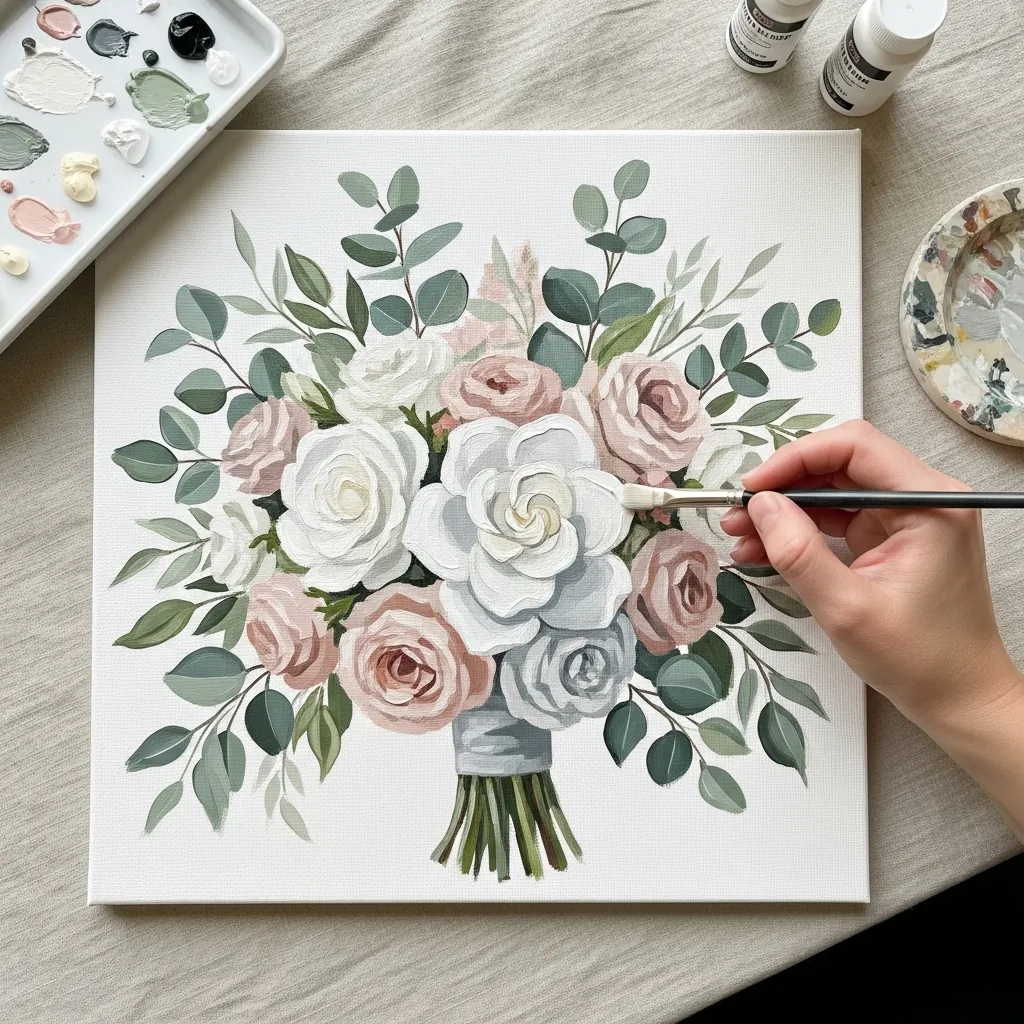
Muted palettes still need a value range. Keep every color low in saturation but push the shadows between the roses genuinely dark, because a pale painting with no darks reads as unfinished rather than delicate. Add one slightly warmer cream rose so the group is not entirely cool.
30. Passionflower on Dark Green
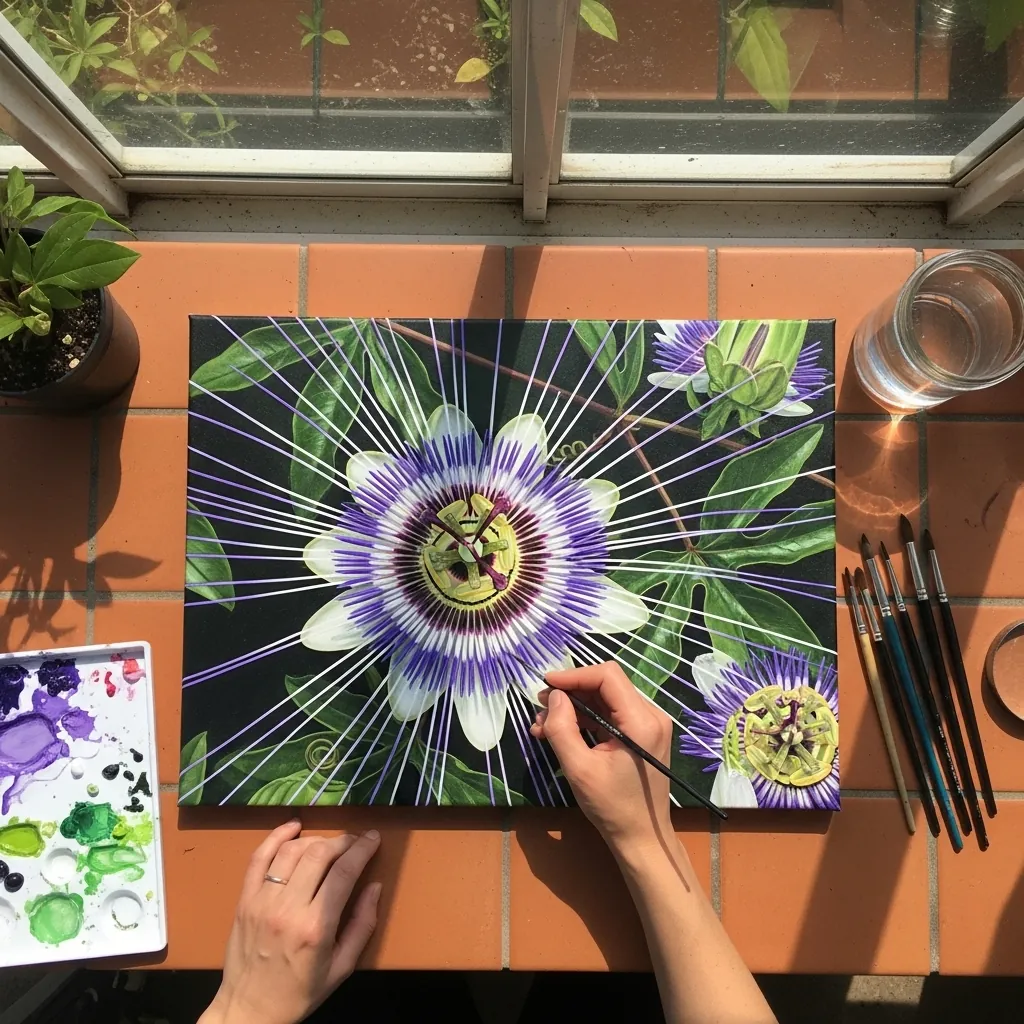
The corona filaments are what make a passionflower recognizable. Paint the flower base first, then add the radiating filaments as single fine strokes with a rigger, keeping them all the same length and evenly spaced around the ring. Paint the filaments in two tones, dark at the base and pale at the tips.
31. Lavender and Yellow Poppies
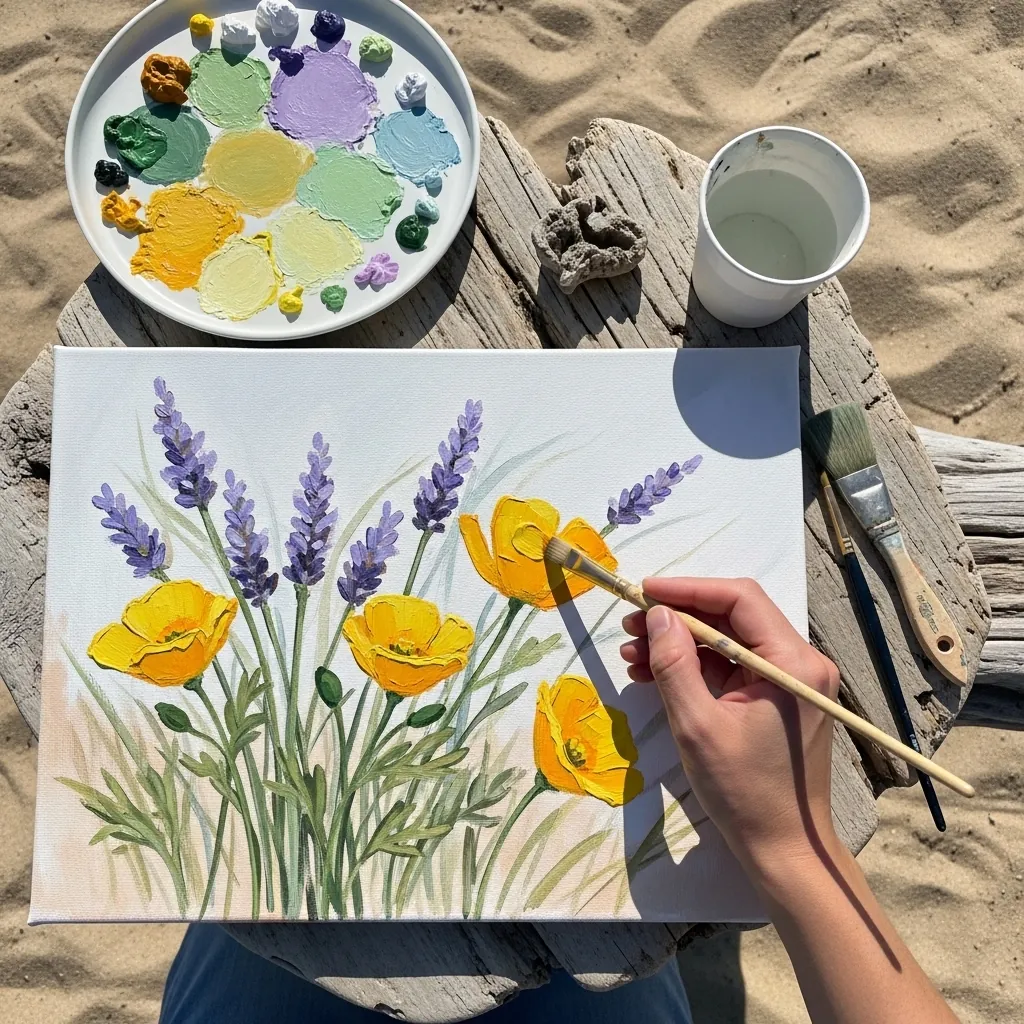
Purple and yellow are complements, so they intensify each other. Keep them apart on the canvas rather than mixing them anywhere, and let a neutral green sit between them to stop the contrast becoming harsh. Keep the poppies in an odd number so the eye keeps circulating.
32. Orange Lily on Black
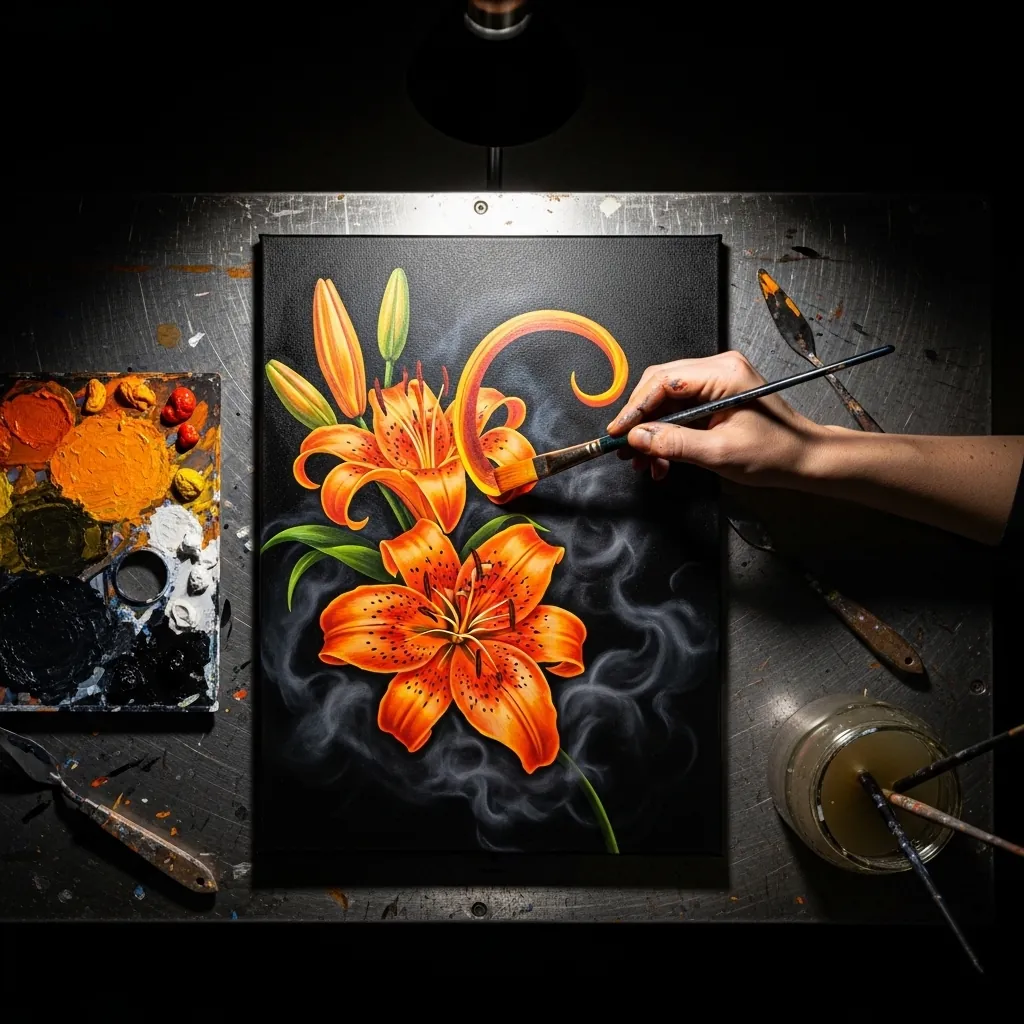
Lily stamens curl outward and are surprisingly long. Paint them last as single curved strokes extending well beyond the petals, and tip each one with a dark rust anther that is noticeably heavier than the filament. Speckle the petals with fine dark dots, since tiger lilies are heavily marked.
33. White Anemones on Gray
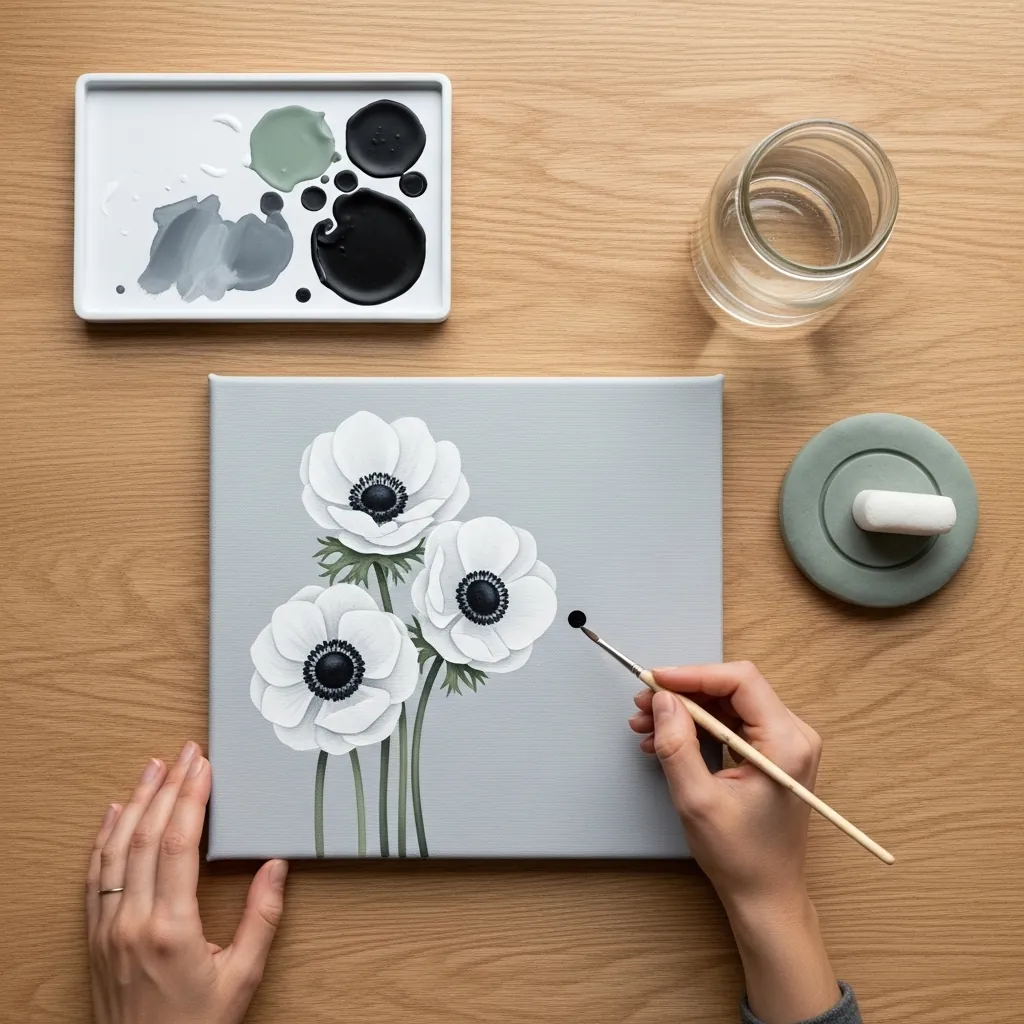
Anemones are defined by the contrast between pale petals and a near-black center. Keep the petals almost pure white with barely any shading, then make the center genuinely black with a fringe of fine dark stamens around it. Vary the head angles so all three are not facing directly at the viewer.
34. Dark Moody Floral
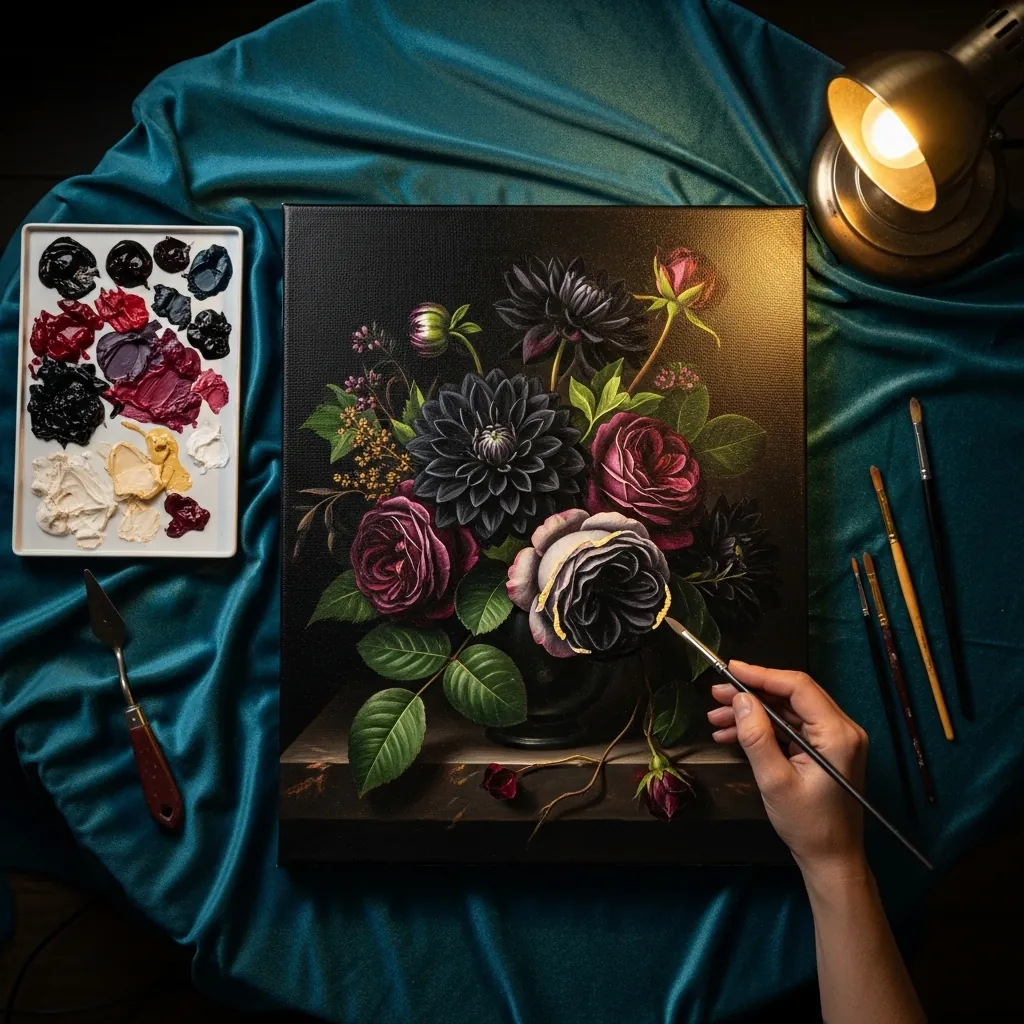
Dutch-style dark florals work because most of the canvas is in shadow. Keep three quarters of the painting very dark, light only one or two blooms strongly, and let everything else fall away into the background. Let the fabric folds carry a cooler note so the flowers stay the warmest area.
35. Autumn Seed Heads
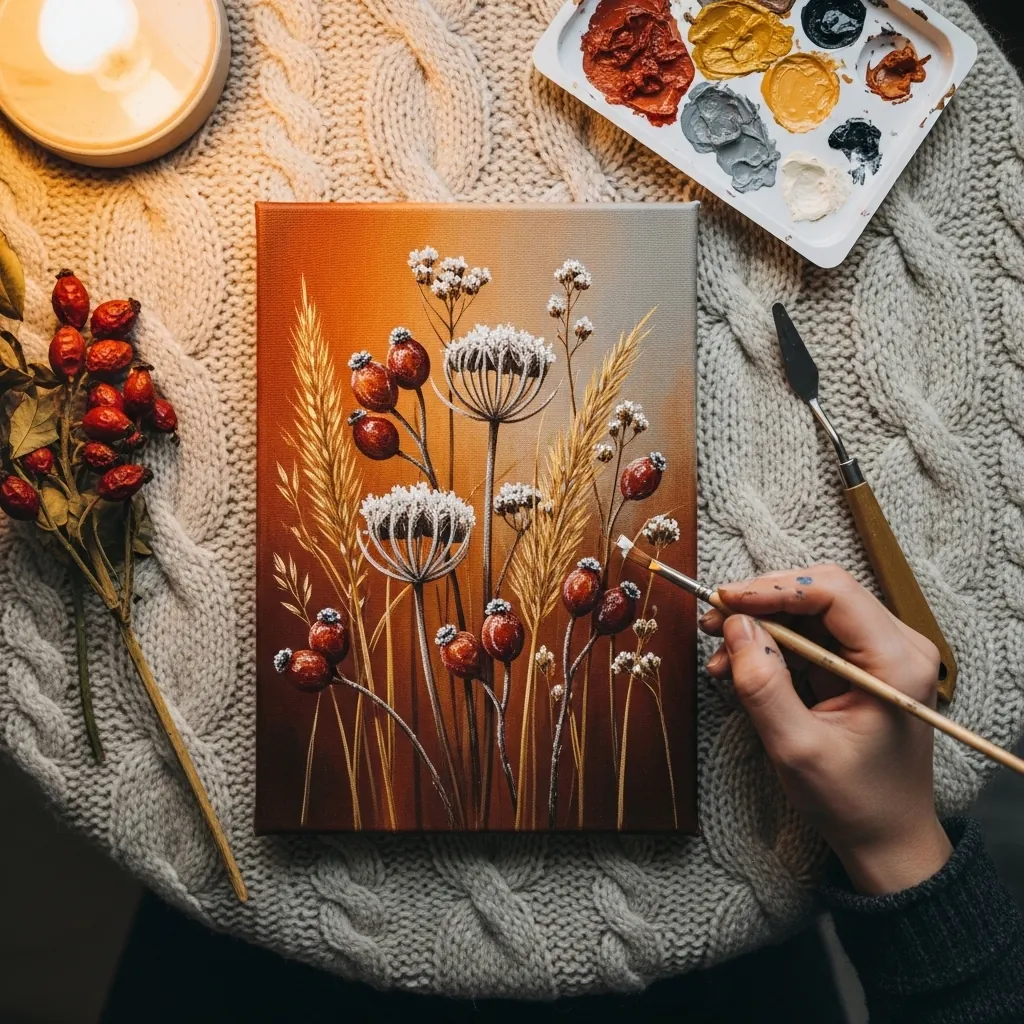
Dried plants are about silhouette rather than color. Keep the palette to three earth tones, make every stem thin and slightly irregular, and let the seed heads read as pale fuzzy shapes against the warm ground. Keep the berries as the only saturated color anywhere on the board.
36. Flat Graphic Tulips
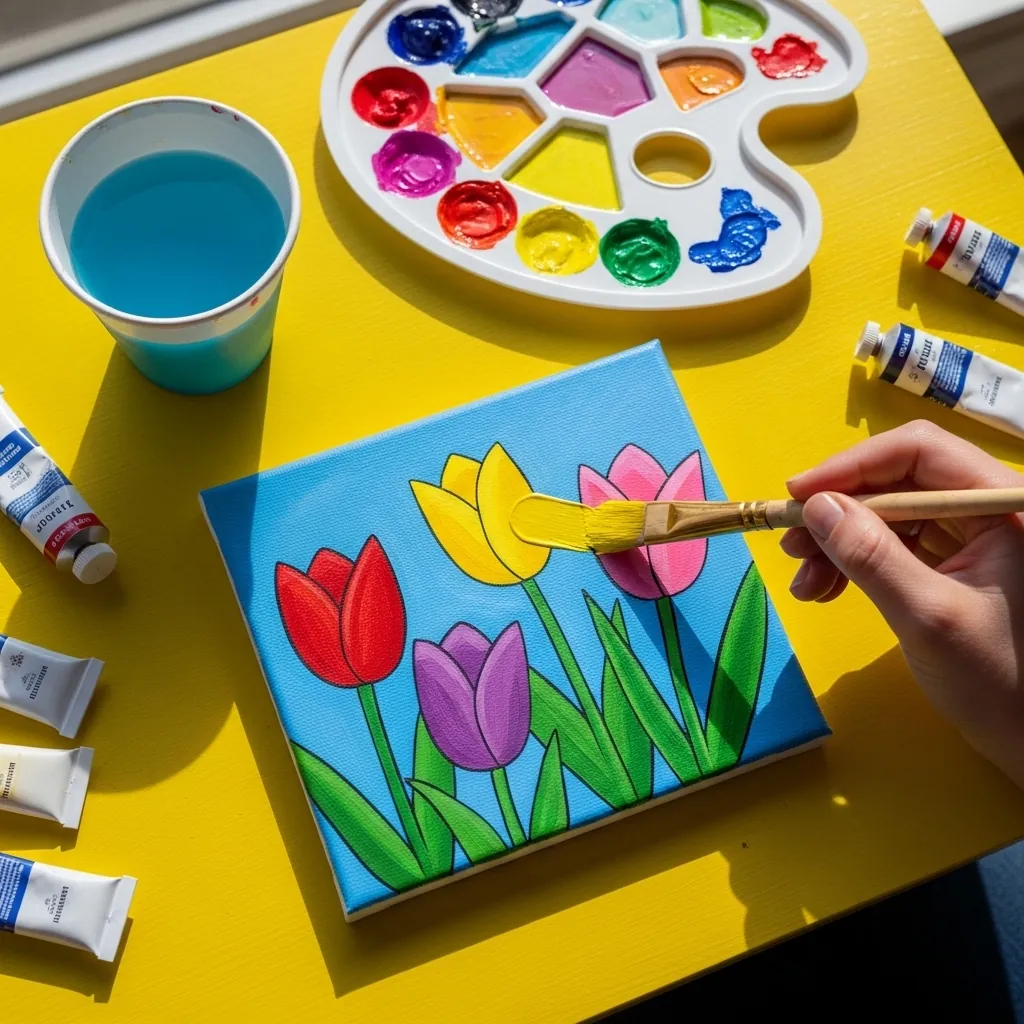
Outlined flat color is a design approach rather than a painting one. Keep the outline a consistent weight everywhere, fill each shape with one unmodulated color, and let the black do all the separating between forms. Paint the outlines last, over the color, so every edge stays perfectly crisp.
37. Underpainting Stage
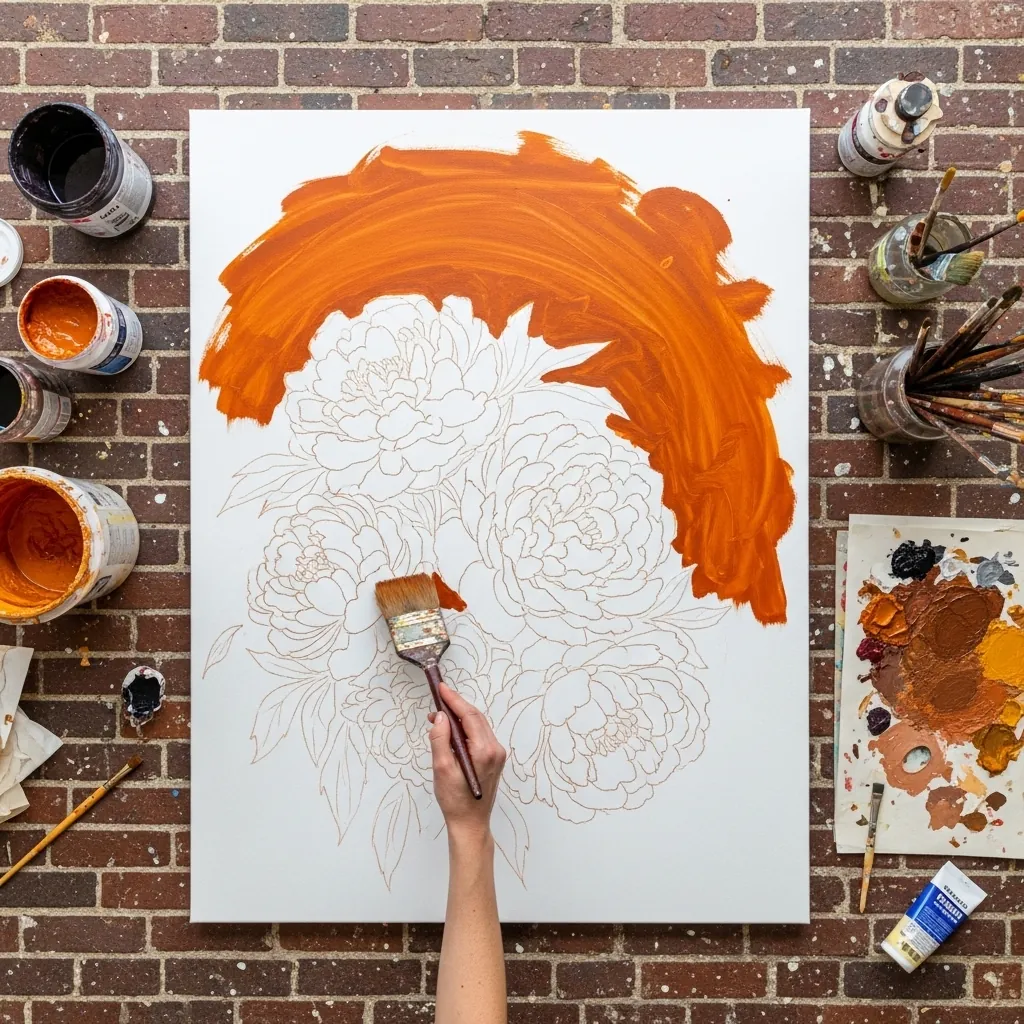
An underpainting sets the temperature of everything above it. Lay a thin warm orange over the whole canvas before any color goes down, let it dry completely, and allow small patches to show through at the edges of later layers.
38. Bougainvillea on a Wall
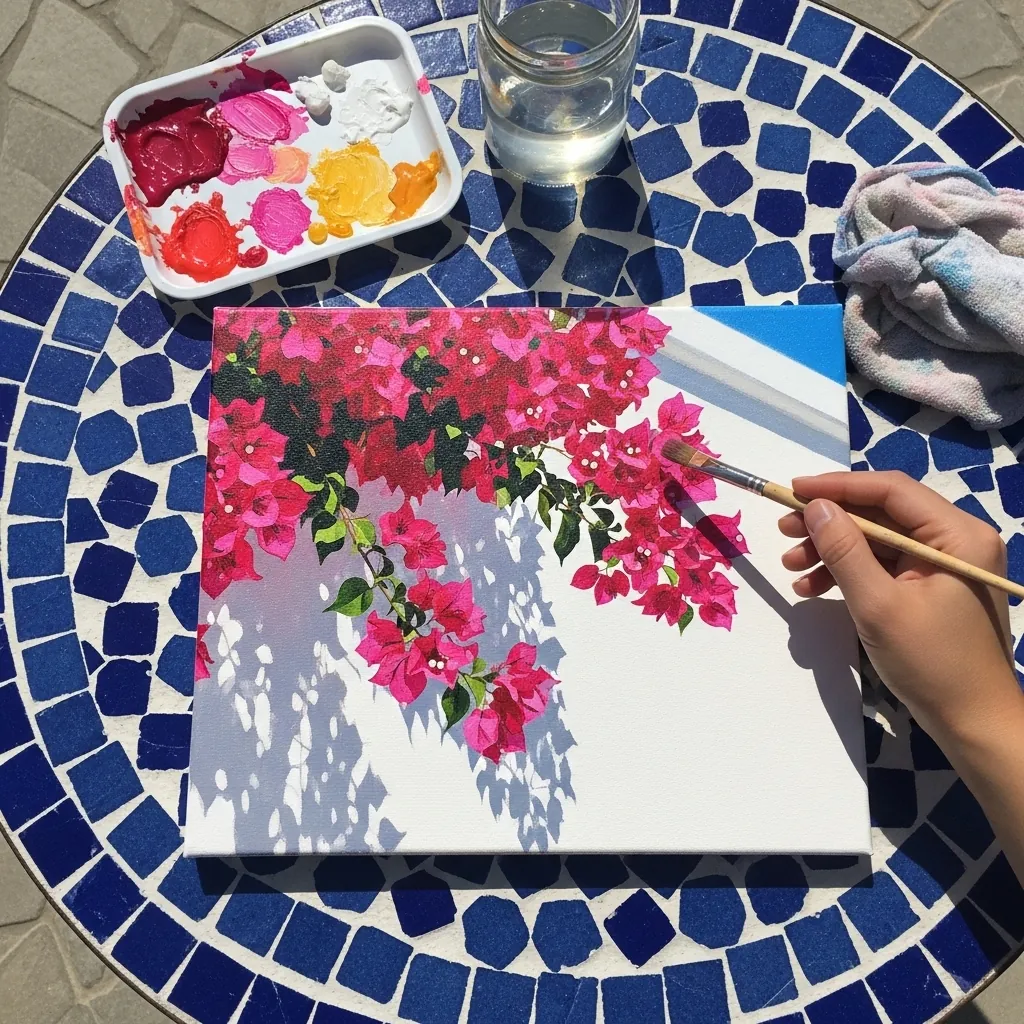
Flowers against architecture need a hard edge somewhere. Keep the wall completely flat and clean, let the bougainvillea break its edge irregularly, and paint the shadow the plant casts onto the wall as one soft gray shape. Keep the wall slightly warmer where sunlight strikes it and cooler in shade.
39. Minimal Cherry Sprig
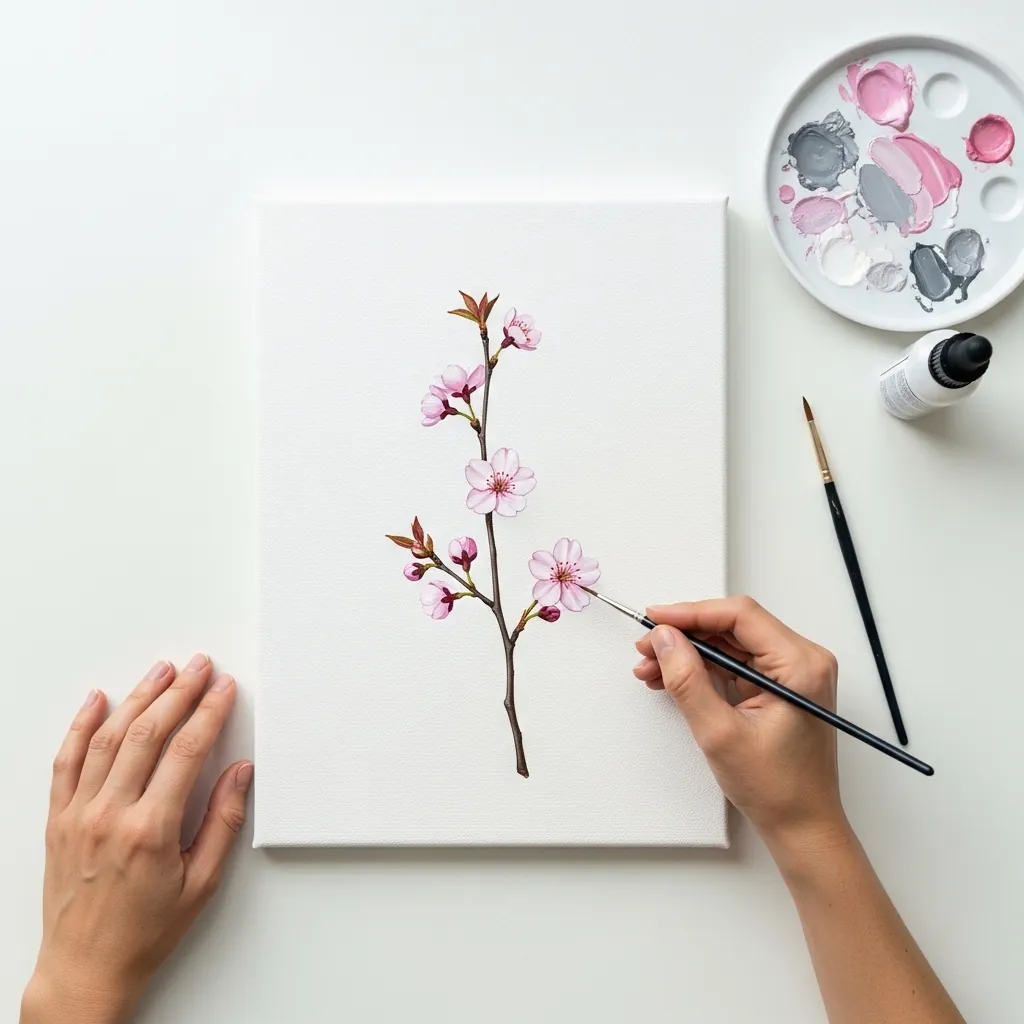
A tiny subject on a large white ground is entirely about placement. Put the sprig well off center, angle it so it points into the empty space rather than out of the canvas, and add nothing else at all. Leave the canvas edges completely untouched so the white reads as deliberate.
40. Magenta Dahlia Close-Up
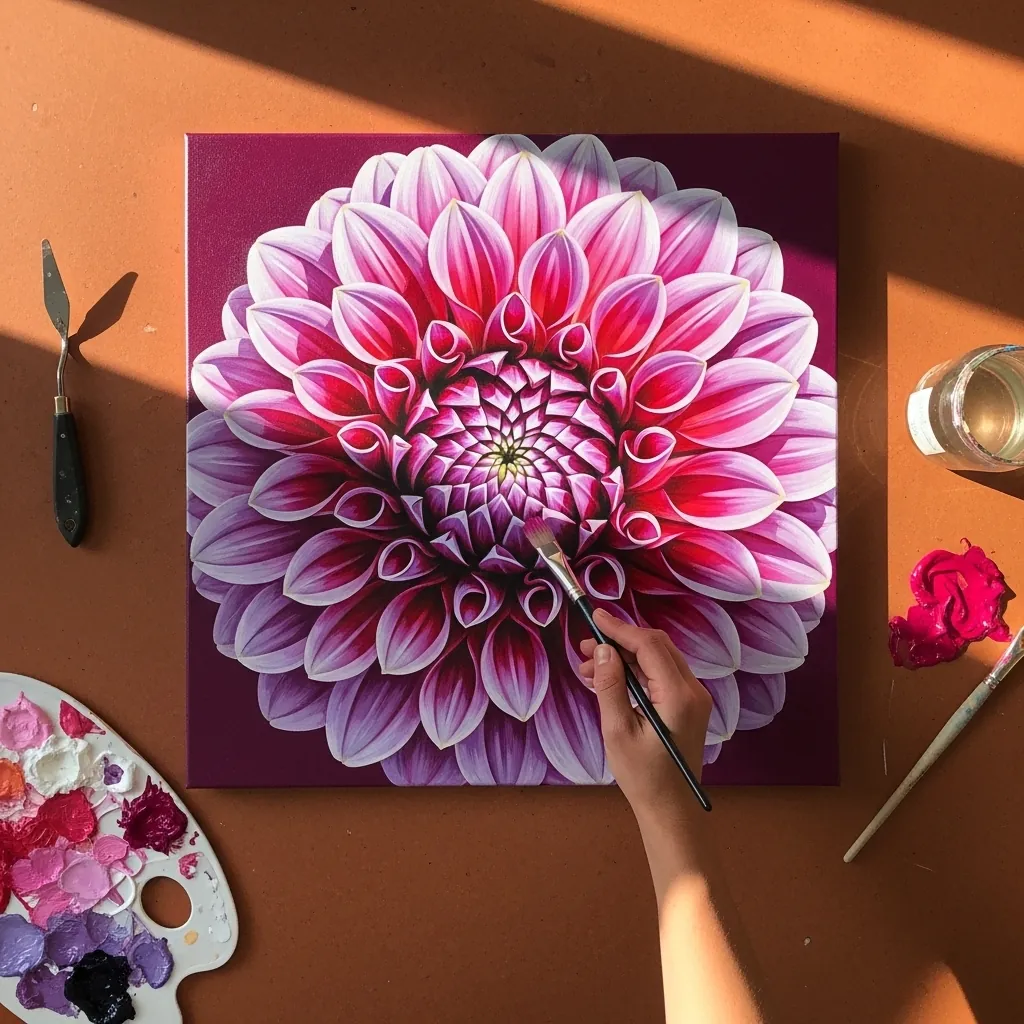
Painting a dahlia large means every petal needs its own light. Give each petal a lighter outer edge and a darker inner base, keep the direction of light consistent across all of them, and let the center stay the darkest point.
Frequently Asked Questions
Why does acrylic paint dry darker?
Because the acrylic binder is a milky white emulsion when wet and turns completely clear as it dries. That milkiness lightens the color while you are working, so the paint appears a value or two lighter on the palette than it will once the water has left it.
Should I paint the background or the flowers first?
The background, always. Acrylic is opaque, so you can lay flowers straight over a dry background with clean edges. Painting the background around finished petals leaves a ragged halo, and it is the fastest way to spoil an otherwise good piece.
How do I paint a petal so it looks natural?
In one loaded stroke rather than several. Press the brush at the base of the petal where it is widest and lift as you pull toward the tip, so the stroke tapers naturally. Repeated small strokes inside a single petal is what makes acrylic flowers look labored.
How do I stop acrylic drying on the palette?
Use a stay-wet palette, which is a sealed tray with a damp sponge under greaseproof paper, or add a retarder medium to the paint. A spray bottle of water helps, but misting alone dilutes the paint and weakens the film.
Can I fix a mistake in acrylic?
You cannot lift it the way you can with watercolor, but you can simply paint over it once it is dry, which is the great advantage of the medium. Wait for the surface to be fully dry rather than tacky, or the new layer will drag the old one.
References and Further Reading