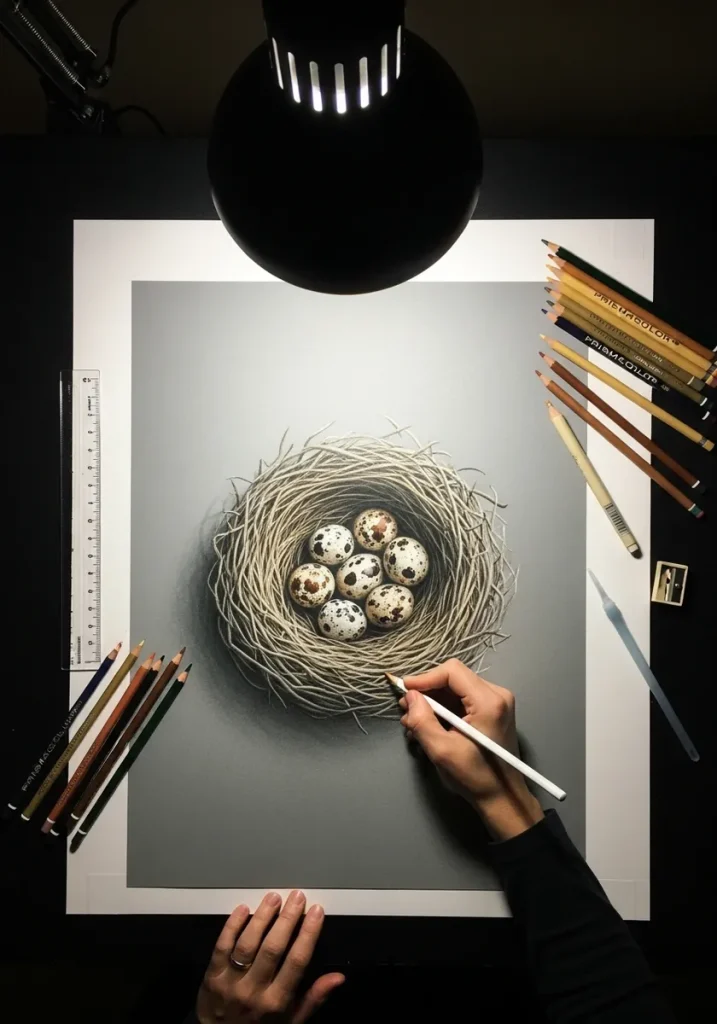
A convincing bird nest is drawn in three layers, not one. Put down a dark tangle of twigs first, add mid-tone twigs over it, then a few bright twigs on top. That depth of layering is what separates a woven nest from a flat scribble.
Key takeaways
- Build a nest in three value layers: dark base tangle, mid-tone middle, bright twigs catching light on top.
- The nest cup is a bowl, so its inside far wall is always darker than the near rim.
- An egg is not a symmetrical oval; one end is broader and the other tapers noticeably.
- Leave a small unpainted highlight on each egg and add reflected light along its shadow edge.
- Draw twig direction as a spiral around the cup rather than random crossing lines.
Almost every flat-looking nest drawing has the same cause: one layer of twigs instead of three. A real nest is deep and woven, so the twigs at the back sit in shadow while the ones at the front catch light. Get that value separation right and the nest reads as woven before you have drawn a single egg.
The eggs have their own rule. A bird egg is not a symmetrical oval. One end is broad and rounded, the other tapers, and speckles cluster toward the wider end. Shade each one in four zones, highlight, mid tone, core shadow and reflected light, and drop a small cast shadow where it touches the nest.
These thirty-one studies cover watercolor, stippled ink, charcoal on gray, oil pastel, collage and even a neon line piece on black. Several pair the nest with blossom or foliage, so tree and branch studies are useful groundwork, and watercolor bird drawing covers the occupant if you want to add one.
For the surrounding botanicals, flower drawing ideas and nature watercolor ideas are the closest companions on the site, while the ornamental pieces later on borrow their construction from mandala work.
Compiled by the GS Art Zone editorial team. Last updated August 2026. Each idea is paired with the specific step that produces the effect, so you can go from the reference straight to paper.
What You Need Before You Start
- A sharp HB and a 4B, because twigs need fine crisp lines and deep dark gaps between them
- A white gel pen or white pencil, which does most of the work on toned, gray and black paper
- Warm browns and raw umber plus a cool blue-gray for the shadow inside the cup
- A rigger or liner brush, whose long springy hairs make single twig strokes far easier
- Toned kraft or gray paper for at least a few studies, since it saves you painting the mid tone
1. Speckled Blue Eggs in a Loose Watercolor Nest

Start with this one. The nest is loose enough to forgive mistakes, but it still teaches the core lesson: paint a dark brown tangle first, let it dry completely, then lay lighter twigs over the top. Add the moss last as small green dabs around the outer rim, never inside the cup.
2. Fine Ink Nest with Quail Eggs and Feathers
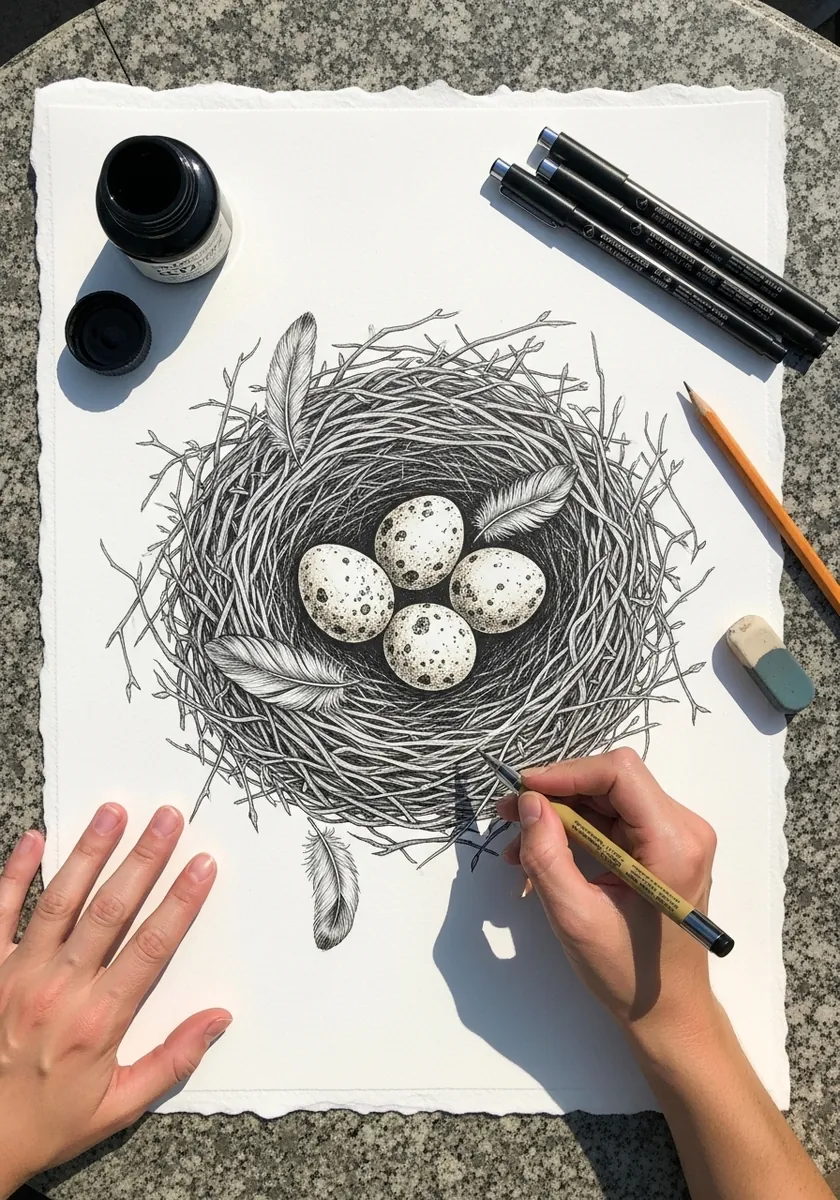
Ink forces you to think about direction, since you cannot smudge your way out of trouble. Draw each twig as a single confident stroke that curves around the cup rather than across it. The speckles on quail eggs cluster toward the broad end, so resist scattering them evenly.
3. Charcoal Nest on Kraft with White Highlights
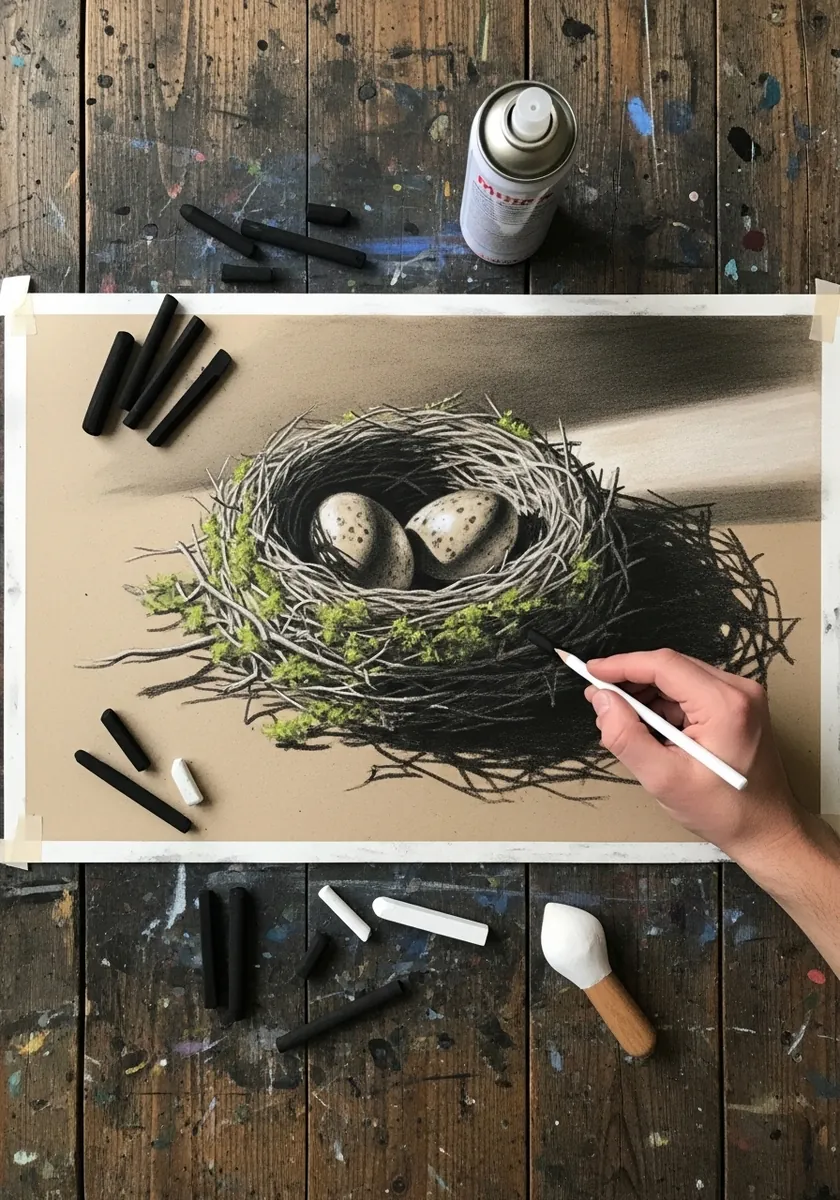
Toned paper hands you the middle value free, which is exactly what a nest needs. Work charcoal into the deep gaps between twigs and add white chalk only along the top edges where light lands. The kraft showing through in between becomes the mid-tone twig without you drawing it.
4. Minimal Ink Nest on Cream Paper
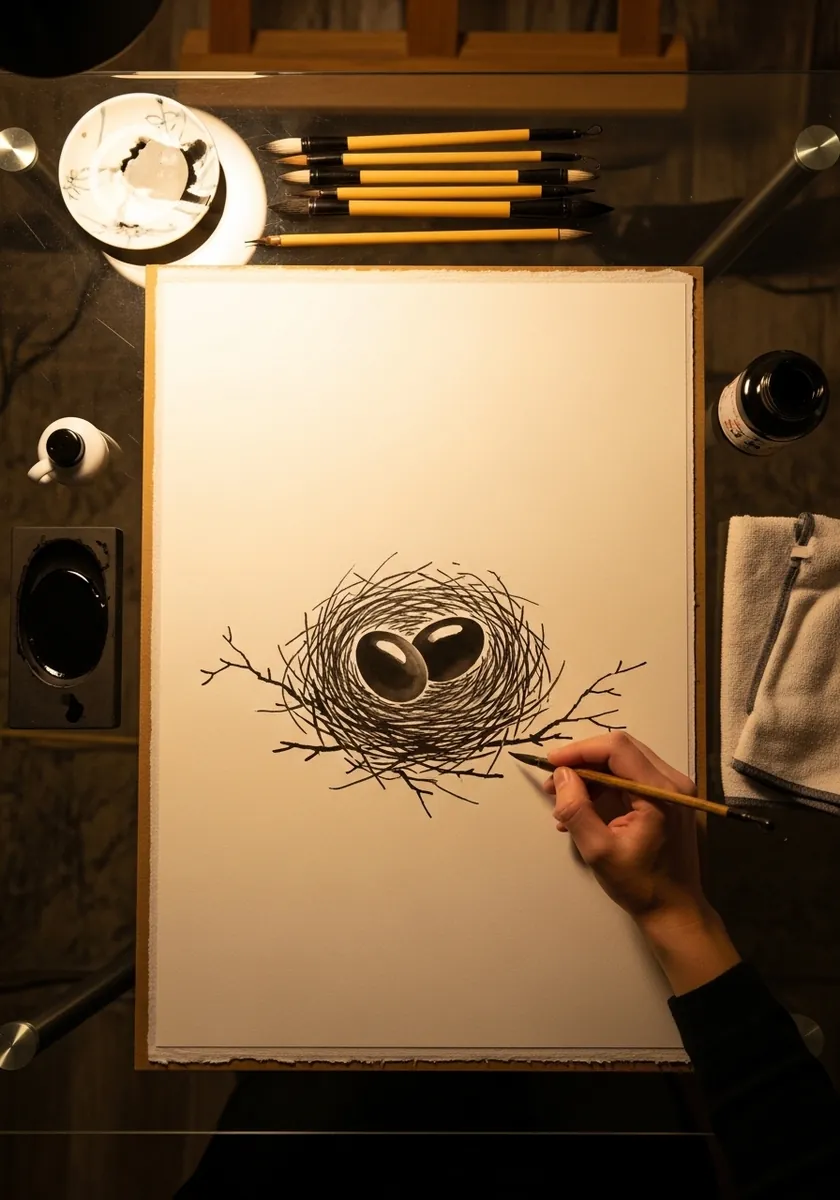
Stripping the subject back to almost nothing is a real exercise. With perhaps thirty lines total, every one has to describe the bowl shape correctly. Draw the cup ellipse first, hang the twigs from it, and let the two eggs sit as clean unshaded shapes so the negative space does the work.
5. Spring Blossom Nest in Soft Pastel
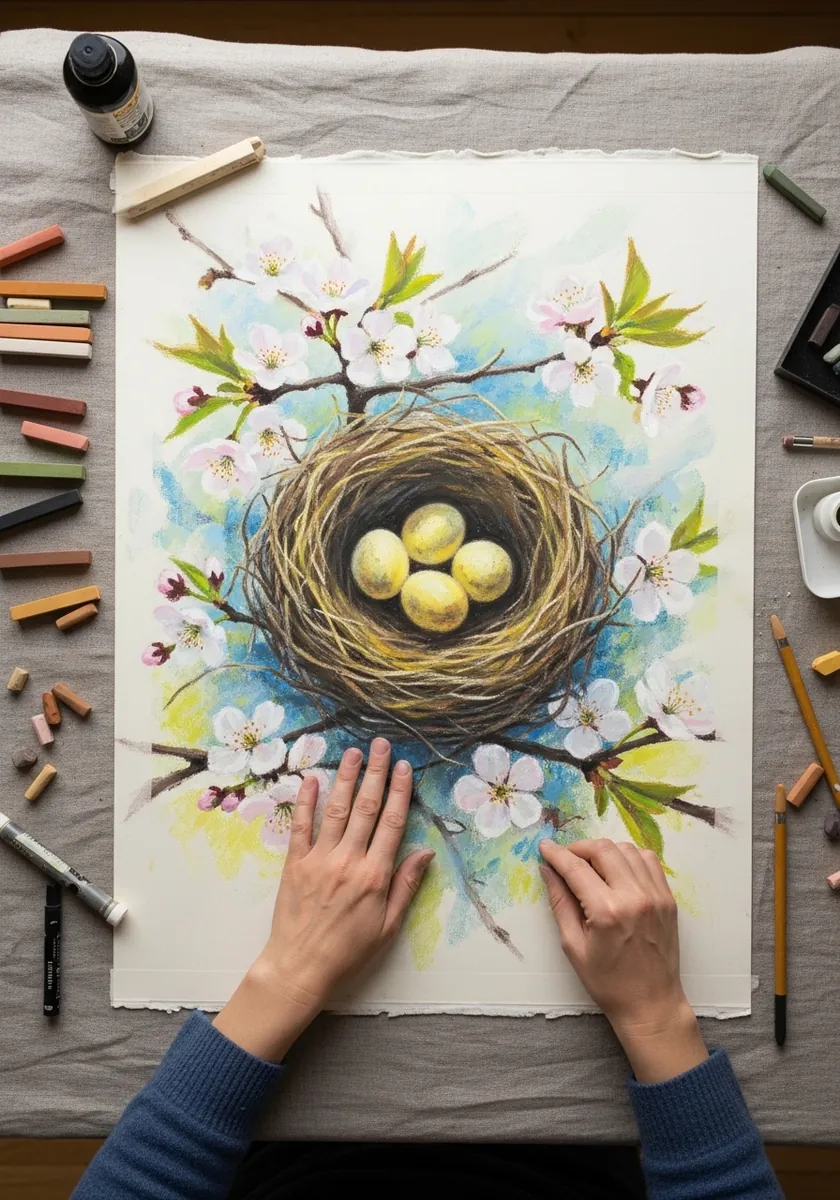
Blossom around a nest can easily overwhelm it. Keep the branches in a narrow value range and let them stay slightly out of focus, then render the nest and eggs sharply. Sharp against soft always reads as near against far, which pushes the nest forward without any extra effort.
6. Ivy Framed Nest in Colored Pencil
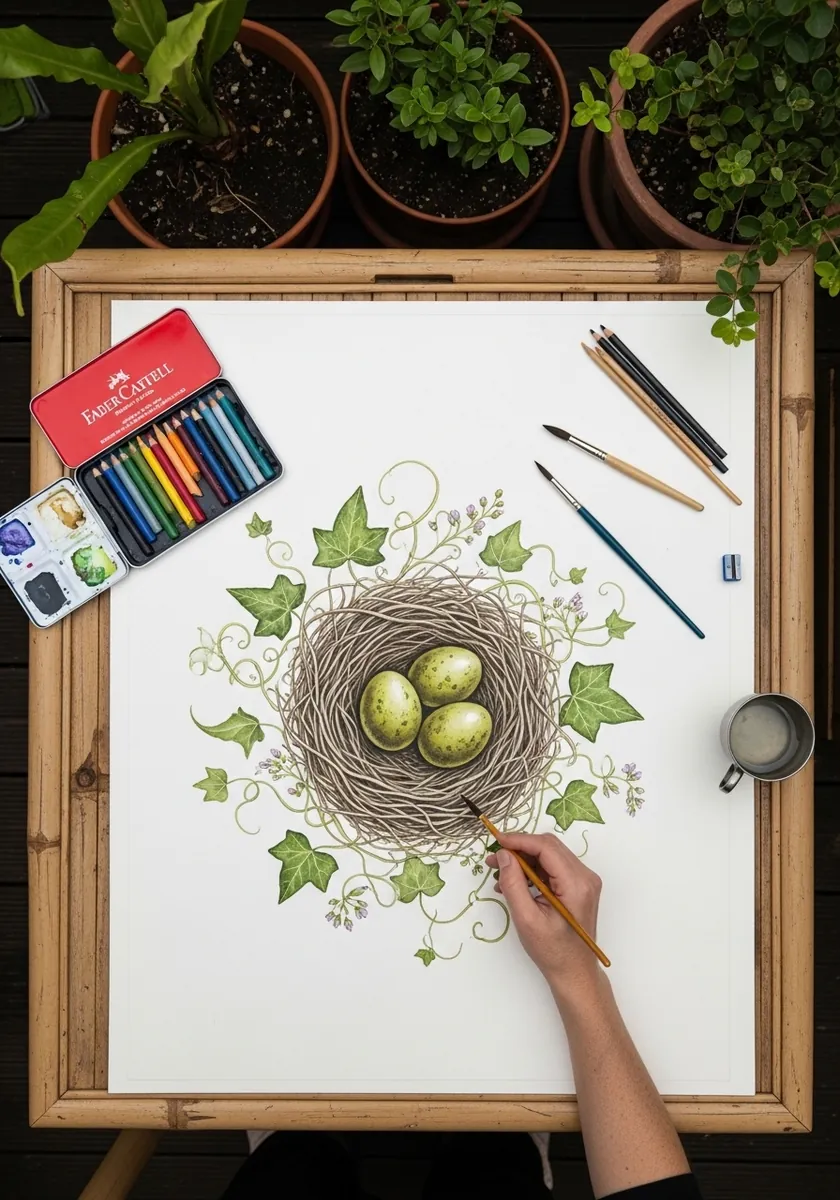
Green eggs against green ivy is a deliberate challenge. Separate them by temperature rather than hue, so warm olive eggs against cooler blue-green leaves. Layer the colored pencil in four or five light passes and burnish the egg highlights last for a waxy shine.
7. Graphite Nest Study in a Sketchbook
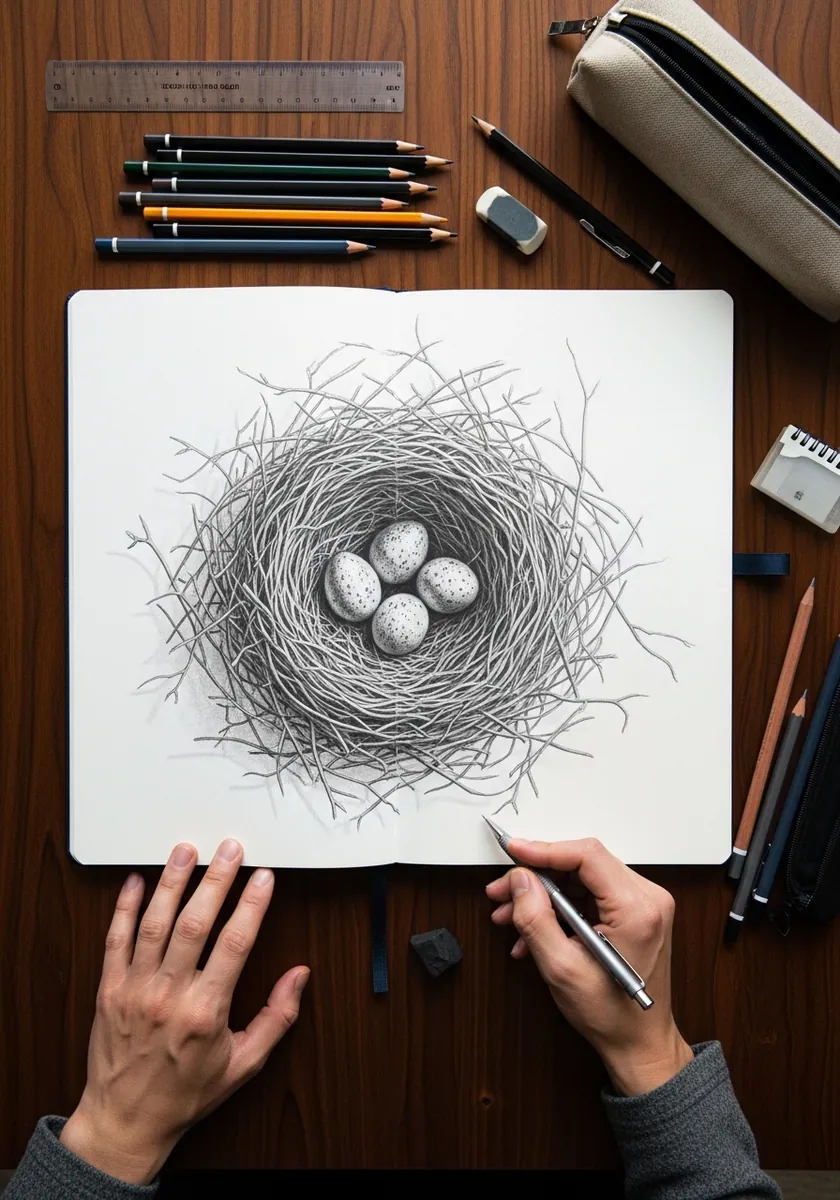
This is the purest version of the three-layer method. Lay a dark scribbled base across the whole nest area, build mid-tone twigs over it with a sharp pencil, then lift a few bright twigs out with a kneaded eraser. Those lifted lights are what make it look woven.
8. Impasto Nest on a Color Block Background
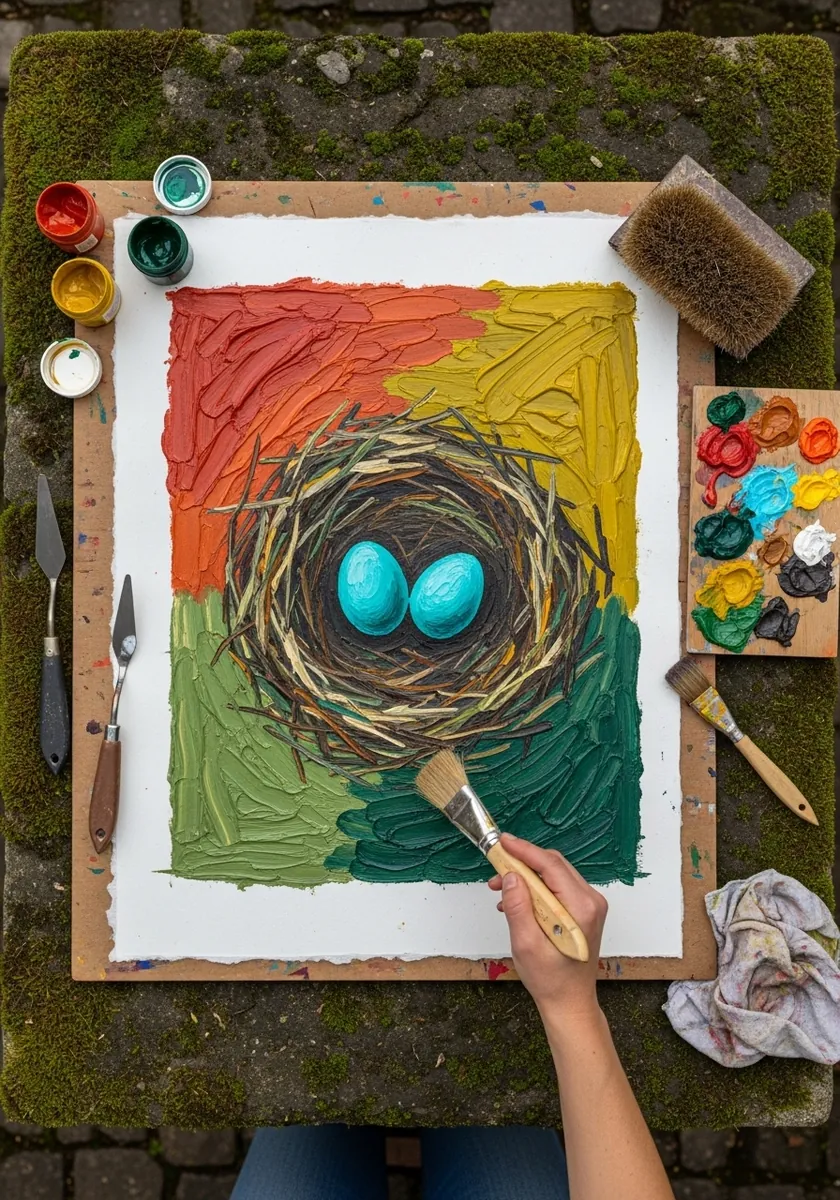
Palette knife work suits nests surprisingly well, because a loaded knife naturally leaves a ridge that looks like a twig. Block the background in four flat color fields first, then build the nest with directional knife strokes and finish with two smooth turquoise eggs for contrast.
9. Zentangle Patterned Nest and Eggs
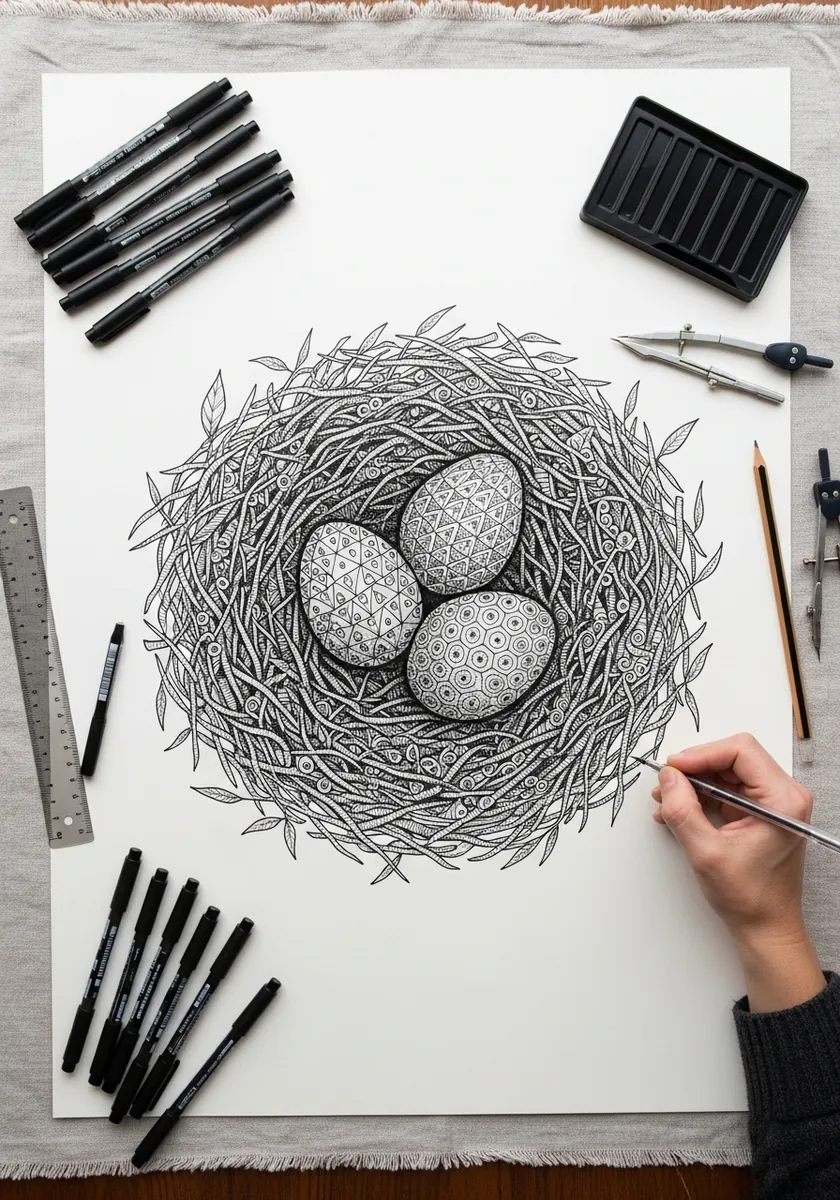
Pattern inside a fixed boundary is meditative and genuinely useful practice. Outline the eggs firmly, then fill each with a different repeating motif, exactly as you would in zentangle work. Keep the nest itself in plain line so it never competes with the eggs.
10. Botanical Branch Nest with Fresh Leaves
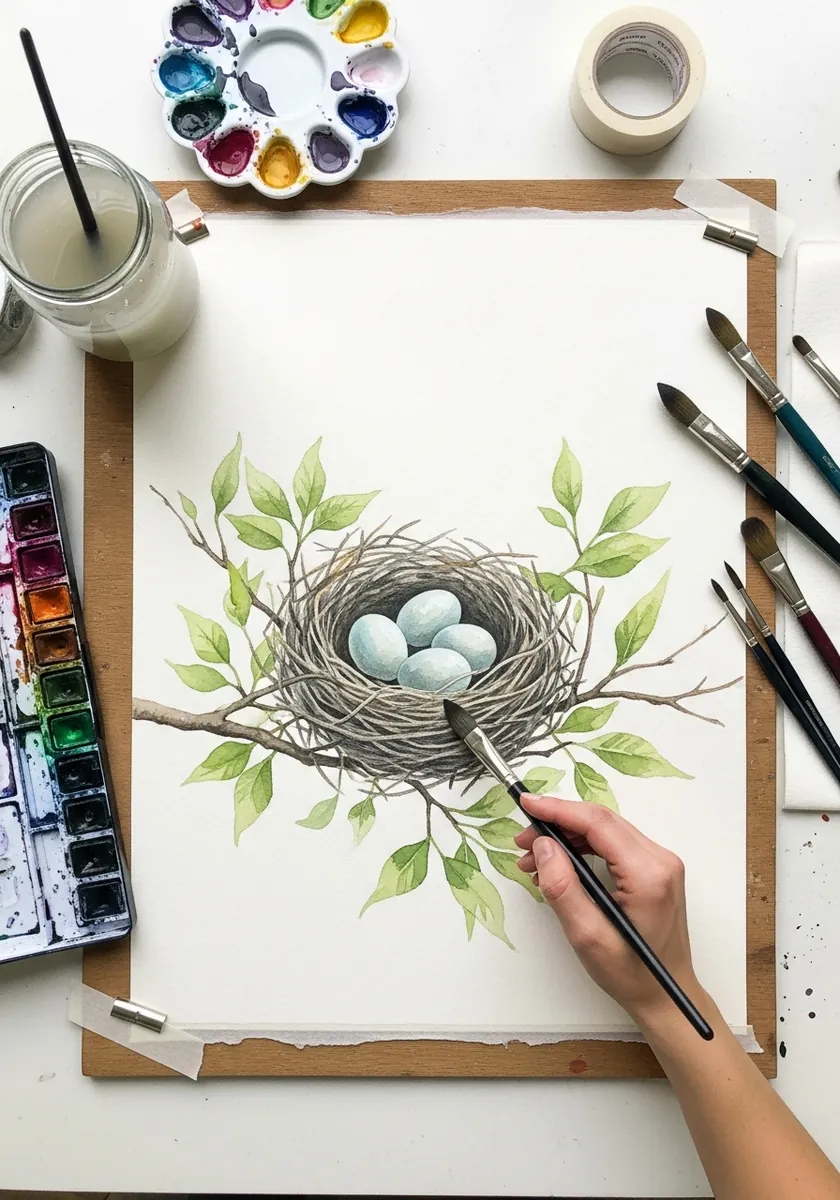
A nest sitting on a branch needs to look supported, not balanced. Draw the branch passing behind and out the other side, and let two or three twigs from the nest wrap around it. That small overlap is what makes the whole thing feel physically attached.
11. Realistic Nest on Gray Card
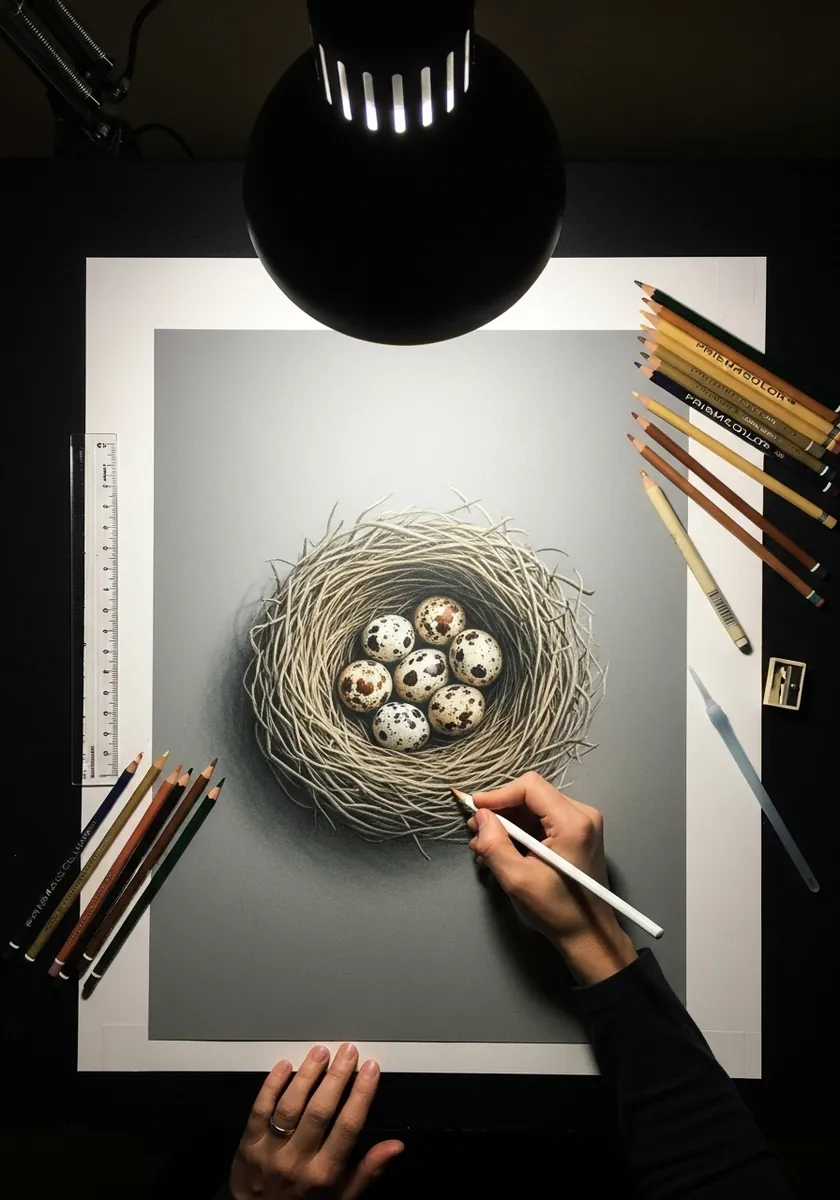
One directional light source turns a nest solid. Choose your light, then keep every twig on the lit side pale and every twig on the shadow side dark, with no exceptions. The far inner wall of the cup should be the darkest value anywhere on the page.
12. Beach Nest with Splash Background
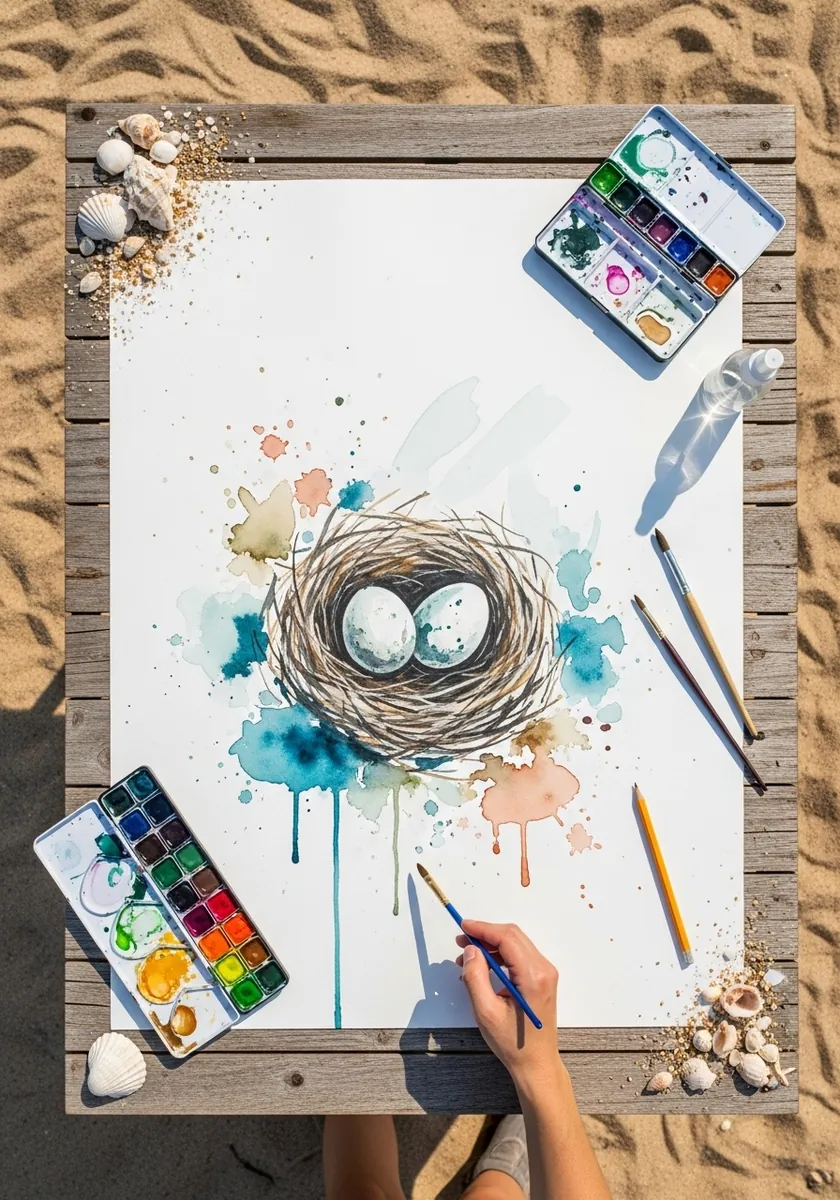
Loose backgrounds need a tight focal point or they read as an accident. Paint the nest with reasonable control in the center, then let the splashes attack everything around it. Flick from a loaded brush for directional streaks rather than dropping paint for round blobs.
13. White Line Nest on Dark Wash
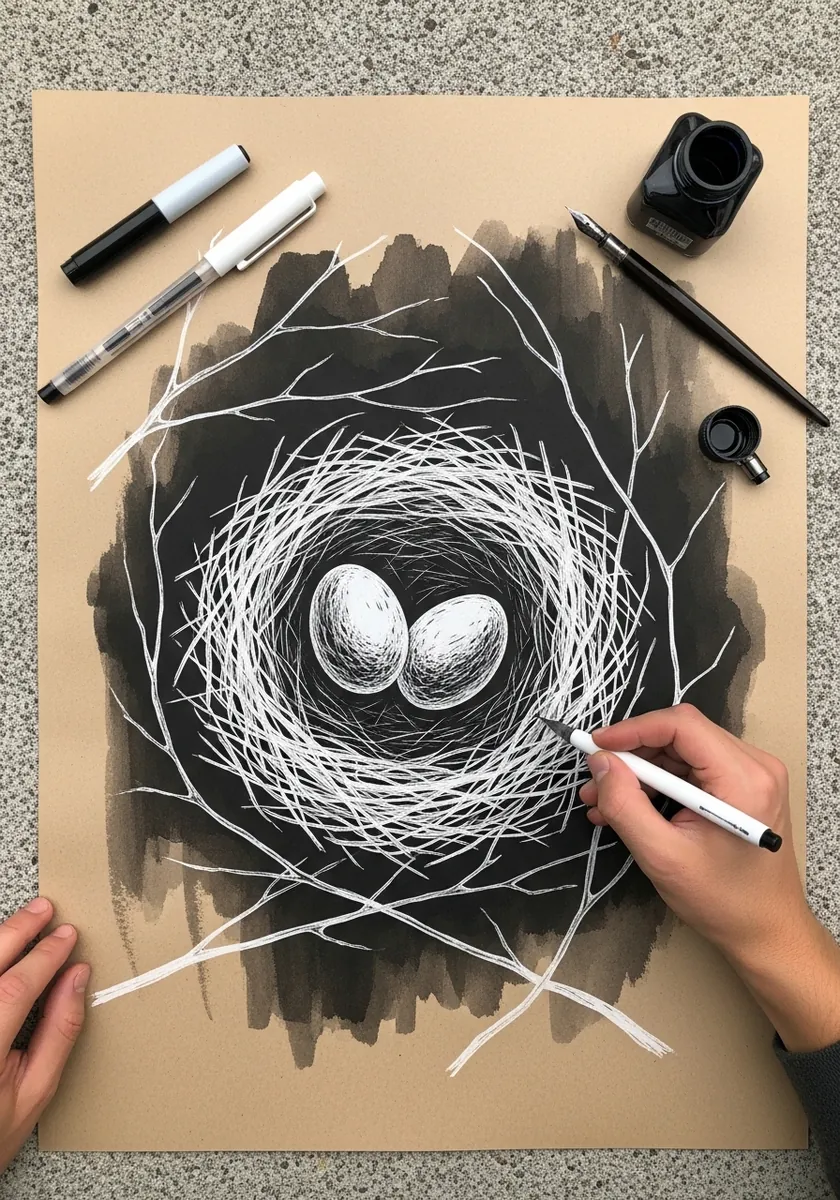
Reversing your process teaches you a lot. Lay a dark wash, let it dry hard, then draw only the twigs that catch light in white. Because you can only add lights, you are forced to decide which twigs actually matter instead of drawing all of them.
14. Bamboo Nest with Red Speckled Eggs
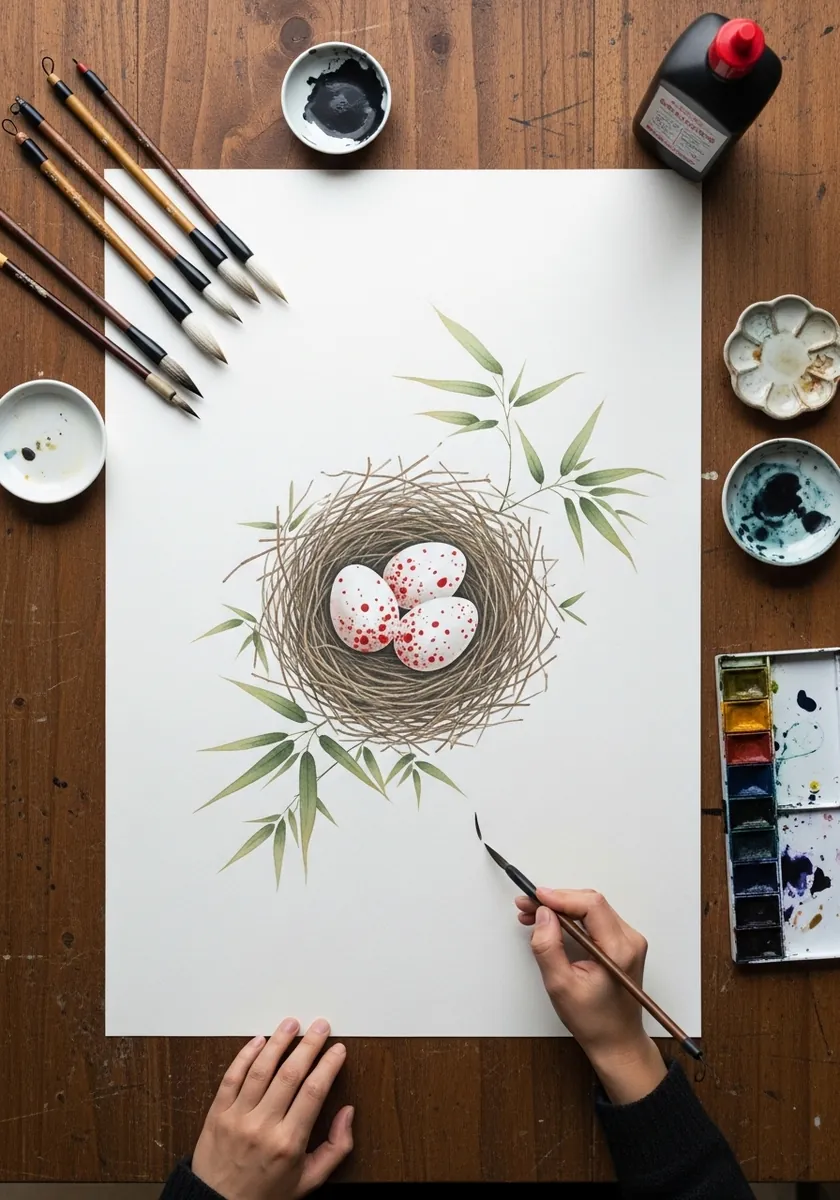
Restraint carries this piece. The nest is a fine woven ring, the leaves are three or four brush strokes each, and the only saturated color on the page is the red speckling. One accent color against a neutral scheme always reads as deliberate design.
15. Bold Pop Art Nest in Flat Color
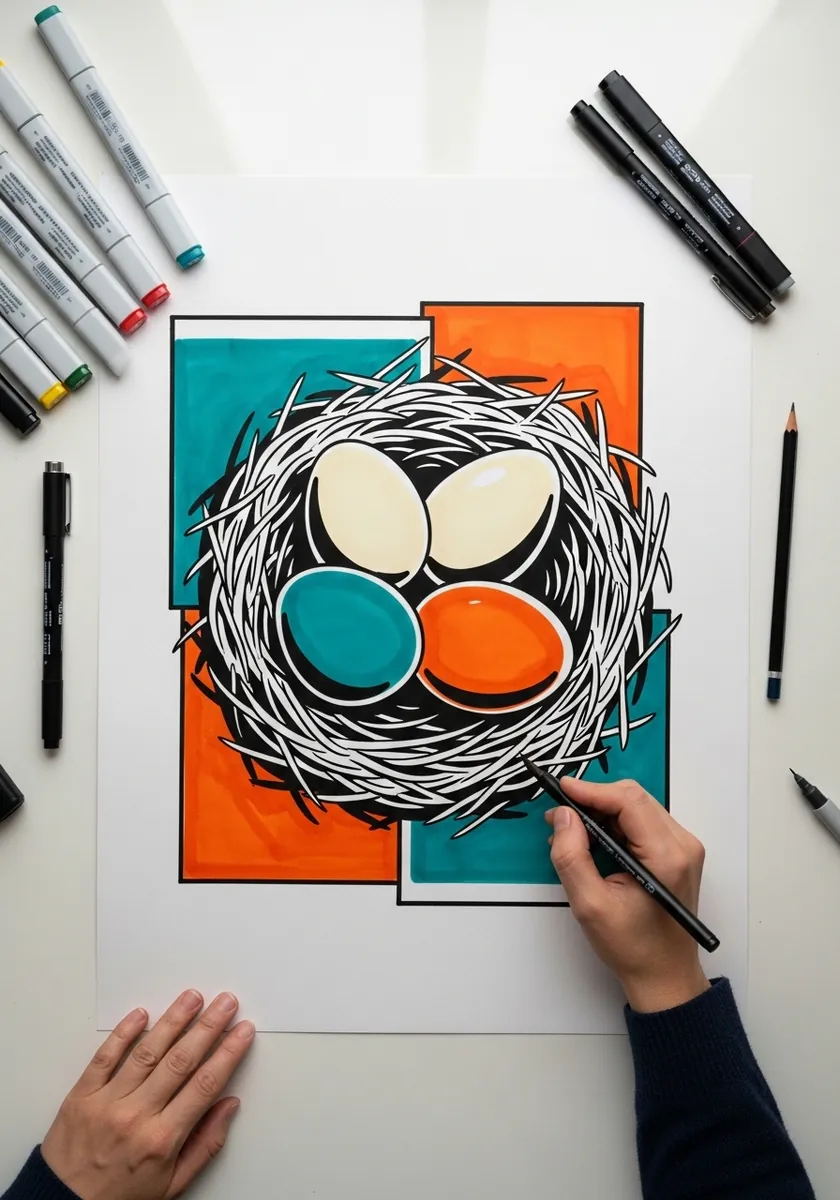
Pop treatment strips the subject to shape and color alone. Ink the twigs in a heavy uniform black line, use no shading anywhere, and place the eggs as flat color shapes. Offsetting the two background panels behind the nest gives the composition its snap.
16. Folk Art Nest with Decorative Border
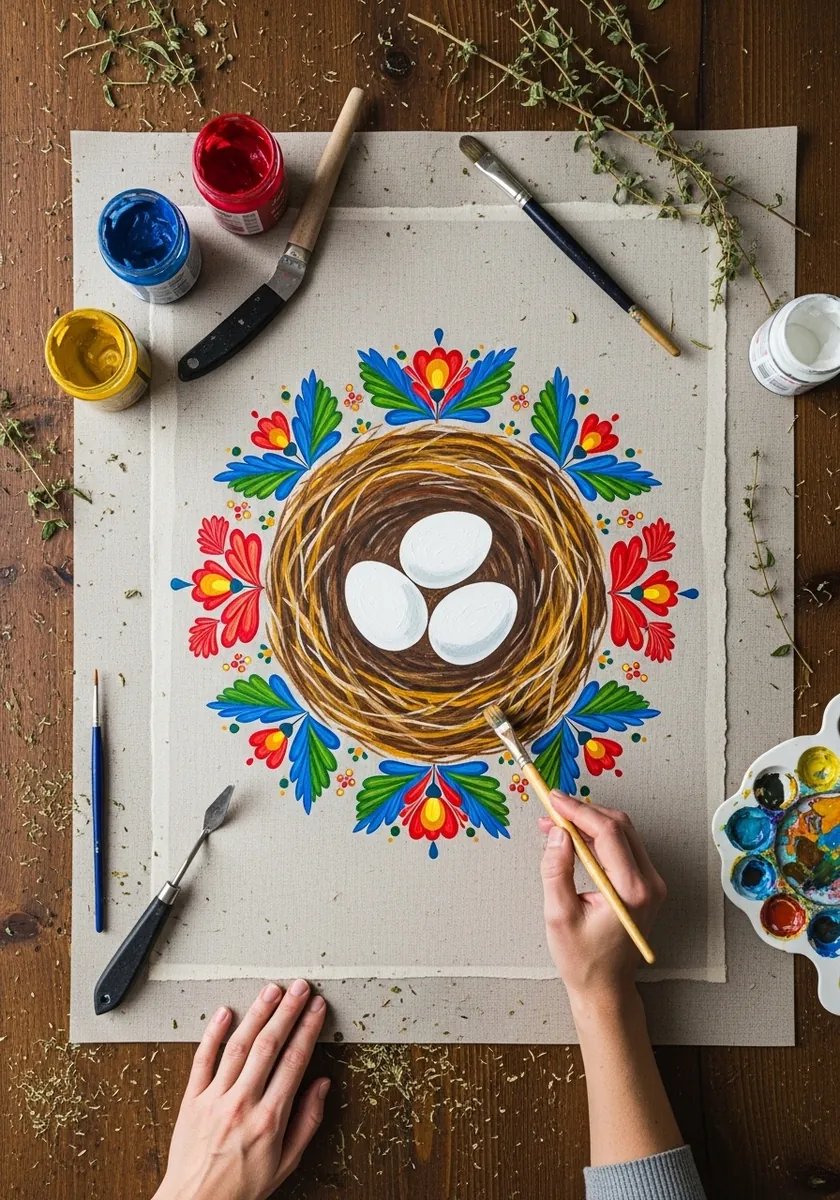
Folk design repeats a tiny vocabulary of motifs. Rule the border first as a fixed frame, choose three or four shapes and reuse only those, and keep the nest woven in flat bands rather than shaded. Everything stays deliberately two-dimensional.
17. Kawaii Nest with Two Baby Birds
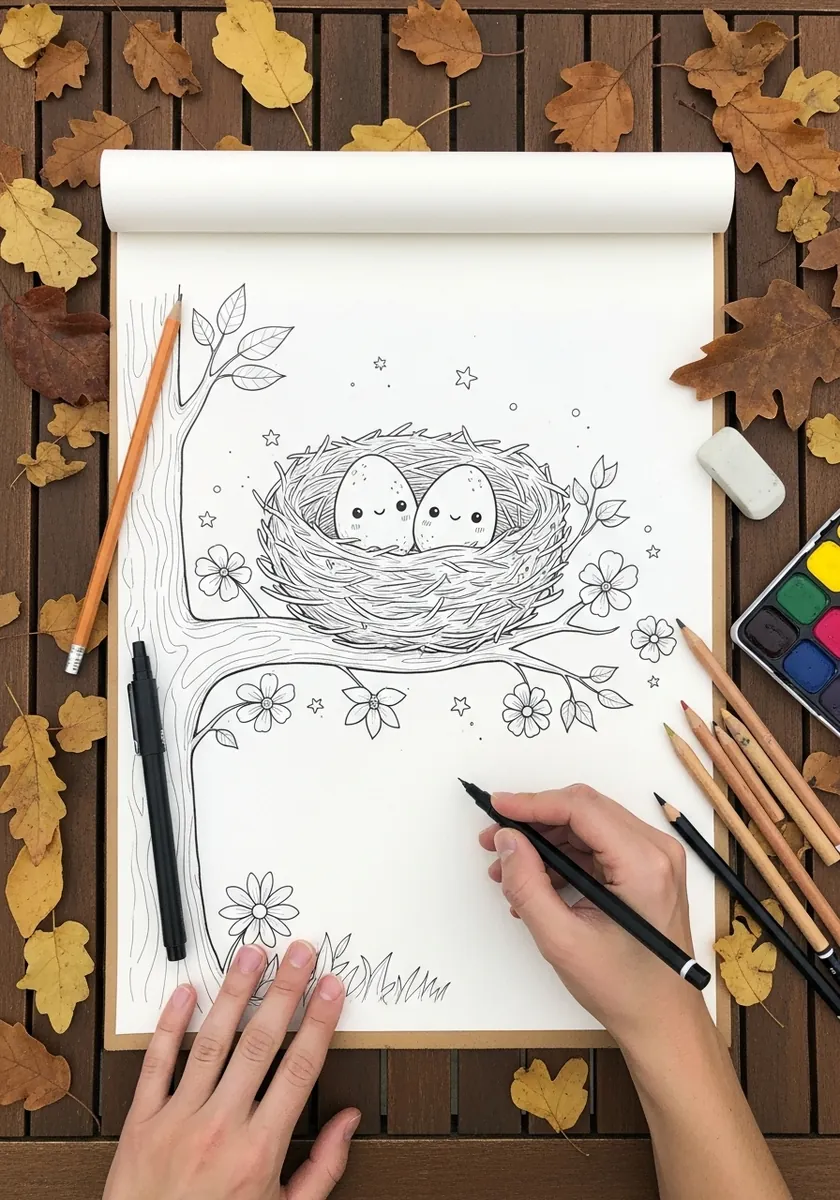
Cute design is proportion work. Make the heads oversized, the bodies round, the eyes low and wide apart, and simplify the nest to a soft woven basket with no shading at all. Keep every line the same weight so the drawing stays friendly rather than detailed.
18. Bright Woven Nest in Blue and Purple
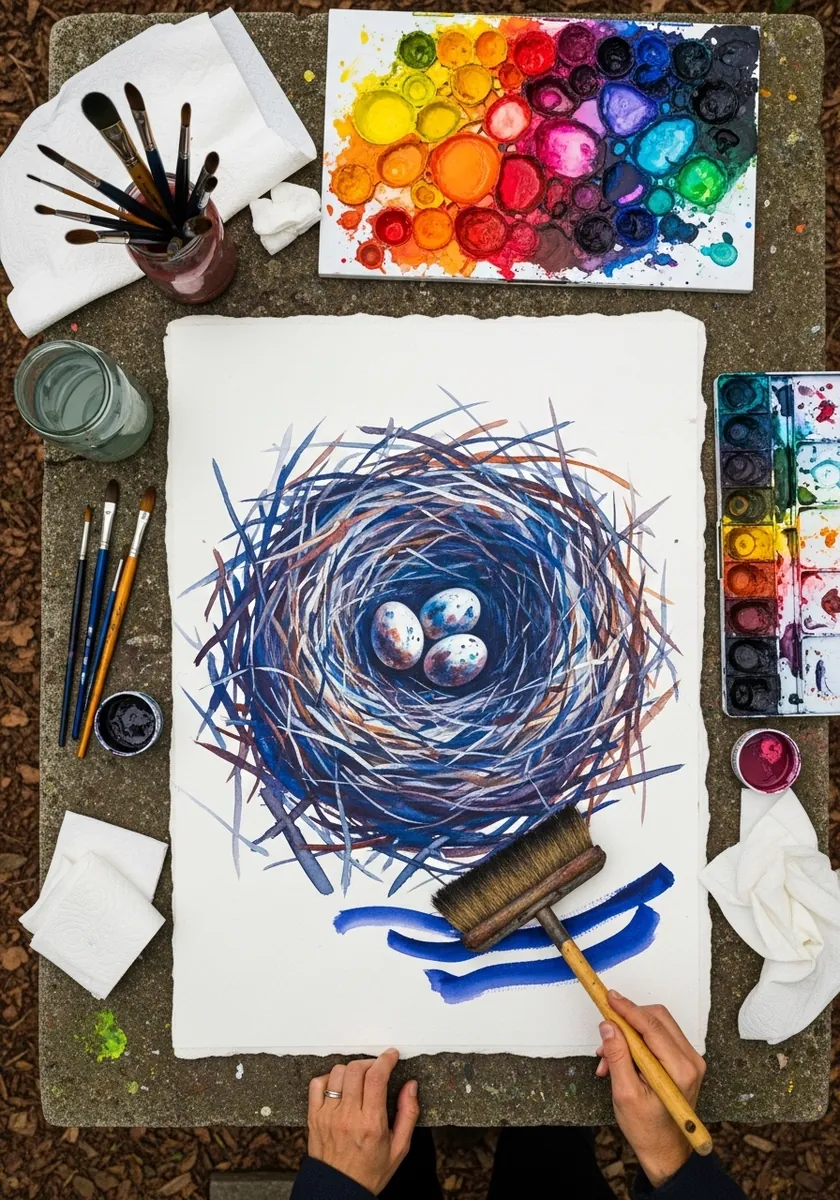
Color can carry structure on its own. Instead of shading with black, use cool blues and violets for the twigs in shadow and warm oranges for those in light. The temperature shift does exactly the same job as a value shift, and the result is far livelier.
19. Moonlit Nest on Blue Gray Paper
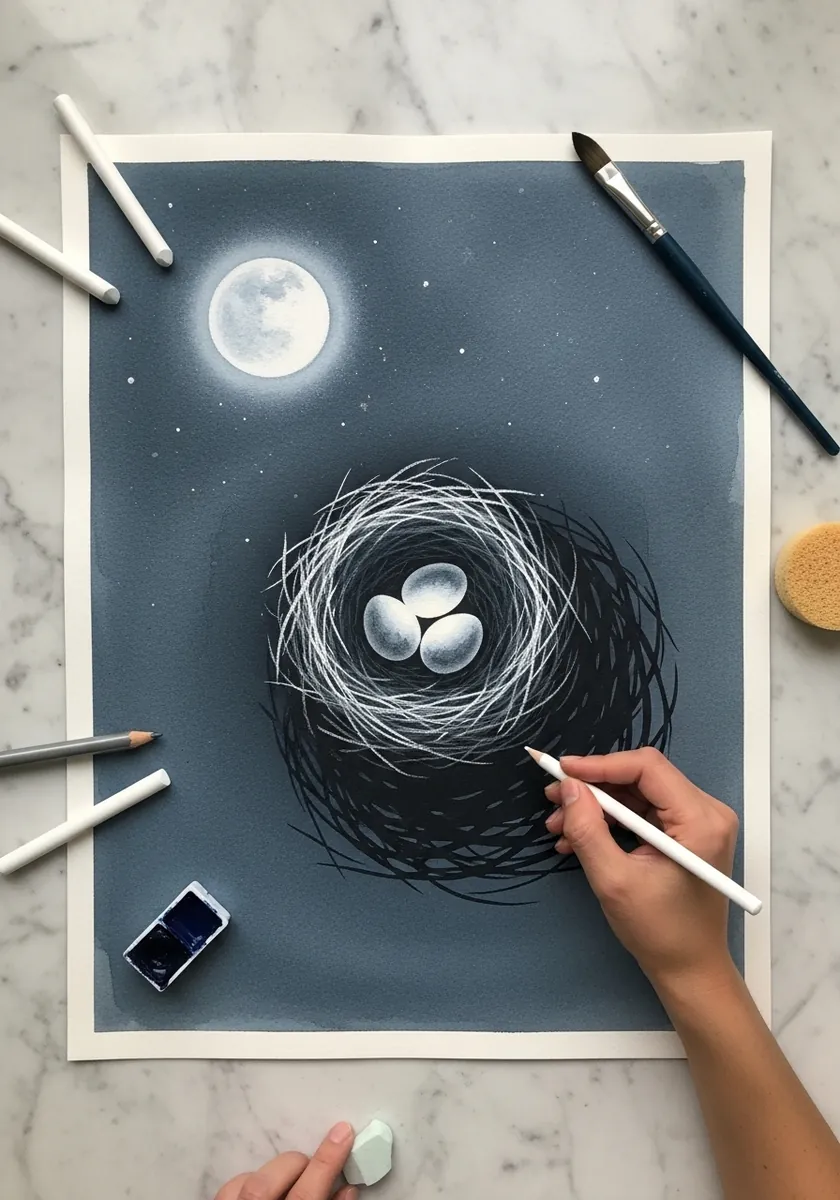
Night scenes need one light source and very few values. Put the moon top left, keep everything facing it pale, and let the rest sink into the paper tone. Adding a faint halo of white around the moon sells the atmosphere more than any amount of detail.
20. Annotated Field Study with Feathers
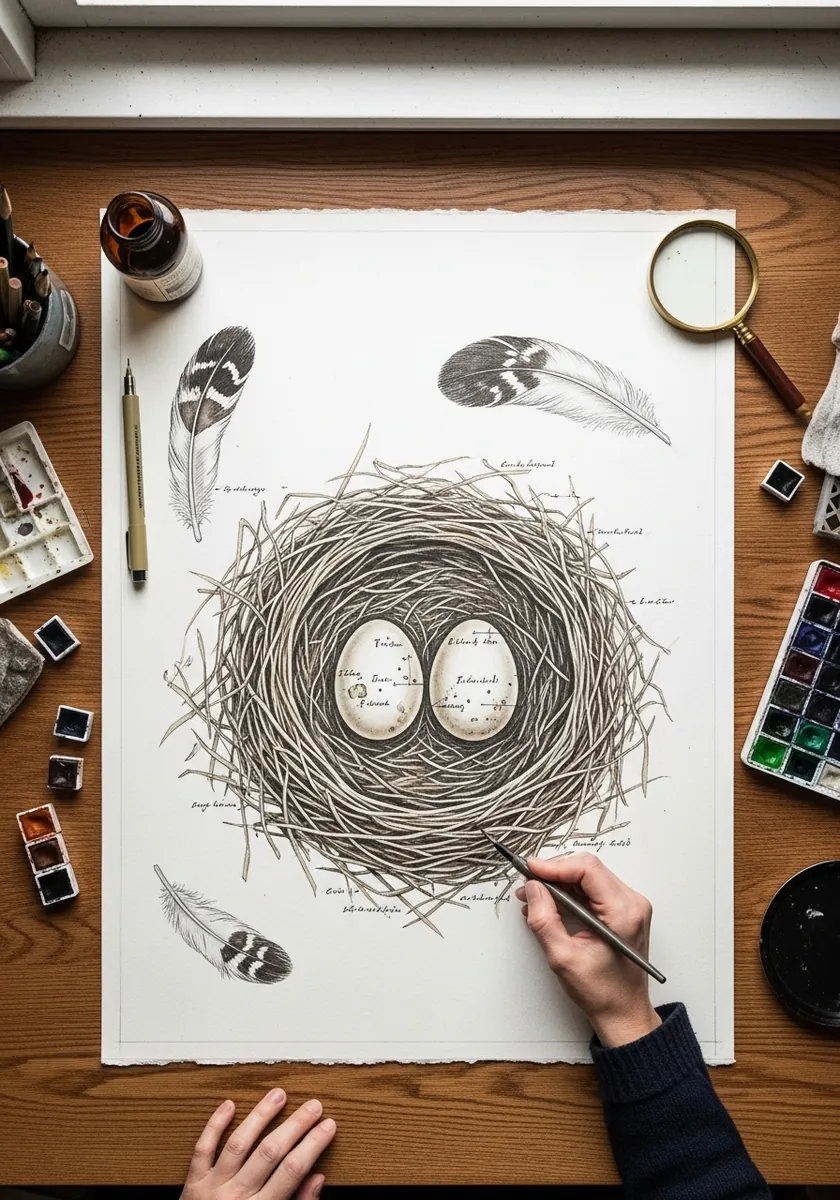
Field pages are as much about layout as drawing. Place the main nest centrally, the feather studies in the margins, and keep every handwritten note in the same small script. Consistent labelling is what makes a page of sketches read as one considered study.
21. Floral Wreath Nest in Soft Pinks
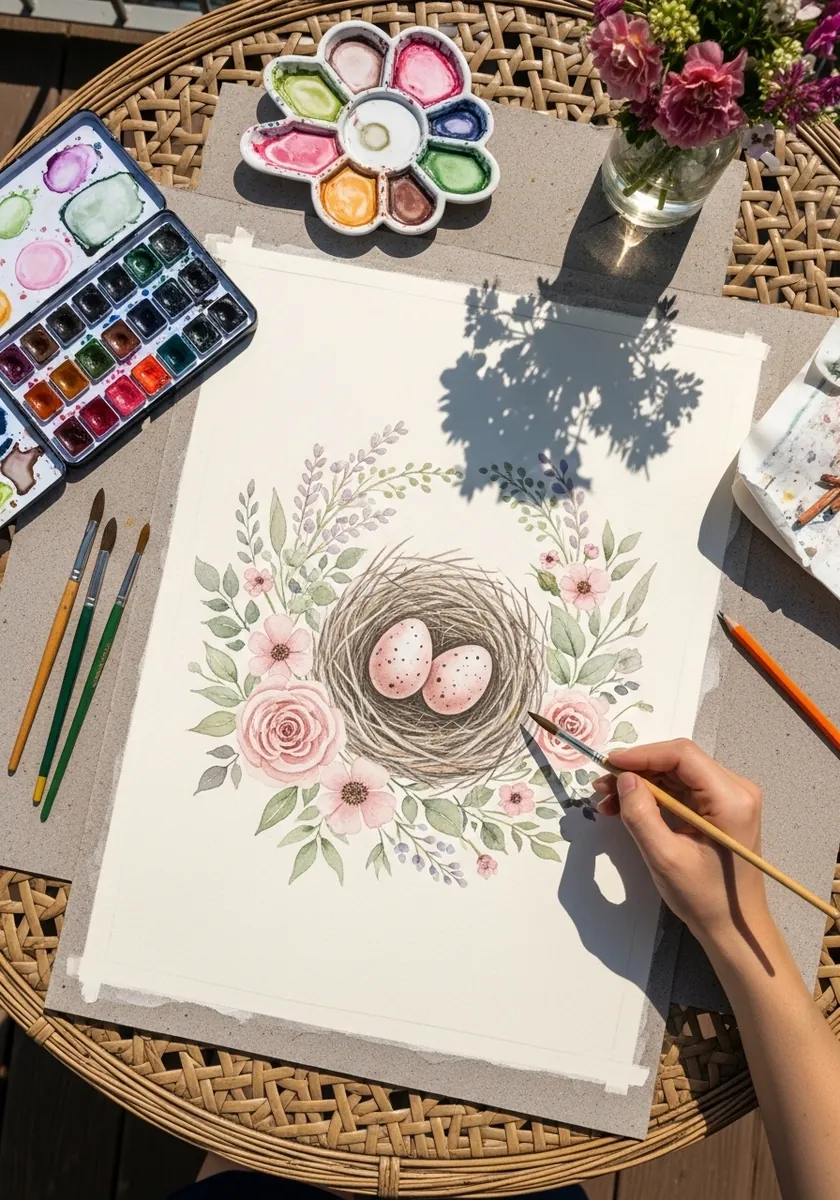
Wreath compositions live or die on spacing. Draw a light circle first and place your largest flowers at four points around it, then fill between them with smaller shapes and foliage. The same construction logic drives floral wreath designs generally.
22. Fast Gesture Nest Sketch
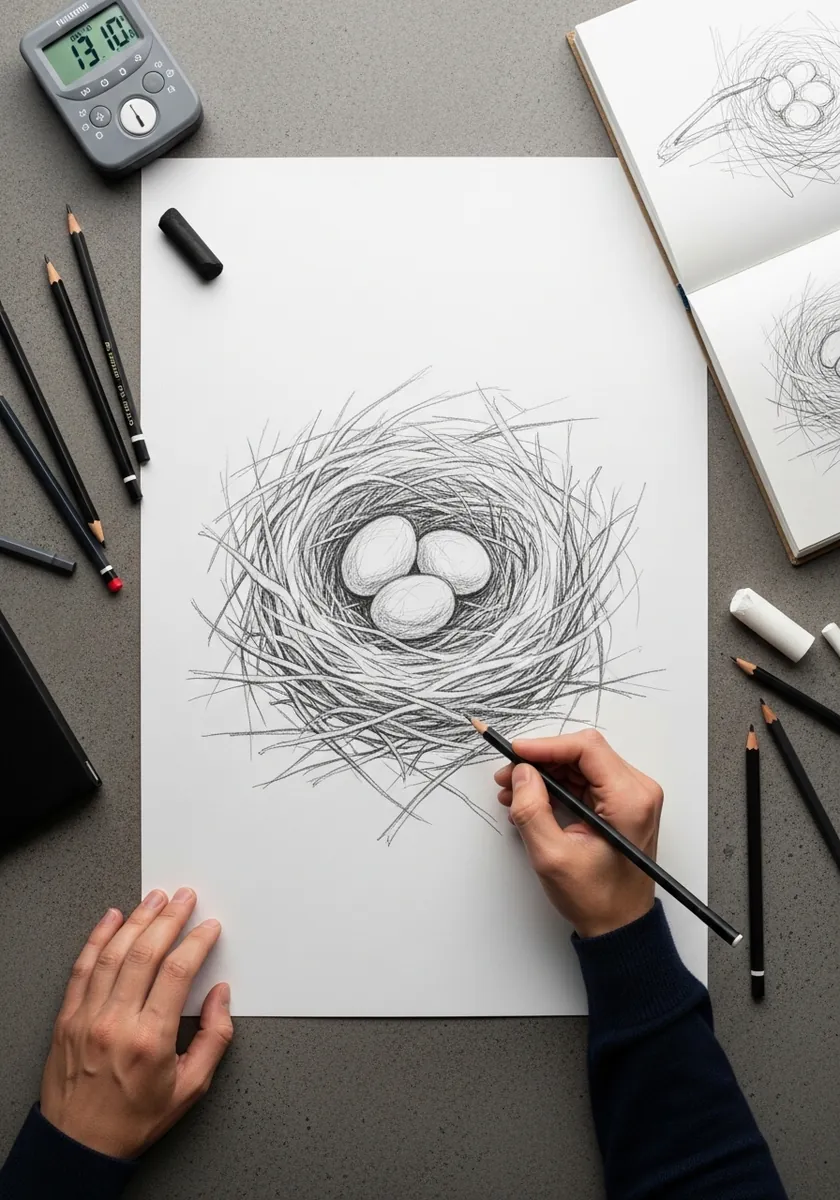
Timed sketching breaks perfectionism. Give yourself ten minutes, work entirely from the shoulder rather than the wrist, and do not correct anything. The looseness usually captures the tangle of a real nest better than a careful drawing does, which is a useful lesson.
23. Persian Illuminated Nest Panel
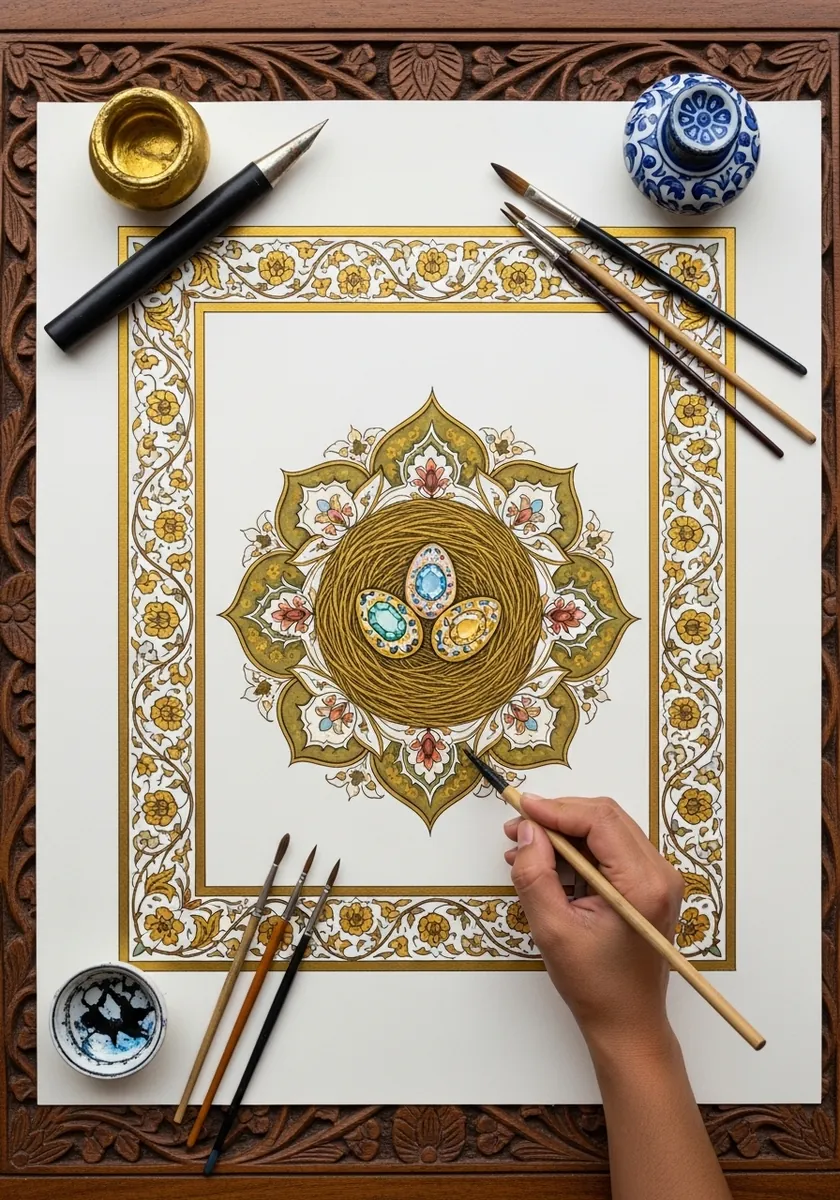
Illumination is ruler and compass work before it is painting. Construct the border geometry accurately, build the central rosette from measured divisions, and only then place the nest at the middle. Reserve gold for small areas so it still feels precious.
24. Line Only Nest with Smiling Eggs
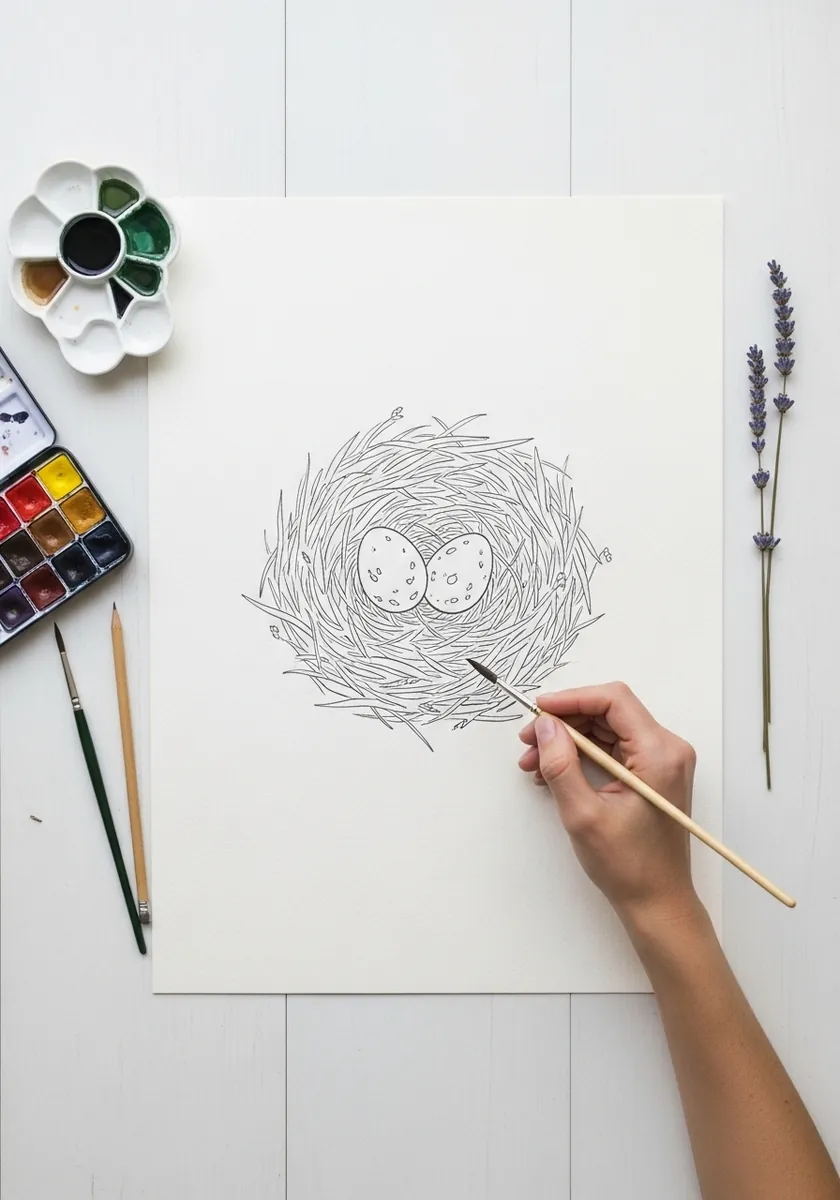
Charm comes from restraint here. Draw the nest as a dense but even ring of fine lines, keep the eggs plain, and add the faces as four tiny marks. Anything more and the piece tips from quietly funny into cluttered.
25. Mixed Media Collage Nest with Gold Eggs

Collage adds real physical texture that paint cannot fake. Tear rather than cut your papers so the edges stay soft, build the nest from layered strips and actual string, and let the two gold eggs be the only painted element on the whole piece.
26. Sepia Botanical Plate with Leaves
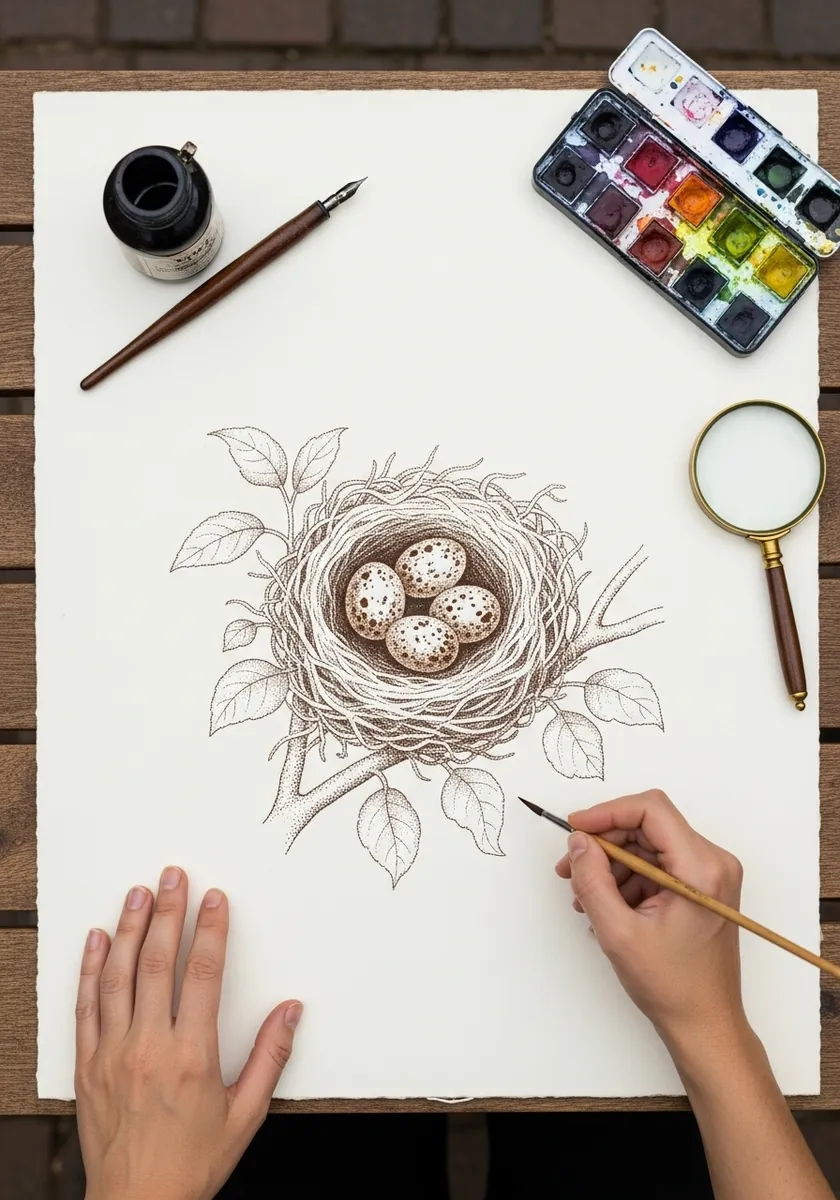
Old botanical plates keep their line weight absolutely consistent. Use one pen width throughout, build every value from hatching alone, and leave generous white space around the subject. The restraint is what makes it read as a scientific illustration rather than a sketch.
27. Golden Hour Nest in Oil Pastel
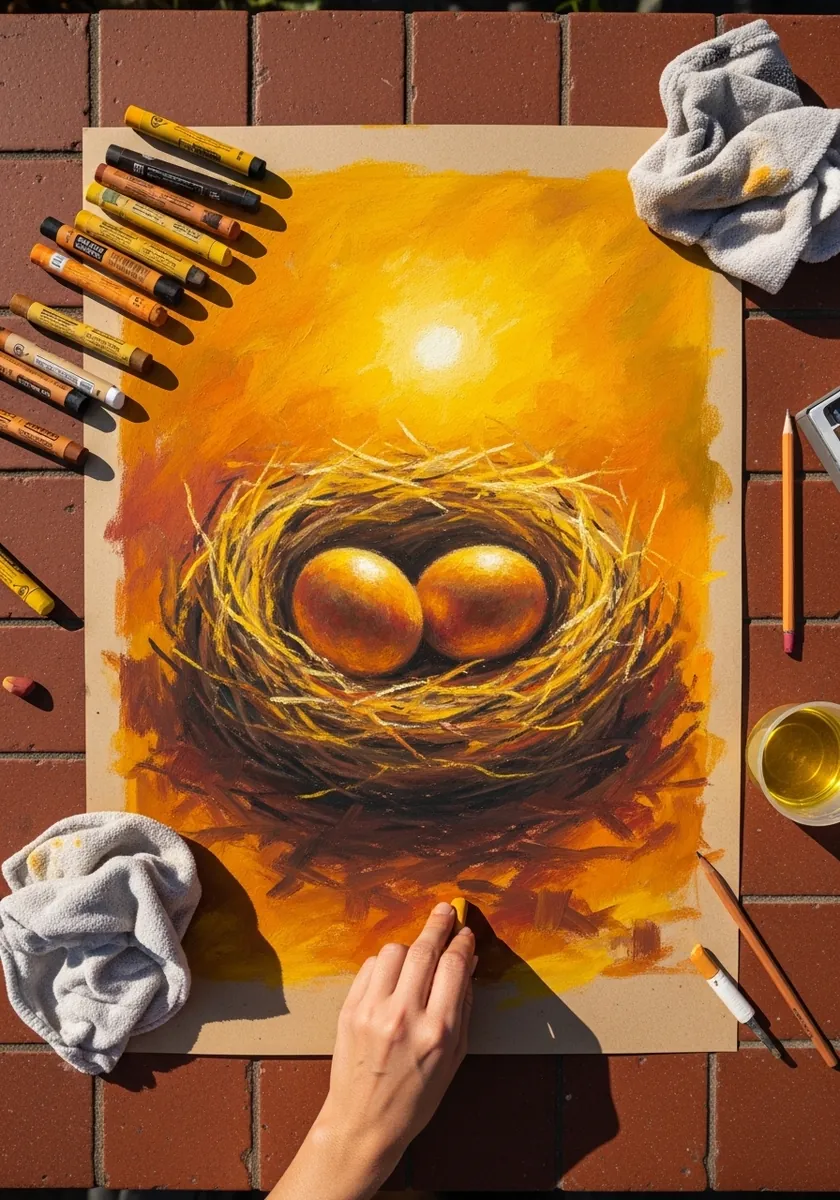
Backlighting is worth practicing because it inverts everything. The sun sits behind, so the nest is largely in shadow and the strongest light rims its outer edges. Keep the eggs the brightest thing on the page and let the whole background glow warm.
28. Tropical Nest with Monstera and Palms
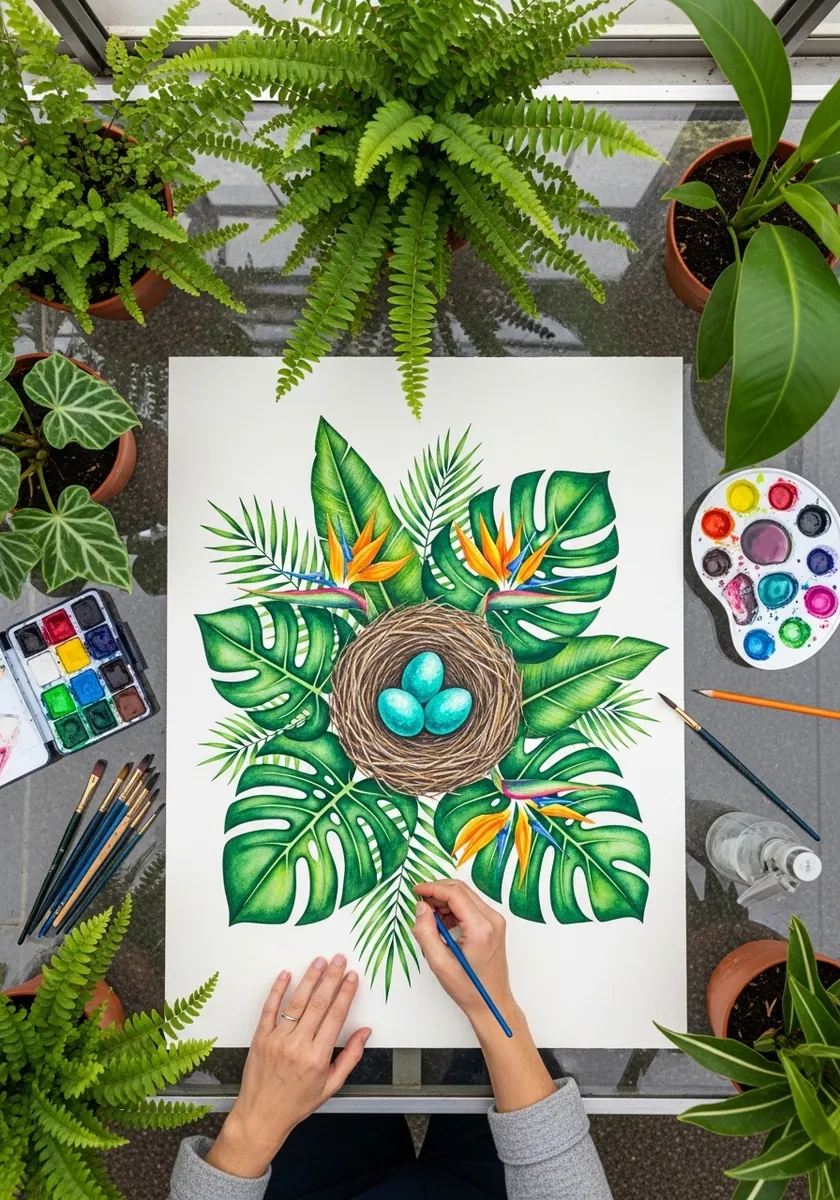
Big foliage needs a small still center. Arrange the leaves radiating outward from the nest so they act as arrows pointing inward, and keep them all in mid-value greens. The turquoise eggs then become the only cool bright note and hold the eye.
29. Neon Line Nest on Black
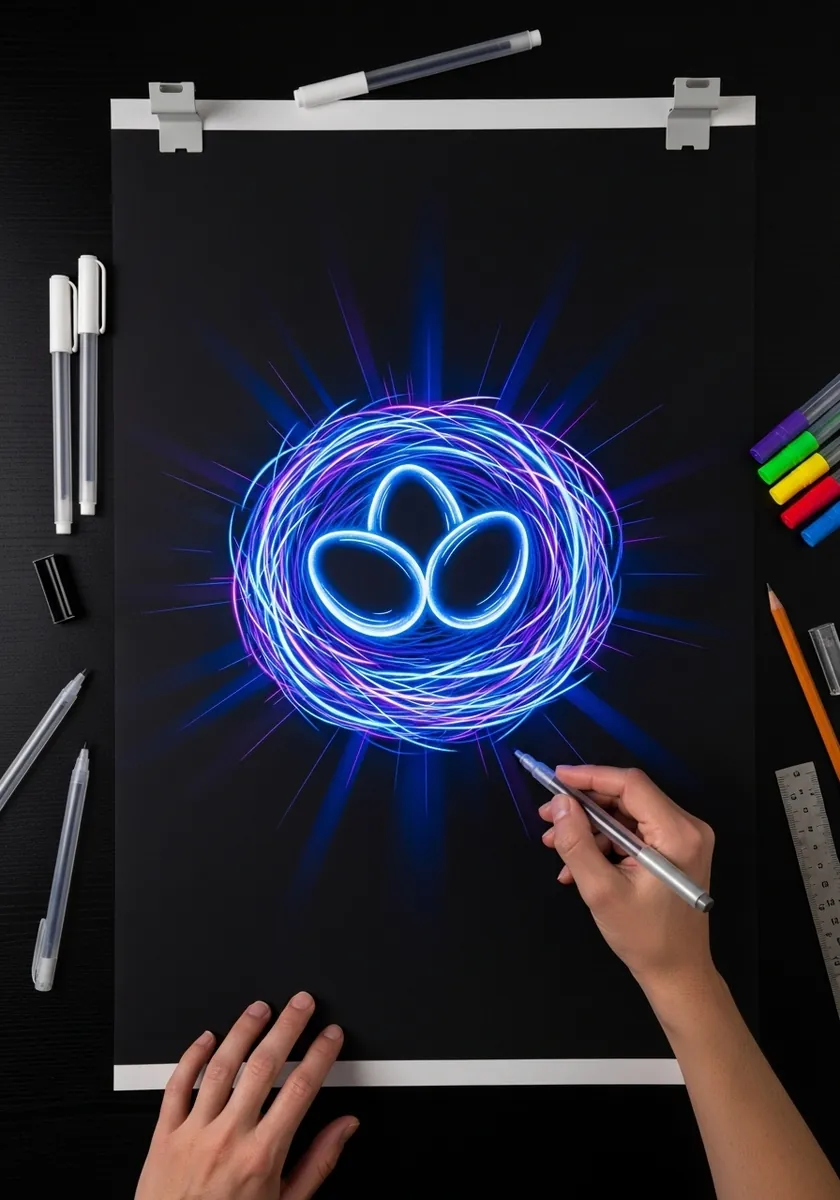
Glow is built in two passes, never one. Lay a wide soft halo of color first, then draw a tight bright core line inside it. Keep the whole design to a single continuous spiral for the nest, since neon work falls apart the moment the lines get busy.
30. Misty Nest with Soft Wash Background
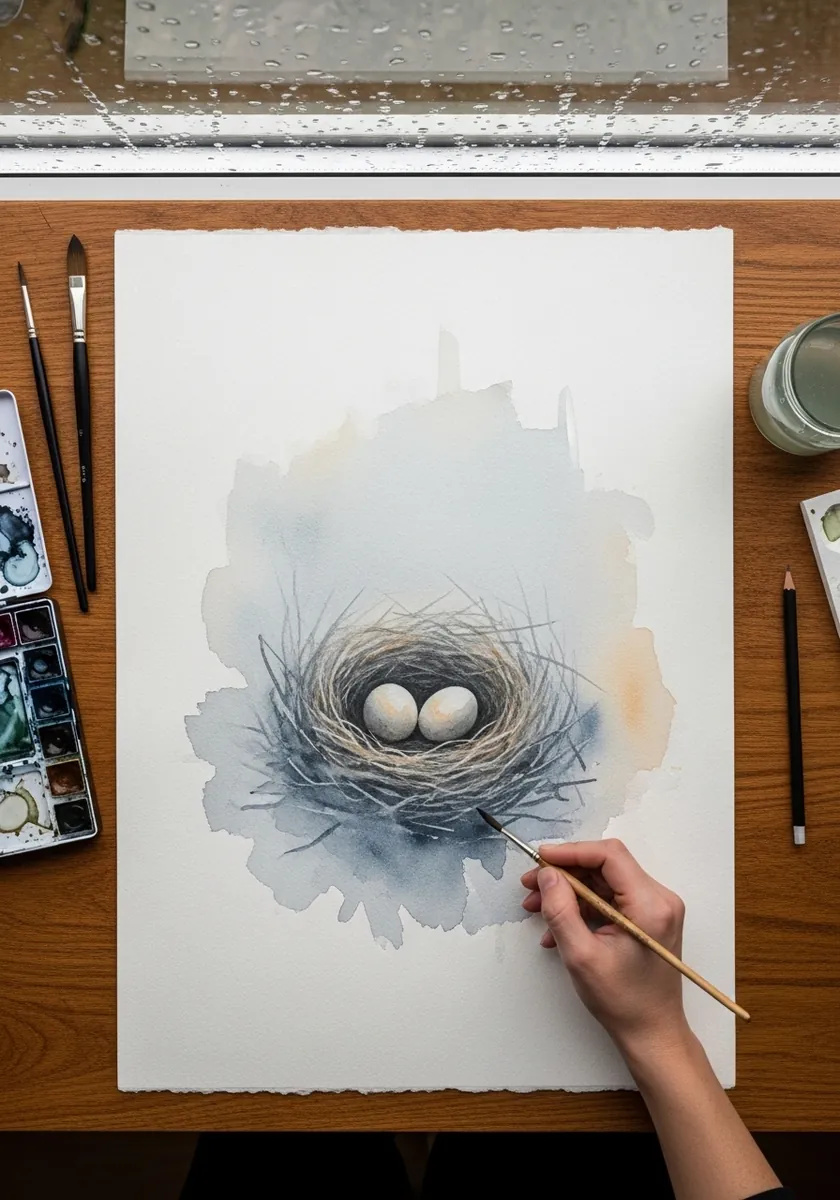
Atmosphere comes from edges, not detail. Let the outer twigs dissolve completely into the wash, keep only the eggs and the near rim of the cup sharp, and use a very narrow value range throughout. The result reads as fog rather than as an unfinished drawing.
31. Ink Wash Nest on a Bare Branch
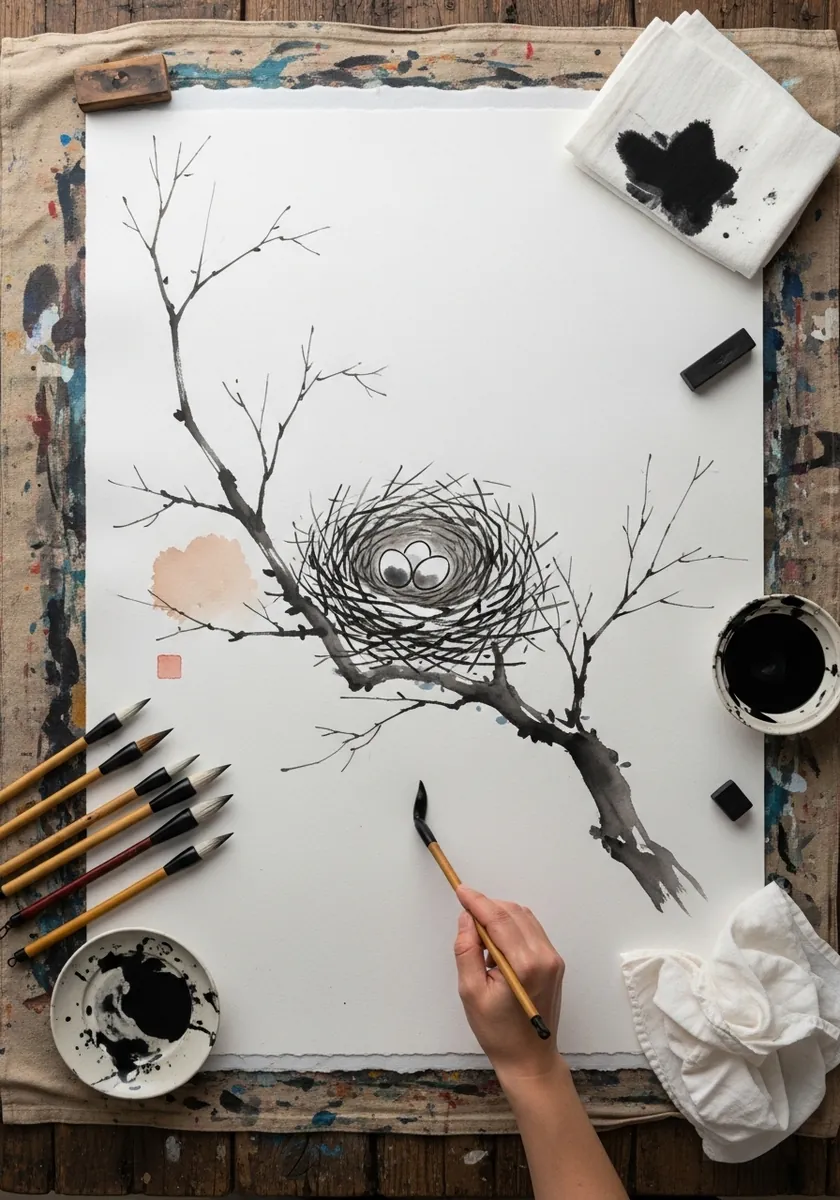
Finish with one confident stroke. Paint the branch in a single loaded sweep from one side of the page to the other, let it dry, then build the nest where it forks. The contrast between that one gestural mark and the tightly woven nest is the whole point.
Frequently Asked Questions
How do you draw a bird nest step by step?
Draw the cup as an ellipse with a bowl beneath it. Lay a dark tangle of twigs across the whole shape, then add mid-tone twigs over that, then a few bright ones catching light. Finally darken the inside far wall and drop the eggs in.
Why does my bird nest look flat?
You are almost certainly drawing one layer of twigs instead of three. A real nest is deep, so the twigs behind must be much darker than the ones in front. Without that value separation the nest reads as a flat scribbled ring.
What shape is a bird egg?
Most bird eggs are asymmetrical, with one broad rounded end and one noticeably narrower end. Drawing a perfect symmetrical oval is the commonest mistake. The exact degree of taper varies by species, so cliff-nesting birds lay far more pointed eggs than tree nesters.
How do you shade eggs so they look round?
Use four zones: a small unpainted highlight, a light mid tone, a core shadow that is the darkest part, and a band of reflected light along the shadow edge. Then add a cast shadow where the egg meets the nest so it sits rather than floats.
What colors should bird eggs be?
Robin-blue, cream, pale olive and speckled buff all occur naturally, so you have plenty of honest choice. Keep speckles concentrated toward the broader end, which is where they usually cluster, and vary their size rather than dotting them evenly.
References and Further Reading